
January 2012
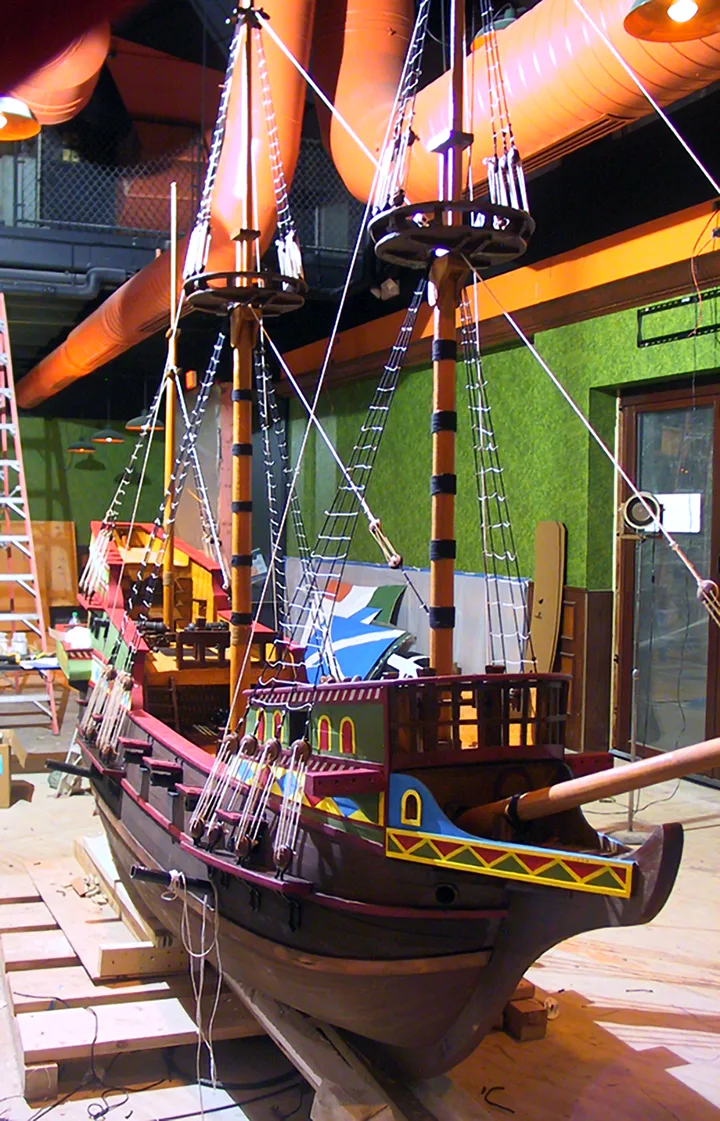
"The background details"It was a cold and windy winter evening when I got an email from a client. The message was Spartan: -"What do you think?" Below he has pasted a link. I followed the link to a sales listing with a picture of a ship sitting inside a warehouse. The "ship" was actually a scale model of a Spanish galleon that had been featured in a Vegas show. Now it was gathering dust until someone made the purchase. The picture was all I had to go on because the information on the listing was scant. But I could tell by looking at it that this model must have been a very pricey item when it was originally constructed since it was detailed enough to be used in a Hollywood movie.
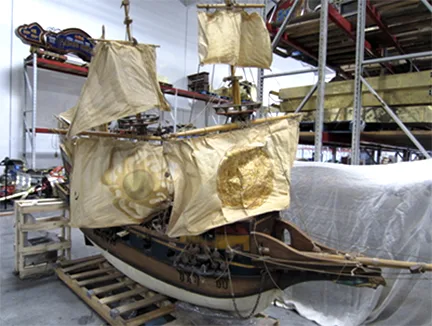
The next day I got a call from the client. He said the ship would make a good focal point at a restaurant and I said it might, but that it needed work. The listed cost was several thousand dollars but the freight cost to have it shipped to Cleveland was even higher. Apparently this was a very heavy prop. After another minute or so, we ended the exchange and I thought that was the last I would hear about the ship. Then, a couple of weeks later I got another call to meet at the Fat Fish Blue Restaurant, which was a stone's throw away from Cleveland's Public Square. It was at this meeting that I learned that the ship was being crated for it's journey from Vegas to Cleveland, and that its final resting place would be the same place we had gathered. And that's where this story begins.
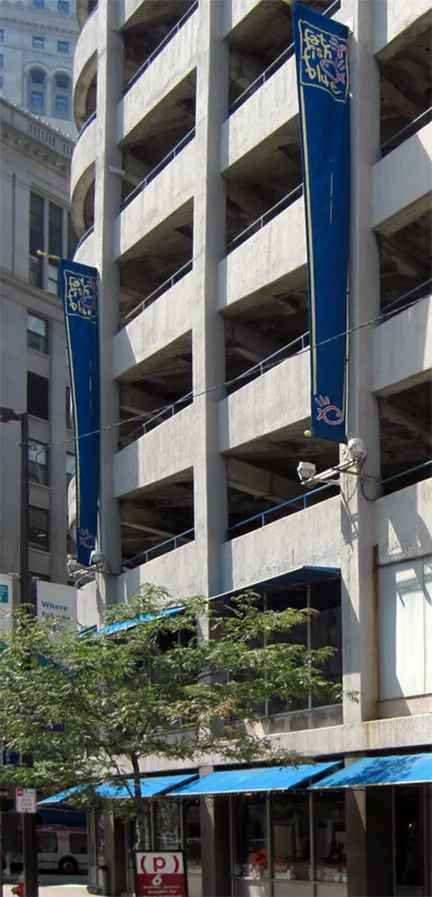
The Tilted Kilt Downtown
I had never heard of the Tilted Kilt before this job came along. The "Tilted Kilt Pub and Eatery" is a modern Celtic themed sports pub and franchise restaurant chain in the United States and Canada. Tilted Kilt describes itself as "a modern American, Scottish and Irish sports pub". Another way I heard it being described is as a "breastaurant," in the same vein as Hooters and Twin Peaks, specializing in scantily-clad female servers.
Well, my first thoughts upon learning more about the franchise, were: -"Well, Cleveland is definitely a sports town. And... men like breasts." That was a two on the plus side. But then the pragmatic side of my mind countered with: "Fifty percent of Cleveland's sport fans are... (get ready for it)... women! So, how will they feel going to a place where their men are ogling (or trying very hard not to ogle) young female breasts prominently displayed on push-up bras?" And last but not least as important: "Celtic is very white. Almost fifty percent of Cleveland sport fans are... (get ready for this)... very black! So, aside from the universal male attraction to breasts, would the Tilted Kilt concept of a sports bar with not a single black athlete -in a town ruled by Lebon James, be an appealing decor for them?" Hmmm... Food for thought.
Well, this thoughts aside, the clients were not immune to pragmatism either. But on the numbers side, the Tilted Kilt at this time was a strong growing franchise and the Cleveland location couln't have been better placed -literally a stone's throw away, a few blocks walking distance, from the Gund Arena (now the Quicken Loans Arena) and Jacob's Field (now renamed Progressive Field), and across the street from the JACK Cleveland Casino. But if they could add another piece to the decor that would be an iconic attention grabber, it made sense to go for it. This is where the idea of having a galleon display came into being.
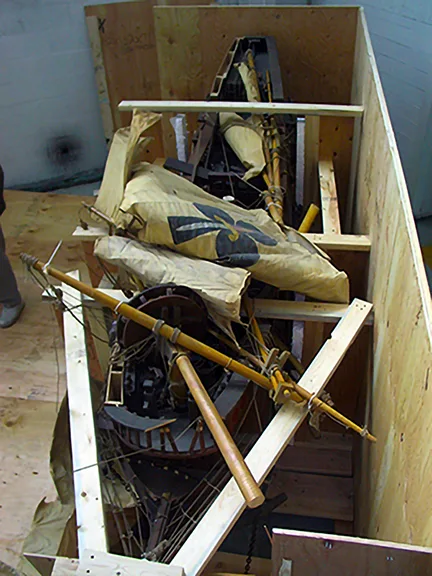
But going ahead with the plan was not a done deal. The problem was that the Tilted Kilt had an almost medieval franchise regulation book of everything that you-can and can-not-do with the place. Hanging a galleon was a "no" on the can-do list. But the client was not sitting idle while this conundrum was being cracked. The ship was on the way from Vegas so, if Tilted Kilt didn't approve it, there were other restaurants, such as Paninis Bar & Grill, that would were more pragmatic about going with would grab the patron's fancy. But then, what would better catch men's fancy: young female boobs or a toy boat? The answer seems obvious, but what an interesting experiment in psychological and behavioral science (with a surprising result -once you get to the end of this page). And so, whatever the outcome, I was asked to "fix a boat".
Designing the display
While the ship was inside a crate, being trucked to Cleveland, I had to do a conceptual rendering of the ship display so the clients could show their idea to the Tilted Kilt franchise. All I had to start with was a ship image from the sales catalog. But a galleon is a type of sailing ship I was familiar with, so I knew I could create a reasonable facsimile of the ship. I then asked the clients what they wanted to do with the ship; what type of display was it going to be? The answers were as follow: the ship was going to hung from the ceiling, out of hands reach, but they should be able to see the details on the deck. You know what's funny about this answer? That they failed to see the irony of this request.
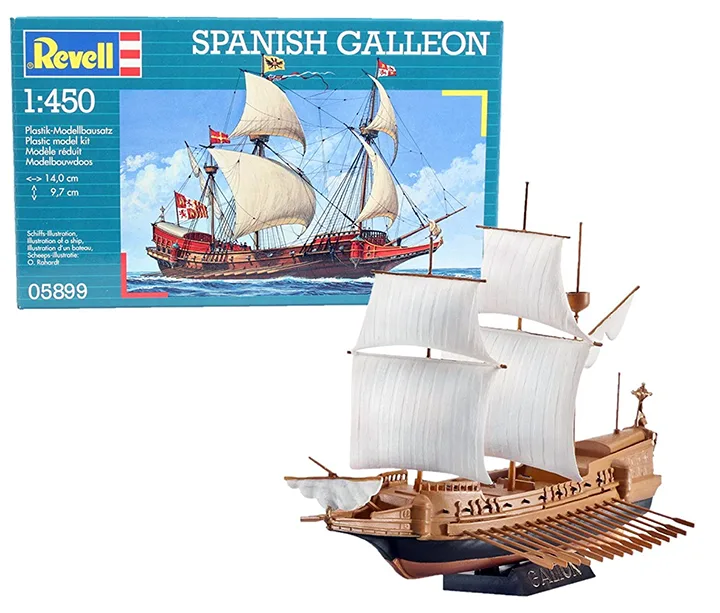
If the ship is raised up in the air, all you can see from the ground is the bottom of the ship's hull, not the deck. To see the deck you had to be up in the air above the boat. To see the deck from the ground, the ship had to hang upside down. This I didn't mind at all. What could more memorable than an upside galleon inside a restaurant? Before the idea took hold, it was set aside because of the logistics of hanging the boat and other safety issues -namely, idiots trying to hit the masts and rocking the boat. But being reasonable didn't stand in the way of the clients still wanting to show the deck of the ship. This is why I get the calls: I can think out of the box. So I went home and let my mind do its thing -while I played video games.
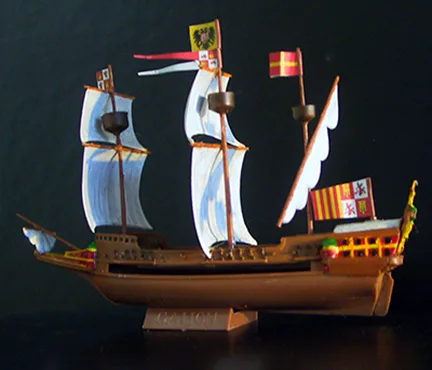
One of my best tools of visualization, is the use of scaled models. I started doing miniature models when I was about twelve years old, and by the time I was creating theatrical sets at age fourteen, I had discovered how effective models were in working out design problems. To study how a ship would look suspended from the ceiling of a particular space, I needed a miniature of the ship, and photographs of the space taken from various viewpoints. One way to go about it, was to build a model of the ship. Or, I could go online and order a replica, like a toy or something of that nature.
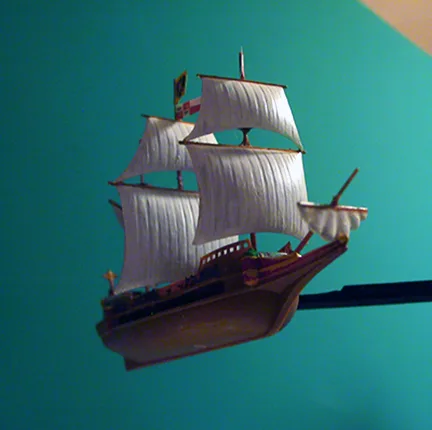
All good replicas of galleons began a the one-hundred dollar mark. But I finally found a galleon model kit from the company Revell of Germany that fit the ticket. It was very close in appearance to the actual boat and it only cost ten-dollars. The scale was 1/450 the finished model would be less than four inched long when assembled. When it arrived, it took me less than ten minutes to put together the nineteen pieces that made up the kit. Then I played with it for a while holding it up and studying the model from various angles. I also had a collection of photographs I had taken at the restaurant. So by having a photo on my computer screen and holding the boat in front, I soon had a good idea of what the ship would look like in reality.
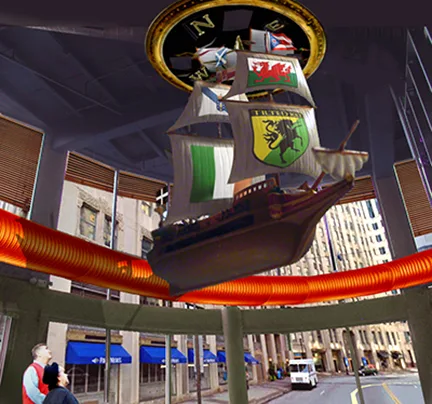
I even solved the problem of showing the deck of the ship while looking from below. Simple: use a mirror to show the reflected image of the deck. As long as you had a mirror facing down from above, you could see the reflection of the deck by looking up at the mirror. Now all I had to do was use this practical information and come up with a design. And to produce a photo-realistic image of this design, I used Adobe Photoshop. Here I could combine an actual photograph of the place (my background plate), another photograph of the ship, a photograph of onlookers, with a digitally painted image of other elements, tweak it here and there by adjusting scale and color, to achieve a final rendering of the conceptual design.
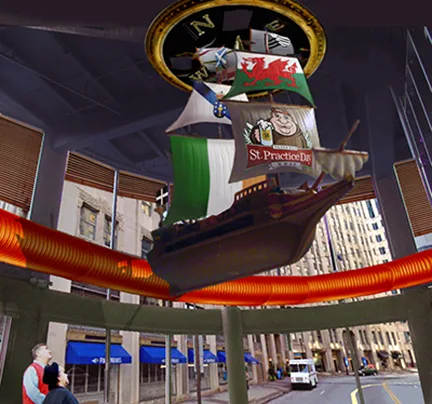
I began by taking a photograph of the ship model in the correct viewing angle and lighting conditions, and then uploading the image into Photoshop. The picture was taken in front of a green-color cardboard to make it easier to eliminate the background. I ended up with a cutout of the ship, which was then over-imposed over a background image of the restaurant. I made scale adjustments until I looked right. Then, with color information I had noted by studying photographs of existing Tilted Kilt restaurants, I colored the background image. Then in another layer I added a couple looking up, corrected the scale, and the finished composite image looked very convincing. Now all I needed to do to complete the visual was to add a mirror above the ship.
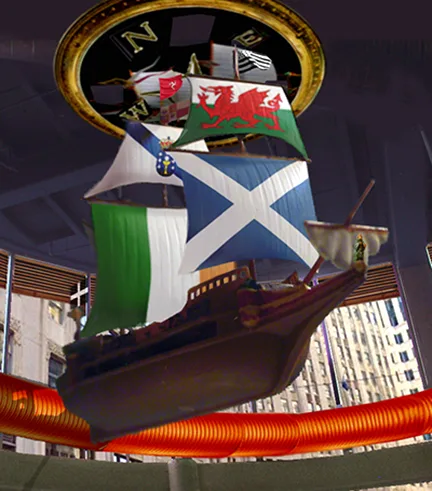
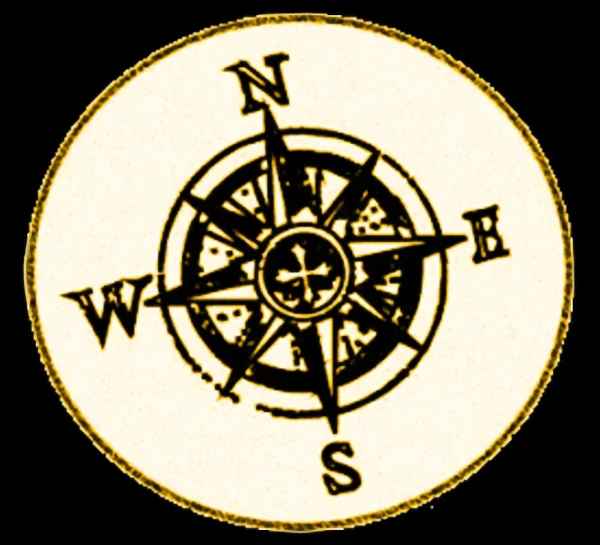
To integrate the mirror into the design, I painted a compass. The face of the compass was the mirror with only the letters of the cardinal directions (north, east, south, and west) showing. Next, I painted the flags of the Celtic nations on the sails, creating a couple of versions showing the flags. At the next meeting I showed the clients printed copies of the two designs. They requested a further change on the sail-flags, and once back home, I produced the final rendering. A digital version of the imaged was sent to the Tilted Kilt corporate office for approval. After a week or so, we received the go-ahead to install the boat inside the restaurant.
Taking inventory of the wreck
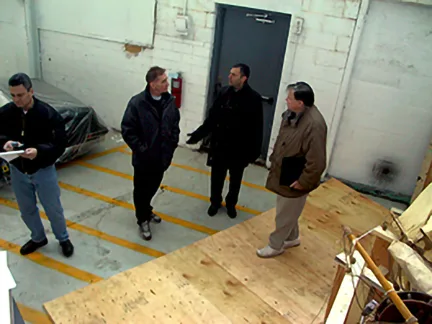
I was still working on the design, when I got a call that the shipment had arrived. So late afternoon the next day, the clients, the architect, the general contractor and I, met at a Cleveland east-side automobile warehouse to see what we got. Winter was raging outside and it was snowing heavily. But thankfully, the warehouse was heated. In it, cars, RV's and boats were kept secured from the weather.
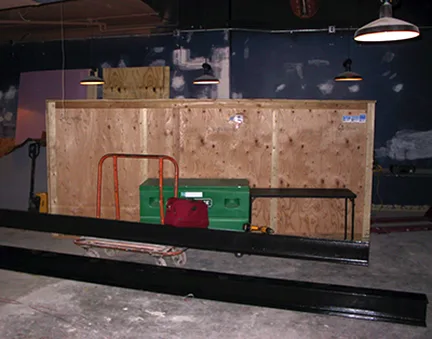
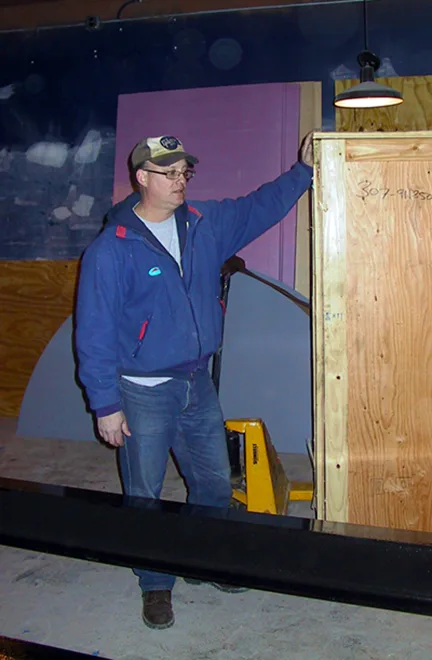
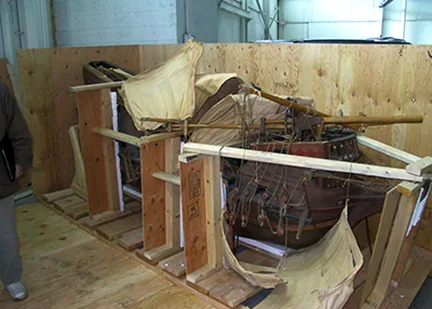
The large crate with the ship took the space of a parking spot. I grabbed a hammer and began to pry open the lid. Once the lid came off, I looked at the content with dismay. There was a ship alright, but all the masts, sails and rigging had been chopped up in pieces. Parts of the ship were also gone. Even worse, the ship was not the one from the catalog image. It was similar, but not the same one.
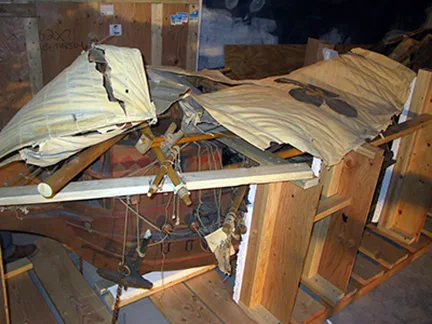
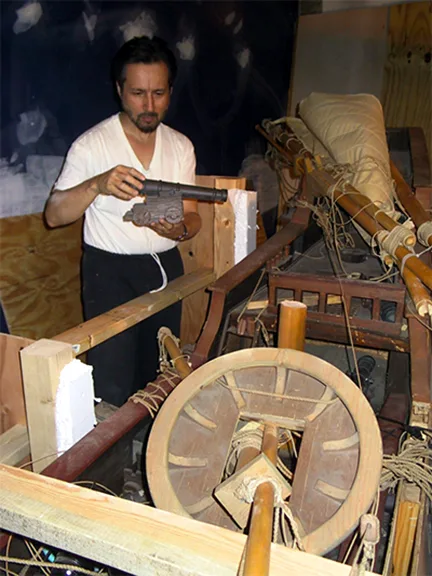
It was going to take a lot of work and time to fix it. How much I couldn't tell because I didn't want to open the entire crate to expose the ship at this time. The clients asked me if I could fix the ship inside the warehouse. I explained that the finished ship with full sails would be at least fifteen feet high. Better to do the repair work and assembly inside the restaurant. And, it would be easier to transport it inside the shipping crate. This task fell on the general contractor. Considering that the crate was listed at 1,200 pounds, I didn't envy his task. Once inside the restaurant, I could remove the crate and estimate what needed to be done.
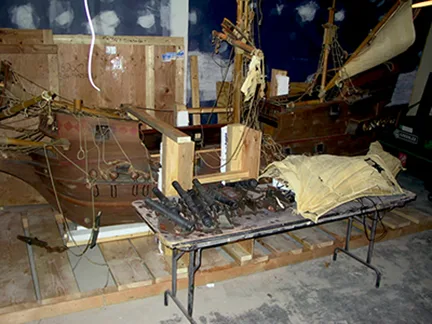
A ship expert, I was not. But I needed to become one fast. And not just any ship, but a fifteenth-century galleon. Not many experts on galleons around. So I hit the books and every article and museum diagram that I could lay my hands on. My ancestors had arrived to Puerto Rico in this type of ship. Some even fought on them. While visiting Genoa, Italy in 2000, I had even boarded a replica that had been used on a period movie. But I never took notice of the million-and-one details that go into rigging one of this ships.
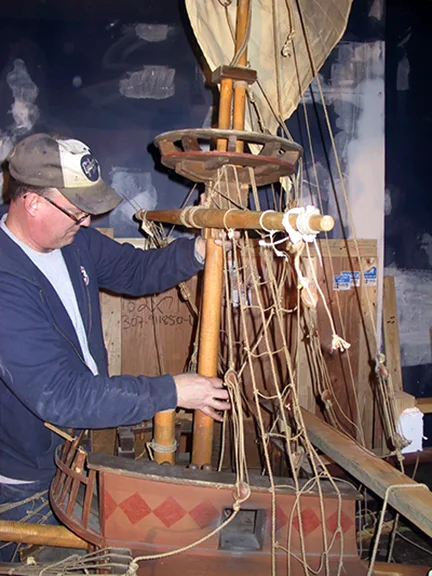
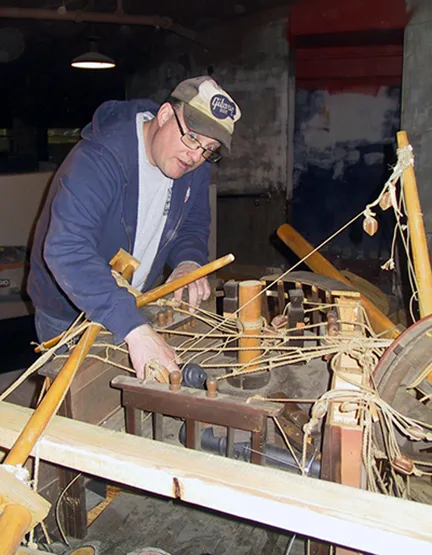
While I was studying books relating to the project, and building up a massive research morgue of notes, diagrams and images, the crated was transported to the restaurant. By then, the Fat Fish Blue had closed for business and demolition work had begun. One of the managers had a roommate that had worked at a nautical store. He was familiar with boats and the terminology. So I asked him to work with me for a few weeks. Together we released the ship from the crate and finally took a good look.
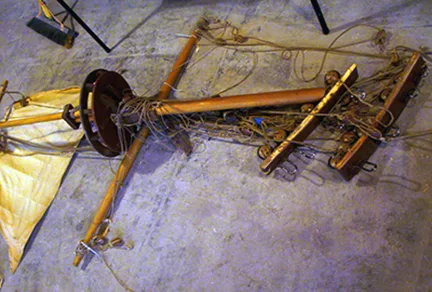
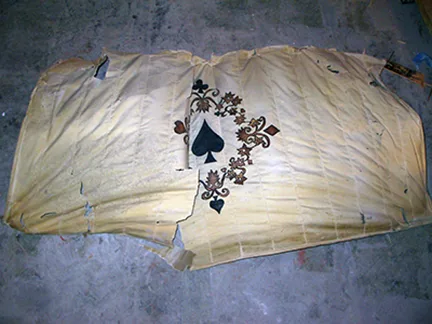
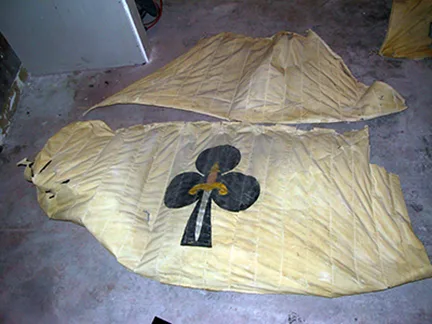
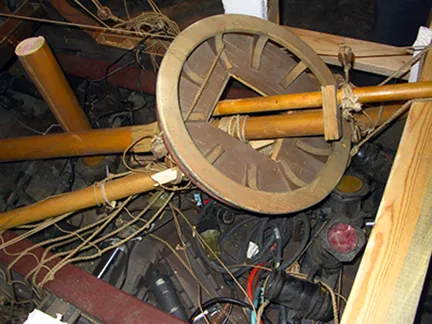
I was dismayed by what we had on our hands. Not only was the ship in an awful shape, but we soon realized that at some point in its history, it had been re-purposed by other owners, and they in turn had reconfigured the ship's masts, sails, rigging, and parts of the bow, in the worse possible way, without any knowledge of how a real ship was put together. Many of the miniature props were also broken or missing. Even the masts had been cut down perhaps to fit the boat at a smaller space. I had been counting on re-assembling a ship, not in having to reconstruct one. This job had turned complicated.
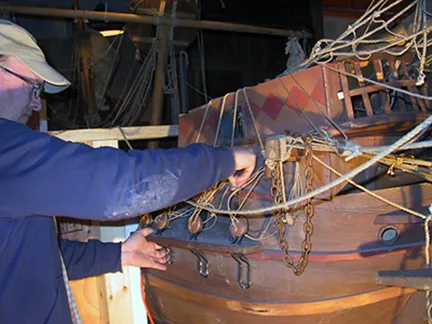
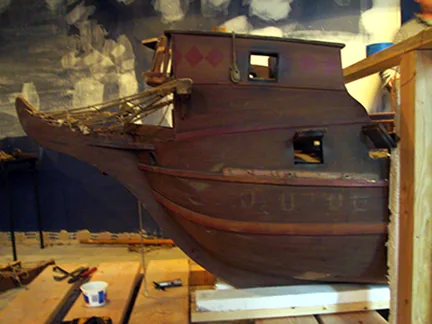
Before I could start planning, I needed to find out what I had to work with. So our first order of business was to take inventory of all the parts and pieces. We began the task by photographing everything in place, and then everything that was loose was removed off the ship. We were particularly careful with the sails. They were so brittle that they cracked like potato chips.
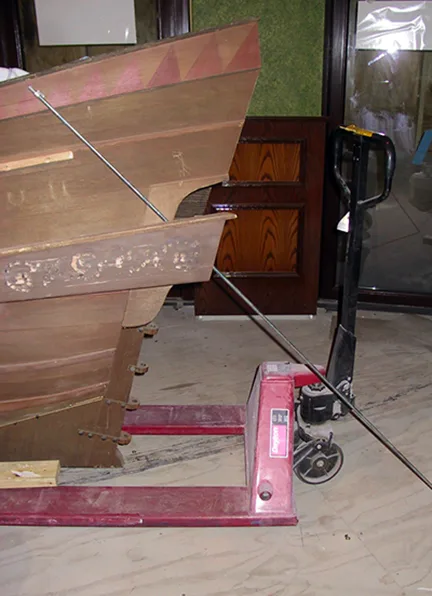
Once everything had been inventoried and photographed, it took little time to decided to move the project from being one of assembly and restoration, to doing a complete reconstruction -a lot of it from scratch. This was going to take a lot of time and effort, not at all what I had anticipated. Not being able to estimate how much time all this was going to take, and considering that we had a deadline for the official opening of the restaurant, I took off for a week to concentrate on research and planning. I needed to come up with answers. I needed to become an expert.
Planning and Research
This is how I do research: Firstly, I go online into the Cleveland Public Library catalog, and I order any book and video relating to the subject. Anything and everything is included. Once I get notification that the material is in, I borrow everything and carefully browse through the content, identifying anything of value with a paper marker. Everything marked gets scanned, photographed or copied by hand into a notebook. Then I return the material as soon as I'm done with it, because if not, your office will be get cluttered in no time.
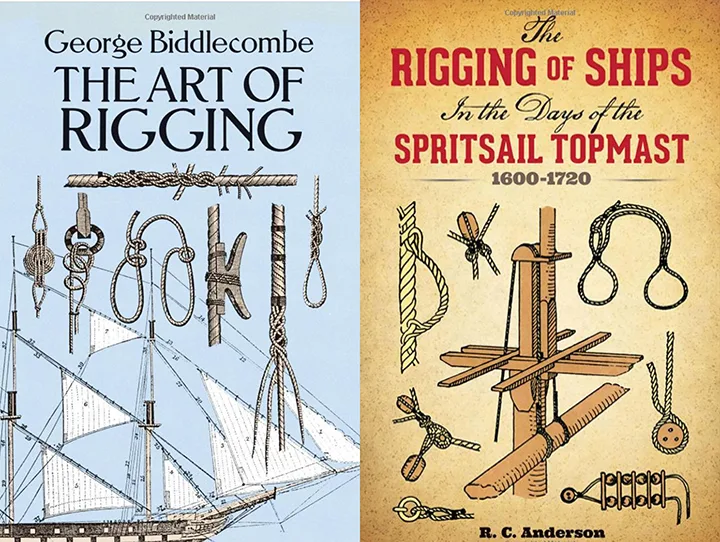
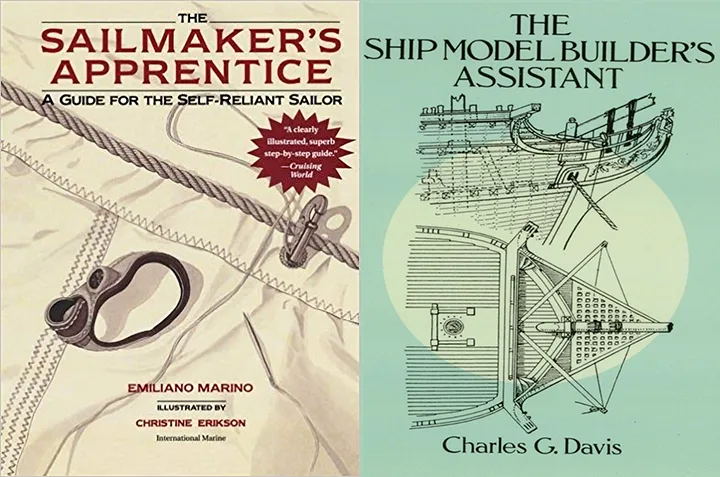
Secondly, I go online and do searches on every topic relating to the project. Images are downloaded and saved into a file, and important text is copied and pasted on Microsoft word, and then saved into an appropriate file. Thirdly, I order any books that may be of use to me and add them to my personal library. And lastly, I get comfortable and go over all the material I have collected. Everything that's printed goes into a large ringed binder and is kept close at hand when references are needed. This will become the "Project's Bible".
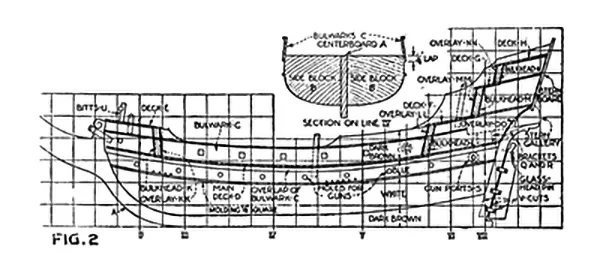
One thing I give special attention are scaled models. In most cases, someone already figured out how things were done. Of course, this depends on the complexity of the model and the amount of detail. Depending on scale, some models are very simple but others, such as museum replicas, are done to exacting detail. But when your knowledge-base is starting from basically zero, even simple models will give you just enough data to digest, before increasing your understanding on the subject with more complex material. The only major drawback of reference images you may find online, is that the image resolution is not good enough for magnification in order to study smaller details.
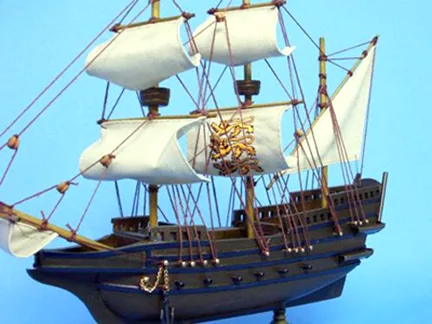
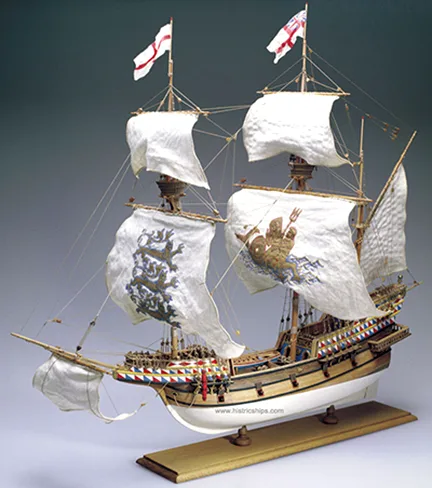
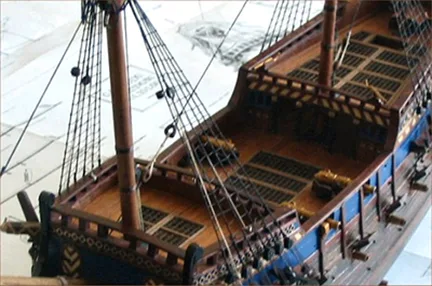
Sometimes it's very useful to revisit period movies to take notice of certain details. I feel this helps to flesh out in three-dimensional reality the knowledge you are absorbing. One of the side effects of becoming an expert on the subject, is that you begin to notice all the things the film creators got right or wrong. So in a way, your enjoyment of the films increases. And, as in my case, you can speak more than one language, your enjoyment goes off the chart, especially when you begin to pick up on all the bad accents, or wrong accents, spoken by supporting characters and extras in the background.
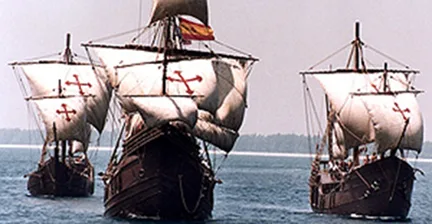
A final comment about doing research, is that you don't have to limit your subject to only Spanish galleons. While Spain popularized these ships needed to do the oceanic crossings between Europe and the American continent, other nations, such as England and Holland, also adopted and even improved on the design. So your research can extend to these countries as well. Galleons were, for the most part, armed cargo vessels, and, as the value of their cargo increased, so did their size. Not only could large galleons carry more cargo, but just as importantly, they could carry more guns for protection. The galleon model we had was from an early design corresponding to the Tudor period (1485-1603).
Creating a suspension system
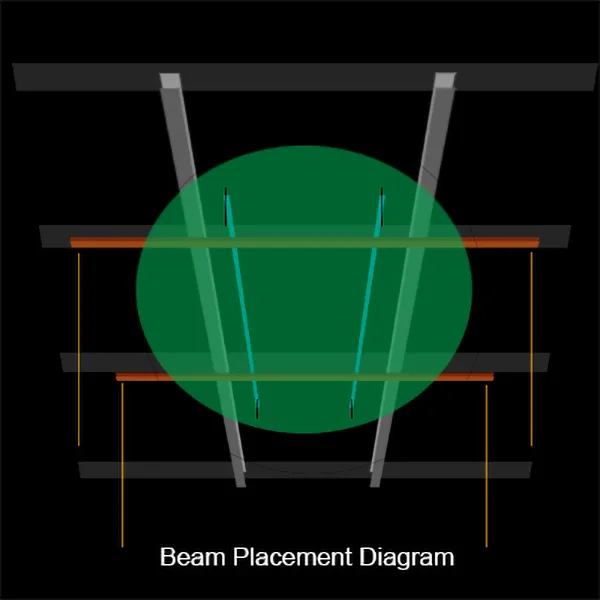
In addition to reconstructing the galleon, I had to figure out the engineering needed to hang the ship from the ceiling. This was a heavy object, so I had to make sure that the ship's inner structure could support the hanging system without breaking or falling apart. Since this part of the job needed to be completed at the earlier stages of remodeling (before the finished floors were laid), I produced two simple renderings to illustrate the system. These types of images are extremely useful to everyone working on a project. The general contractor had no problem understanding the system, and then he was able to pass the information along to a structural engineer who had to make sure the system worked as intended.
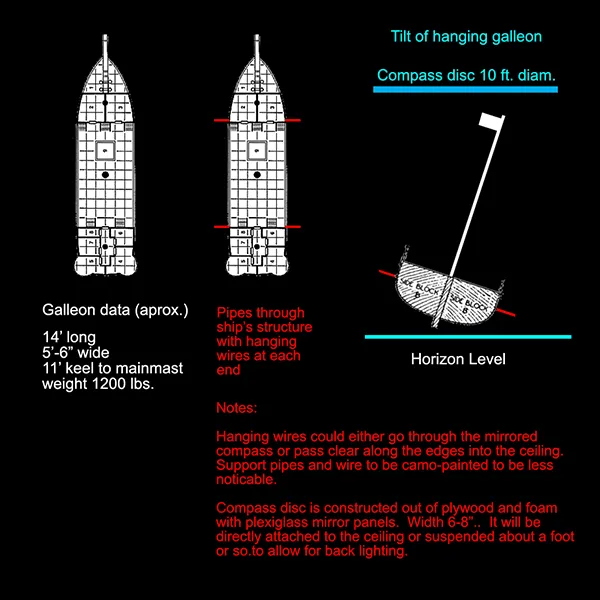
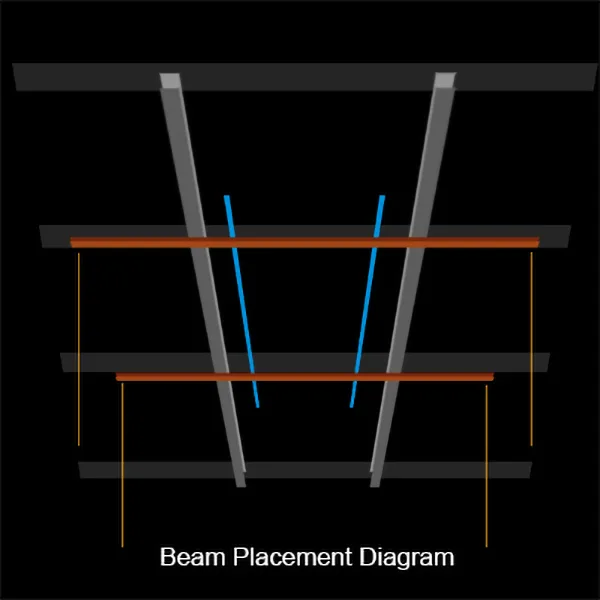
The design for the placement of support beams as shown on the renderings was as follow: Two I-beams (shown grey) would be welded to the existing ceiling structure, and then, two metal cross-beams (shown orange) would be welded across. The galleon then be suspended from four steel cables secured at the tips of each beam. Finally, two hole-punch pieces of structural tubing (shown blue) will be added to support the compass.
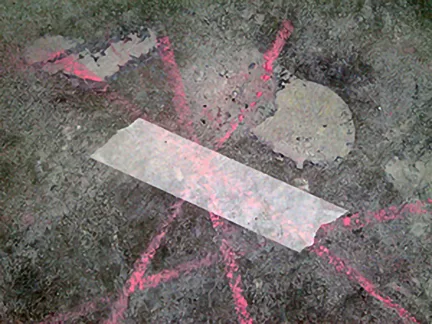
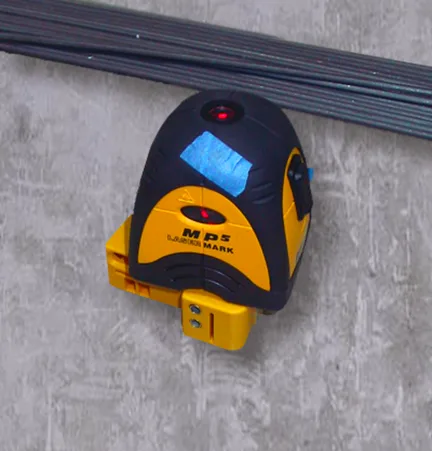
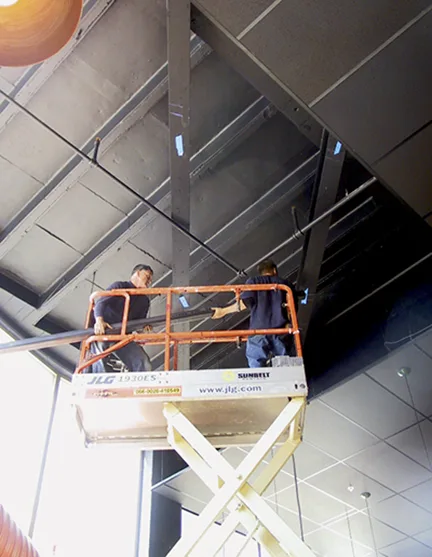
To determine the exact placement of the I-beams on the ceiling, we first positioned them on the floor. Then we placed a laser level on a beam and moved it along until the laser dot was exactly on the intersecting ceiling beam. Next, with the help of a lift, we marked the intersecting points on the ceiling beam with chalk. The final step was to raise the two I-beams to the ceiling and weld them on the right spot.
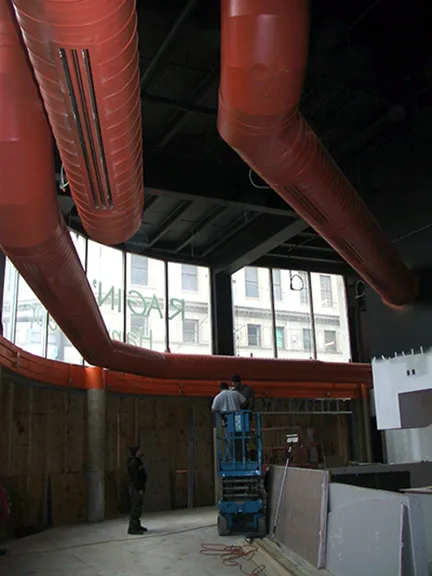
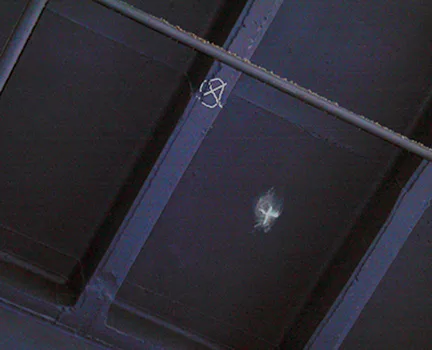
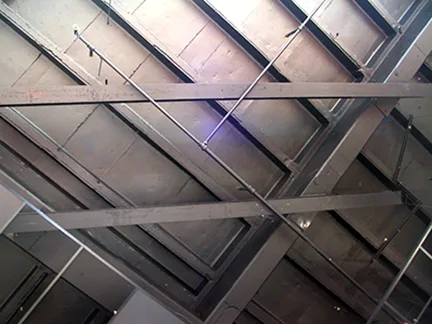
With the I-beams welded in place, we proceeded to attach the crossbeams in similar fashion. Like the two I-beam, the system had been arranged on the floor, marked accordingly, holes for later used were drilled, then lifted and welded in position. Finally, everything was painted flat black to make them "dissapear" from view against the dark high ceiling. Due to good planning, the process worked smoothly without any problem.
Adding hanging pipes to the ship
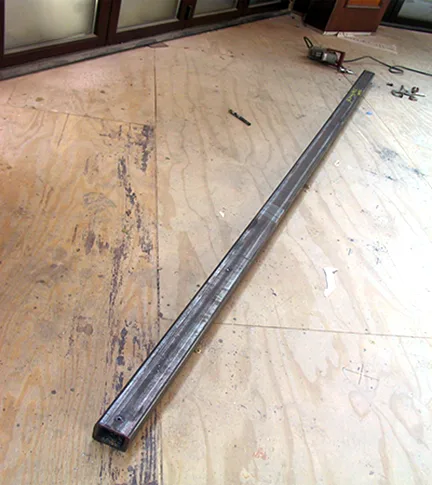
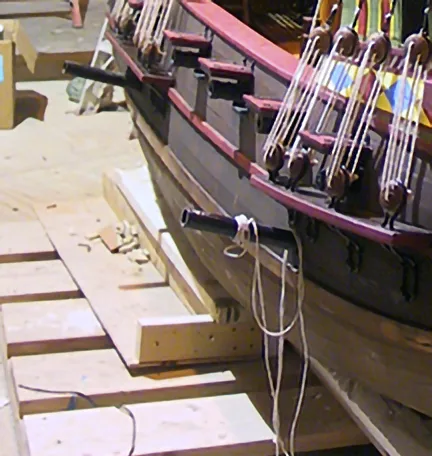
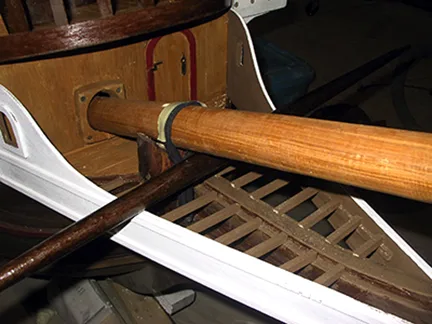
The suspension system required two pipes going across the ship's hull. Steel cables would then be attached to the end of these pipes and to the ends of the cross beams to suspend the ship in midair. But for this to work, the hull had to be strong enough to withstand the pressure of it's own weight. To make this determination, we needed to look inside the hull.
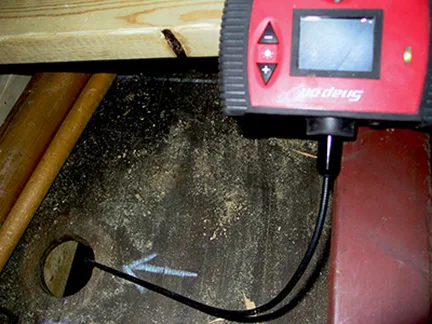
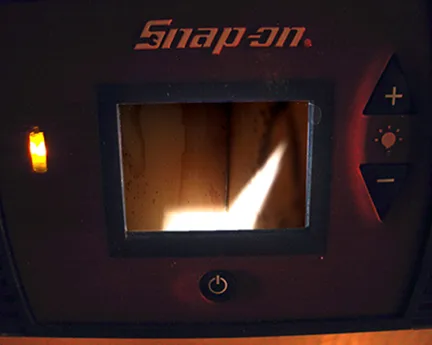
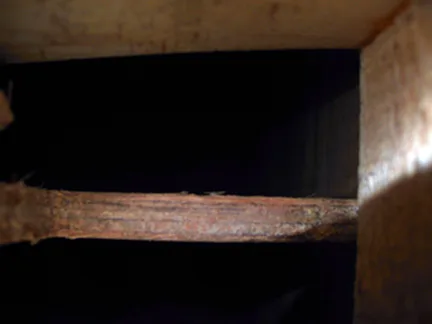
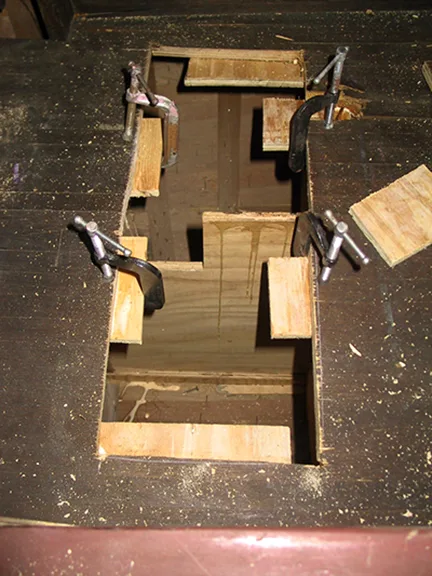
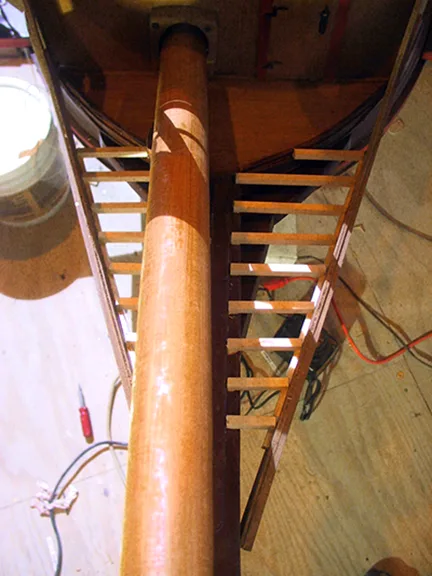
A flexible snake scope camera was inserted in a mast deck hole to view the interior structure of the ship's hull. The scope has a light which allows you to see a clear image on the camera's LCD monitor. What it revealed was that the hull's structure was made by a series of plywood shapes that acted as ribs, which gave the hull its form and made it incredibly sturdy. With this information, I could design a way to secure the cross-pipes so they would support the weight, and not slide if we tilted the ship.
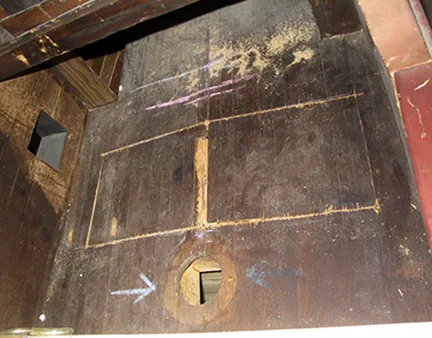
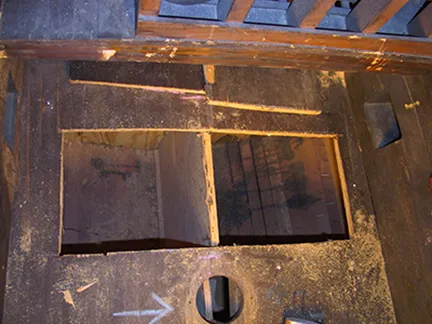
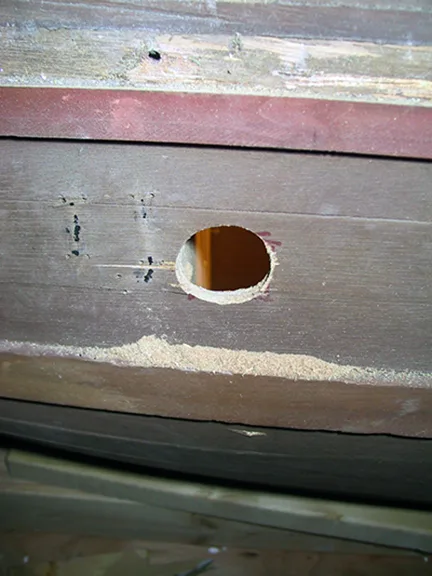
To have access to the plywood ribs, we cut two opening on the ship's deck, one of each pipe. Then holes were drilled on the side of the hull to pass the iron pipes through. Once the pipes had been inserted, they were secured in place with wooden braces that were glued and screwed to the plywood ribs. Lastly, we covered and sealed the deck openings.
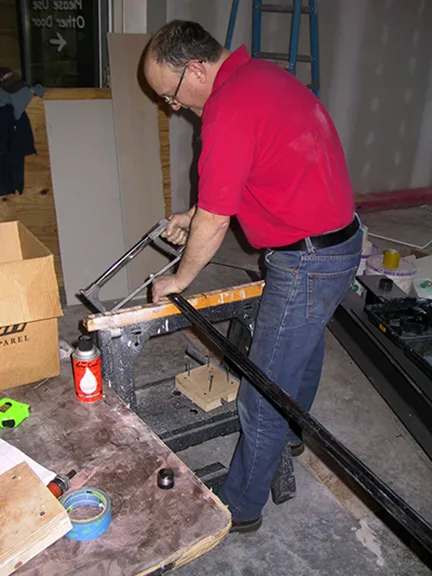
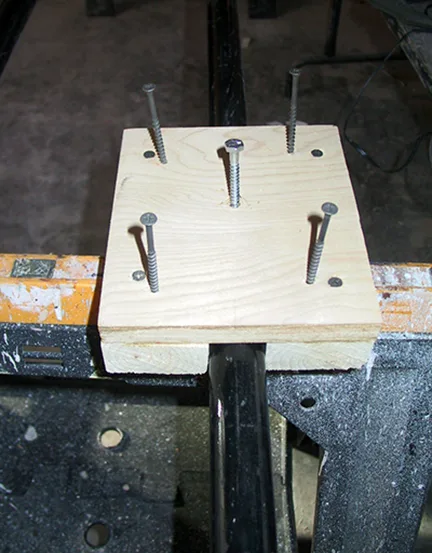
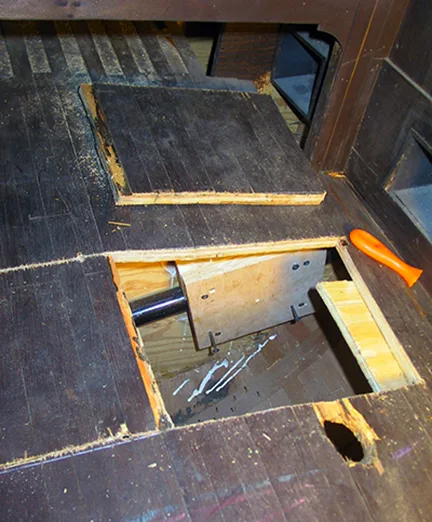
With the completion of the ship's suspension system, we could begin the reconstruction plan. At this point, with his contribution to the job done, my assistant Chris Step left the project and I moved into the comfort of my shop to reproduce all the missing pieces, sew a new set of sails, and shape the parts for the giant compass mirror. Assistants with a new set of skills joined the team.
Reconstructing the masts
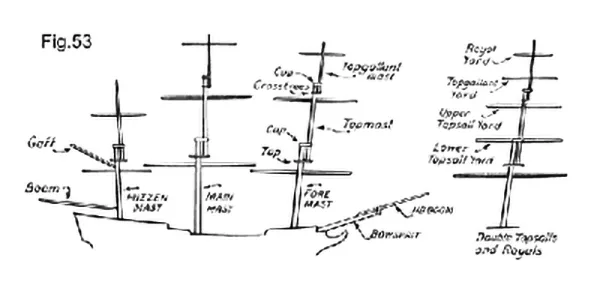
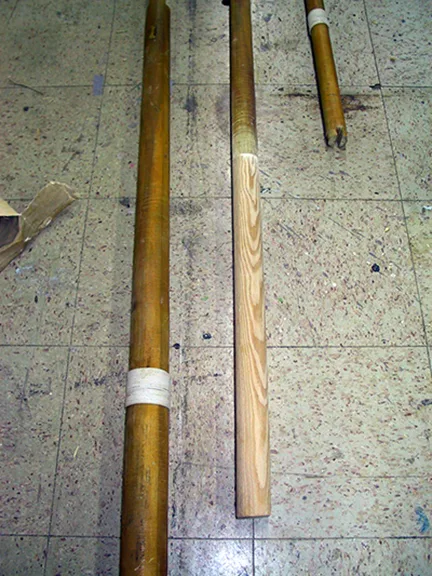
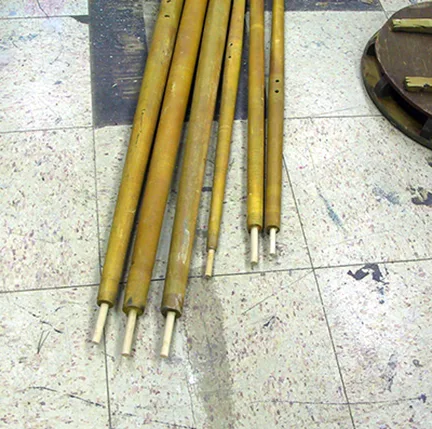
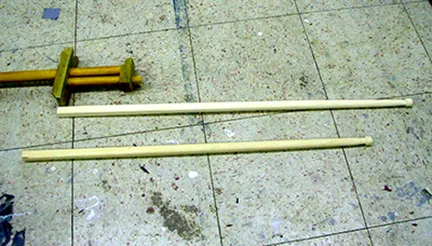
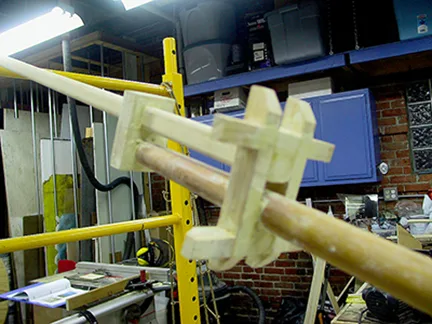
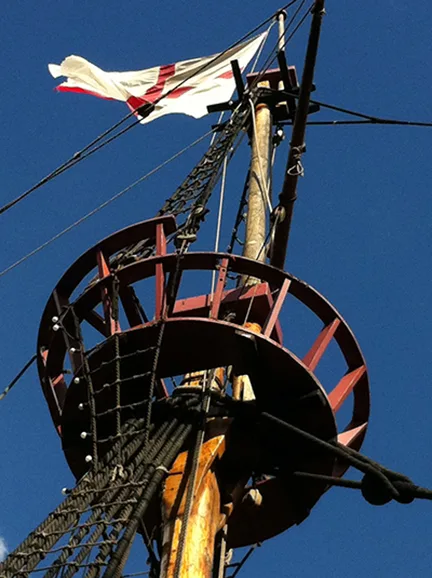
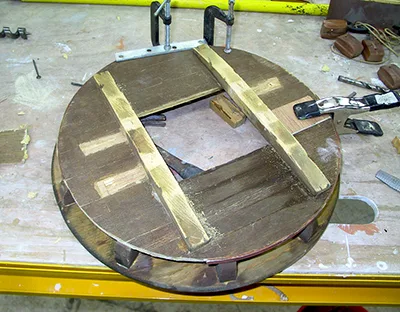
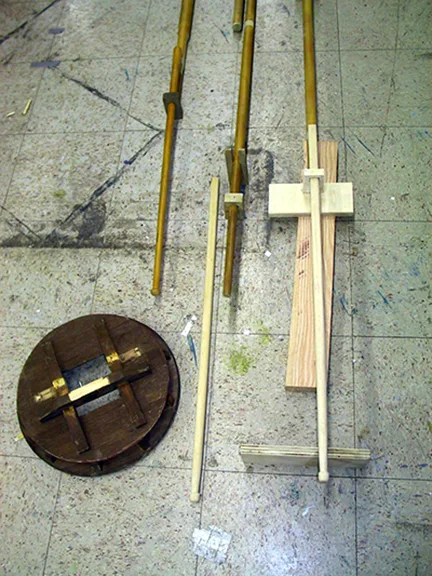
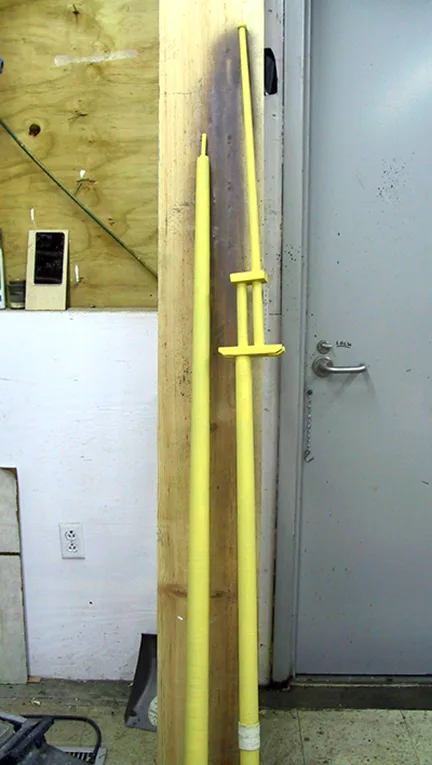
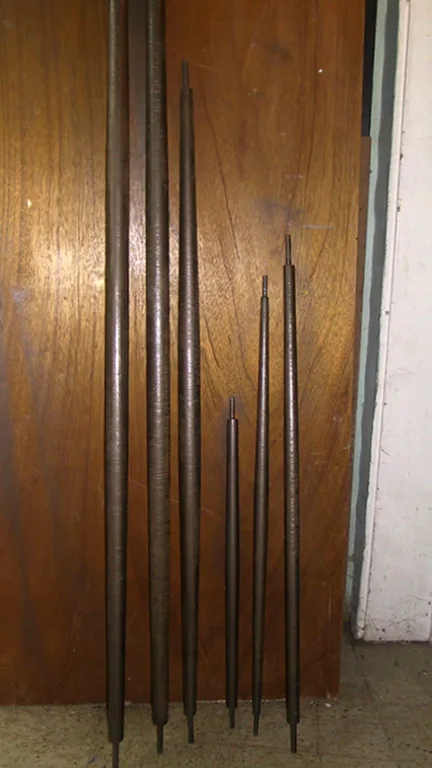
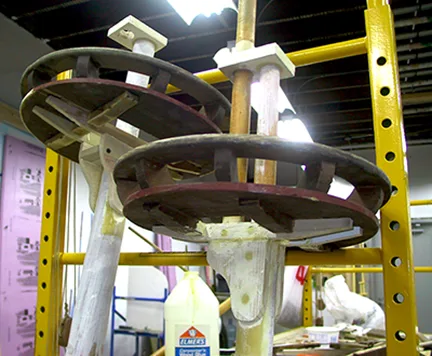
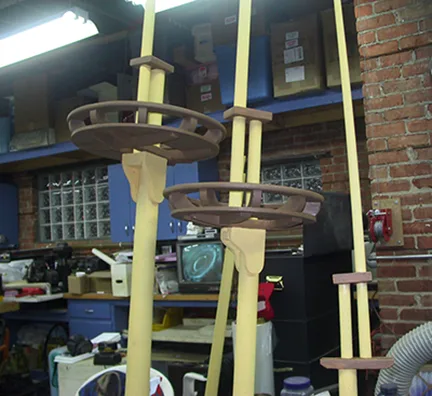
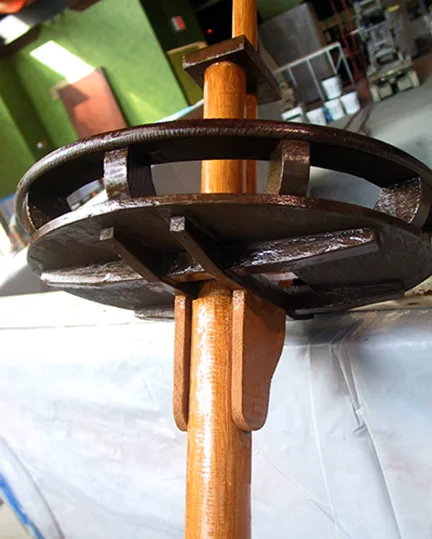
I had very good references and construction manuals to reconstruct the masts, yards, crow's nest and the ship's bow sprit. In addition, I carved dead-eyes and blocks to replace missing pieces. I have fun doing this type of carpentry. After all, you are doing a scaled model. So the craft feels more like a hobby. But I was not adding more to the model than what it original had. Whenever possible, I was simply reconstructed what was missing. In a week's time, I had all the parts I needed, painted and ready to go. The next series of photographs show the work progress.
Constructing new sails
Next on the agenda, was creating a new set of sails. Once again, I had very good references. I also had a seamstress at hand: my wife Nancy. In addition to being an experienced travel-agent and world traveler, a display artist and a chef, she is also a very good seamstress. With detailed measurements and notes at hand, the sails were created to scale. Then they were primed, shaped and painted. Two assisting artists, Denise Aviles-DeNoble and Joey Santana, helped with the painting. The flags of each of the six Celtic nations were painted on the sails. These nations are: Brittany, Cornwall, Wales, Scotland, Ireland, and the Isle of Man. The following series of photographs show the work progression.
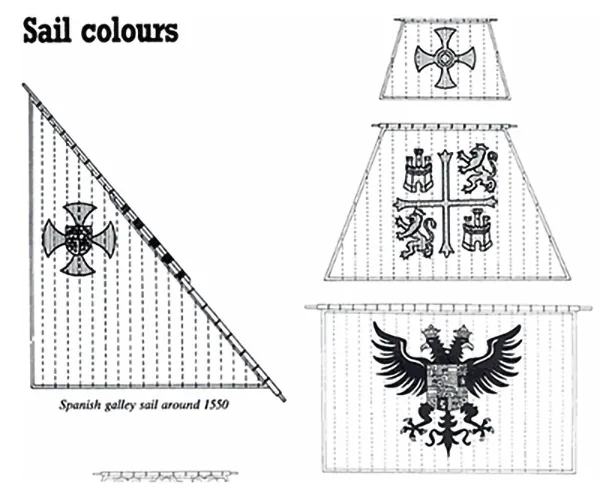
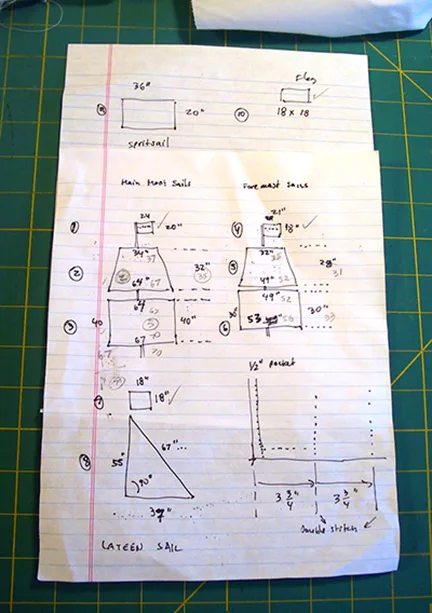
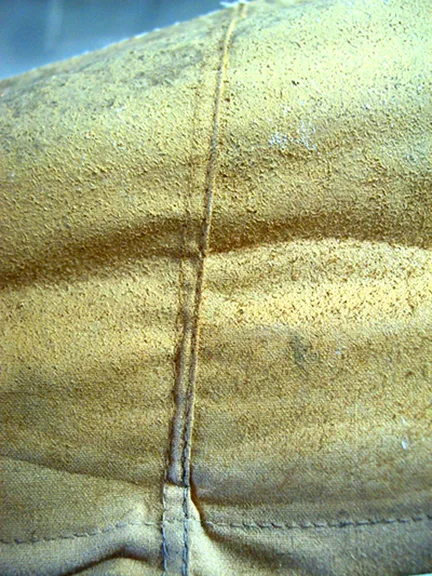
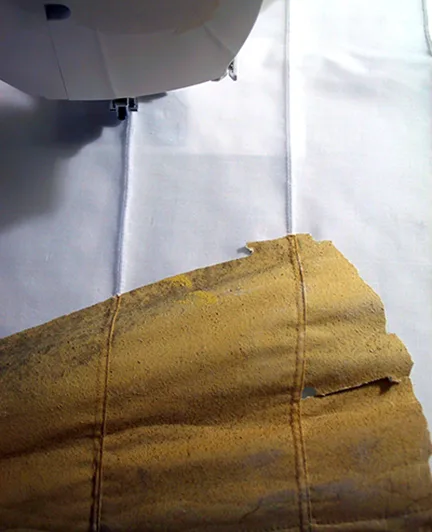
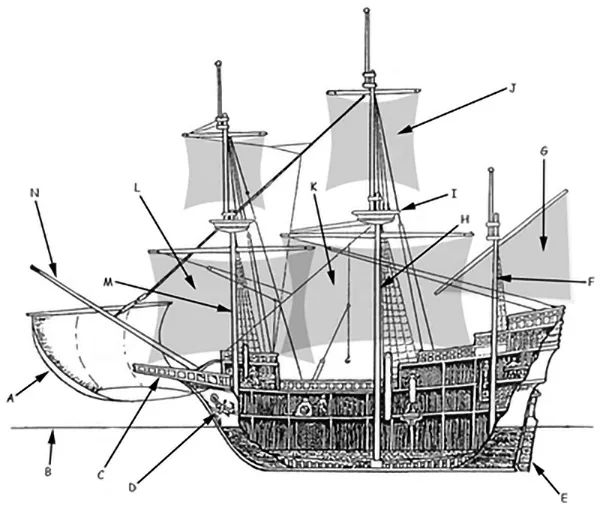
Galleons used two types of sail: the Mediterranean-style lateen-rigged sail on its mizzen mast, and a northern European-style square-rigged sail on its foremast and mainmast. Sails were constructed by stitching together strips of cotton (or sometimes flax) canvas fabric parallel to each other. The seams were often overlapped between panels and sewn with zig-zag stitches in order to increase tensile strength. Bolt ropes were sewn onto the edges of a sail to prevent tearing, or to fix the sails to the spars (poles) supporting them. When constructing the sails for our model, we followed closely the dimensions of the old sails and even improved the stitching pattern to make it more historically accurate.
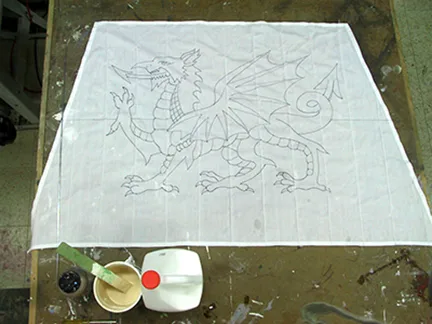
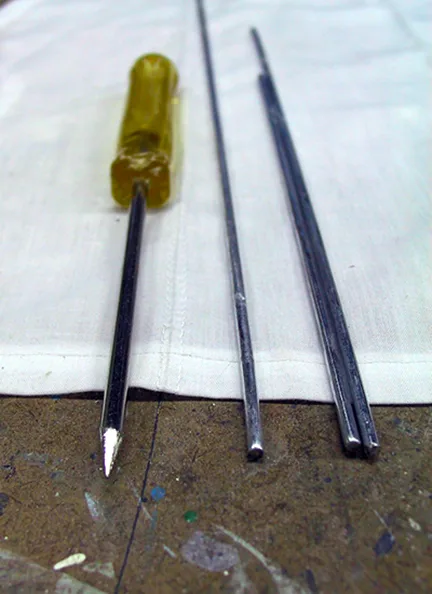
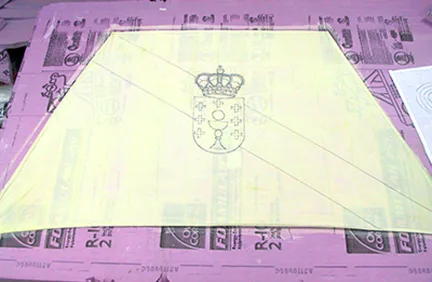
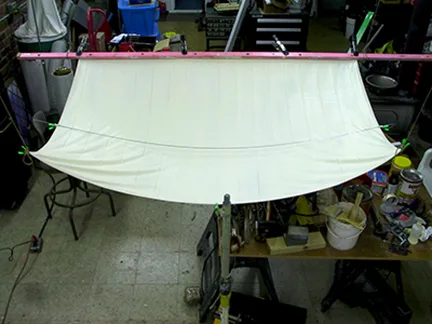
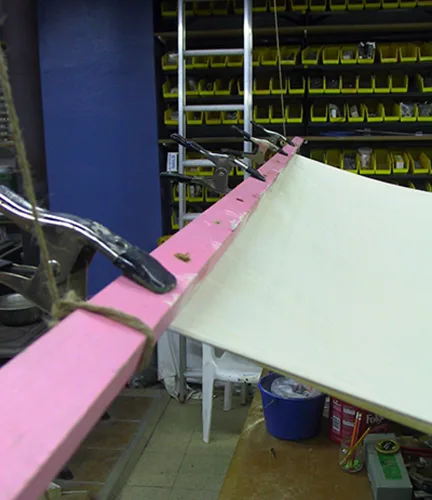
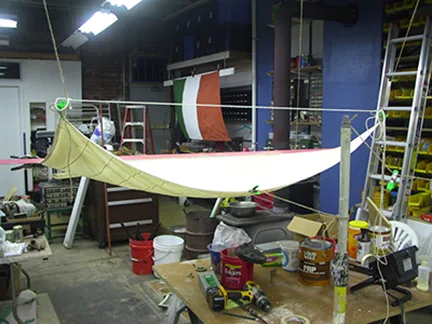
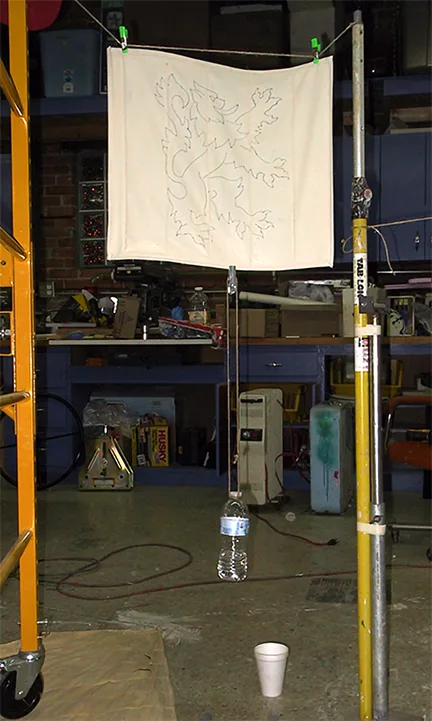
Once a sail was sewn, artwork was traced using a permanent marker. The process consisted of drawing the design on paper, then placing the design over a light table, then placing the sail cloth over the drawing, and lastly, tracing the design on the fabric. We did the tracing before priming the fabric to take advantage of the transparency of the material. Then we applied several coatings of a mixture of paint, glue, and wood filler to stiffen the fabric into shape. The shape of full wind-blown sails was achieved by adding bent metal rods along the edges, and then hanging the sails parallel to the ground to dry while the fabric was still wet with the stiffening mixture. We basically let gravity do its thing.
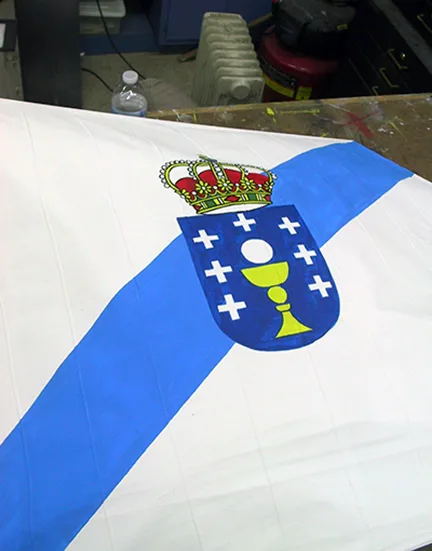
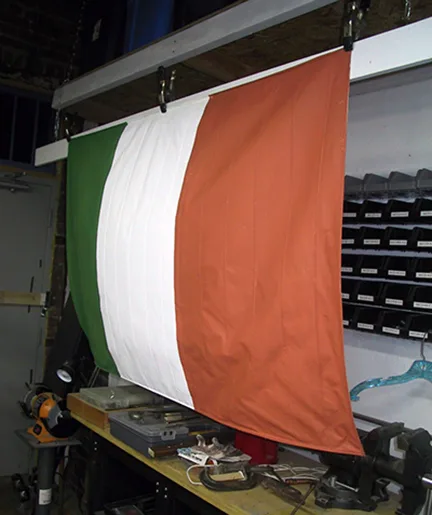
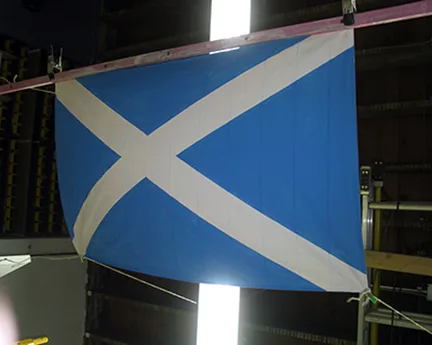
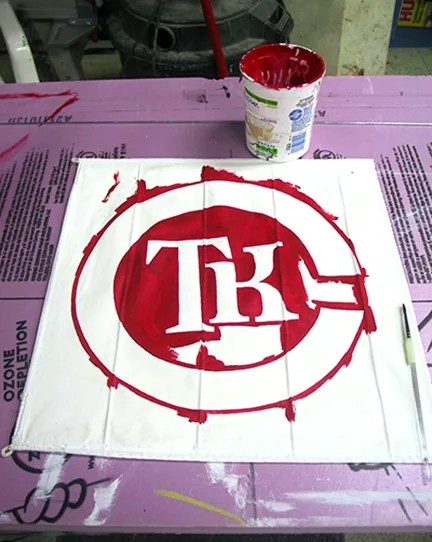
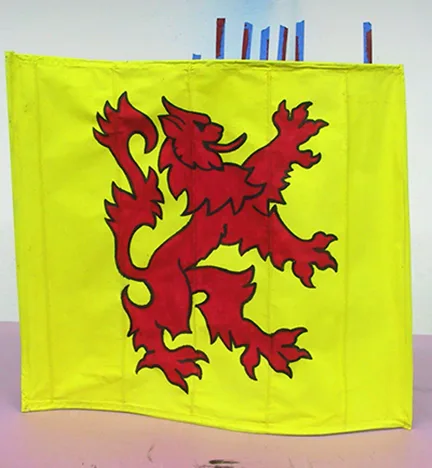
The last task in sail construction was to paint the designs on them. This was done using water-base acrylic paints. If necessary, another coating of stiffening mix was also applied to the back of the sails. After they were hung to dry for several days, we were wrapped in plastic film and stored until needed.
Duplicating broken or lost items
While all the sails, banners and pennants were being completed, I began the reproduction of smaller components. The complexity of a large sailing ship is enormous. It has two systems of rigging: standing, which supports the mast (and bowsprit), and running, which controls the orientation of the sails. Rigging is held together by blocks, which are wooden and metal single or multiple pulleys in a variety of types, depending on the function they perform. Two or more blocks are combined with lines (ropes) to create tackles, which are basically a mechanical assembly to pull or move heavy loads.
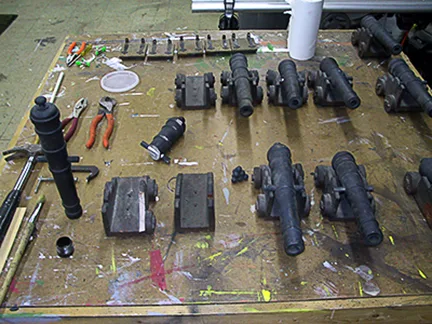
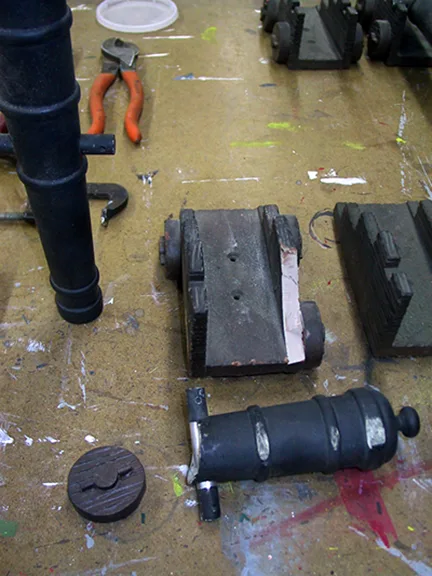
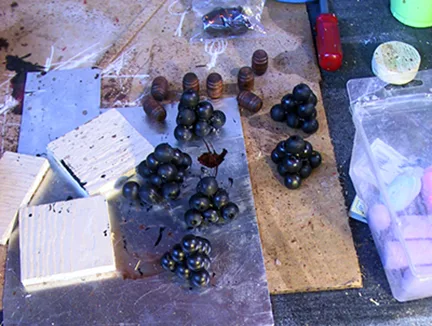
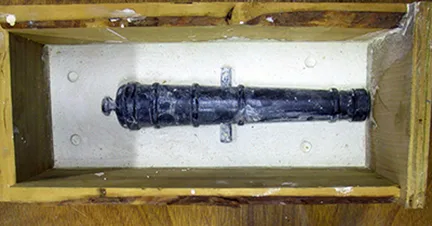
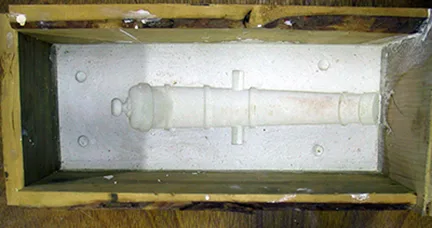
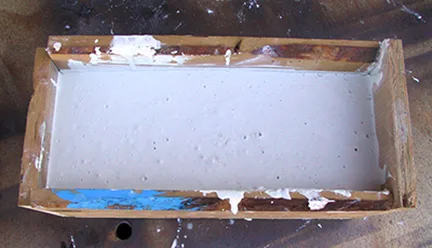
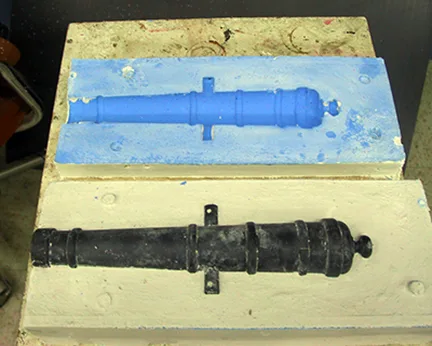
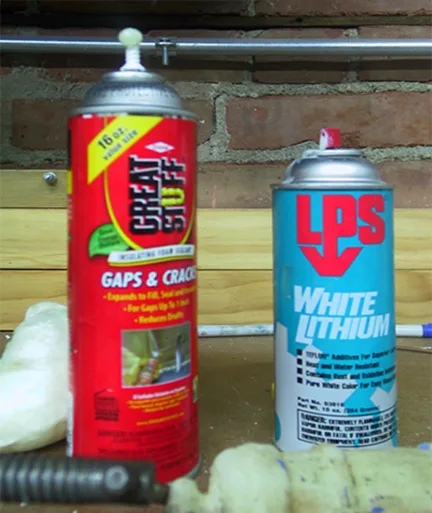
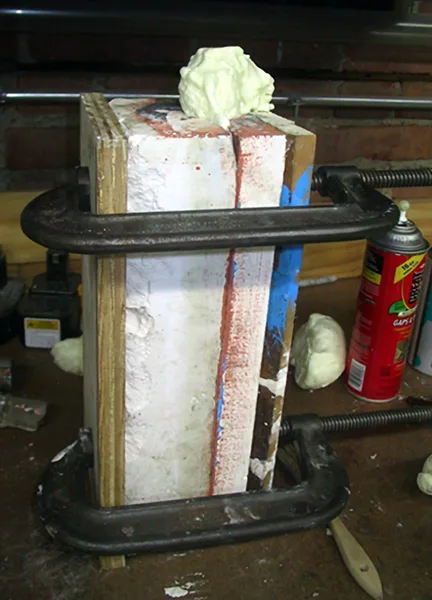
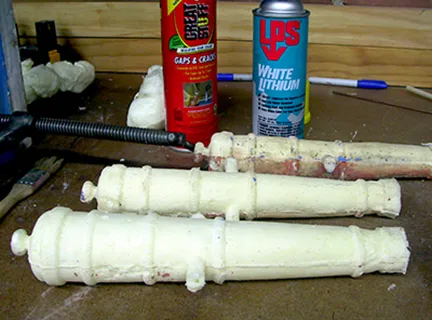
To replace missing blocks, I carved four different styles of block using existing pieces as models. Well, to say "carved" is really a stretch. I used a scroll saw, a drill, and hand files to "shape" wood pieces. Then I smooth them with sandpaper and stained them to match the originals. As the pieces were finished, we placed them in clear plastic bags and stored for later use during assembly. The cannon wooden carriages were constructed in similar fashion. But when it came to reproducing the cannon, I opted for casting them since it would be a faster process, better suited to capturing the form and surface details on the originals. Since the pieces did not have to stand up to close scrutiny, I could get away with less.
Constructing the giant compass
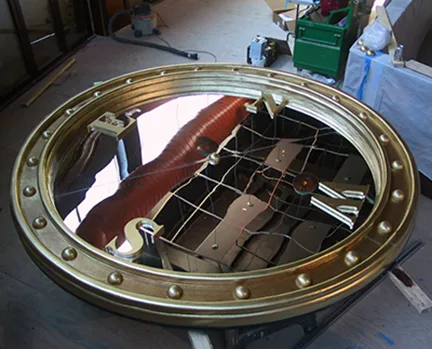
Next on the agenda was the construction of the giant 10-feet diameter compass. The design called for attaching it face down to the ceiling. The face was going to be a circular 8-feet diameter mirror, secured by a simple but elegant gold ring. Its construction had to be sturdy but light in weight. From the start, I knew that using a glass mirror was out of the question. Glass is very heavy, especially for a mirror of the required size, difficult to cut, and worse of all, dangerous to have above people's heads. When it comes to safety, I always prepare for the worse that can happen. So a plastic mirror, cut from 1/4-inch (5.6 mm) thick sheets of rigid acrylic, was what I had envisioned using all along. Acrylic mirror sheets are half the weight of sheet-glass of equivalent size, eight times stronger, and shatter-proof.
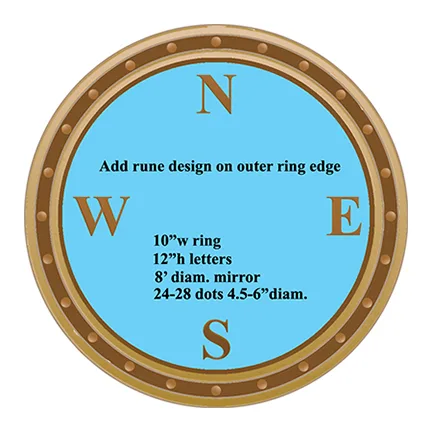
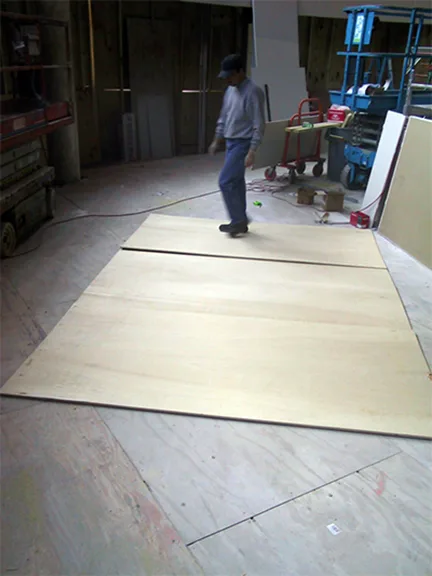
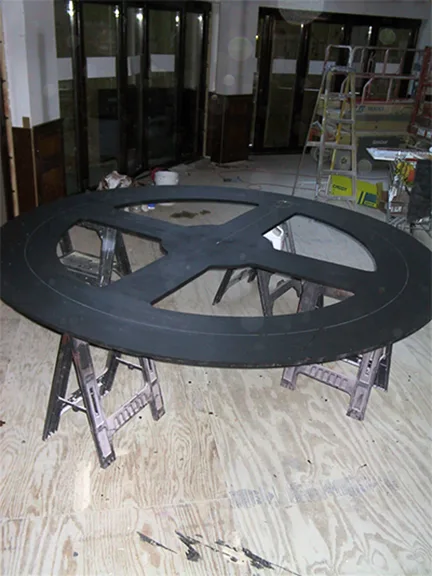
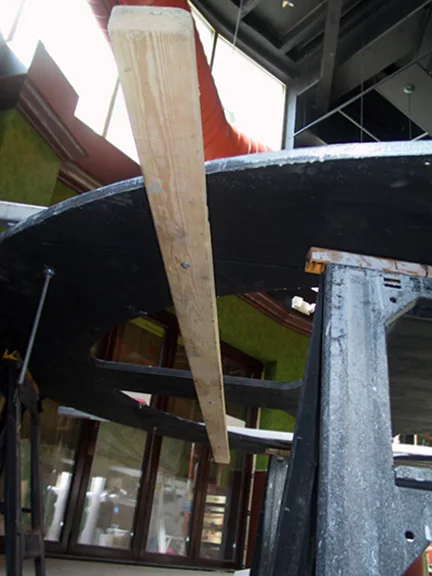
The job of building the compass was divided for two locations. The wood base support and the mirror was going to be worked on site, and the gold ring and compass letters were going to be created in the workshop. To create the 10-foot diameter base, we laid 4 pieces of 5/8" (12.88 mm) thick smooth plywood on the floor -that's two pieces of 4' x 8' (1.22m x 2.44m) and two pieces of 2' x 8' (.6m x 2.44m). We arranged them so we could trace a 10-foot (3.05m) diameter circle on them. Then we cut the circle with a jig saw. The process was repeated a second time to create a second plywood circle. Then we cover the surface of one of the circles with construction adhesive.
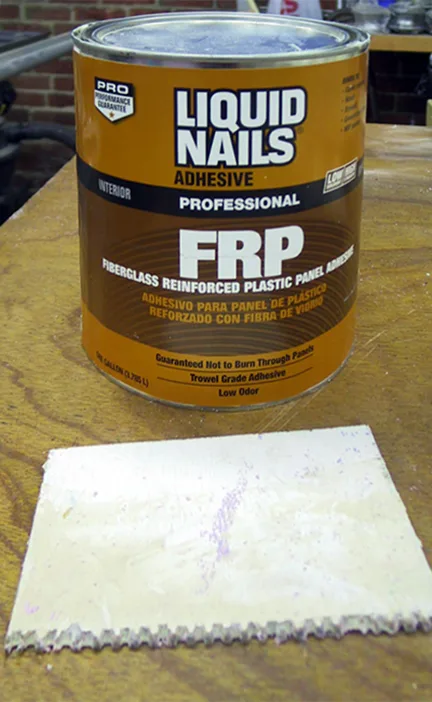
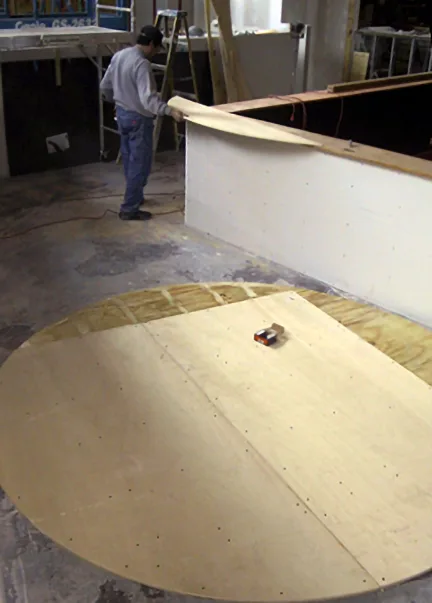
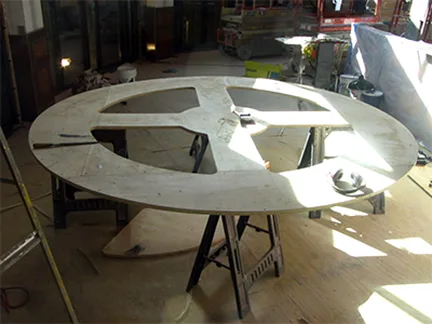
Next, the sections of the second cut circle were placed over the first circle with the joint lines going 90 degrees in the opposite direction so that two abutting joints are always backed by a solid piece on both circles. 3/4" (19mm) drywall screws we used to secured the sections for a strong bond. Then we waited 24 hours for the glue to cure. The resulting circle was both sturdy and rigid. To make it lighter, we cut out four sections within the circle, leaving enough surface to securely glue the mirror pieces in place. Then the entire base was painted flat black on both sides to avoid warping. Then, using a make shift compass (made from a thin wooden ruler, a nail, and a chalk through a pre-drilled hole) we drew the circumference of the mirror on the wooden base.
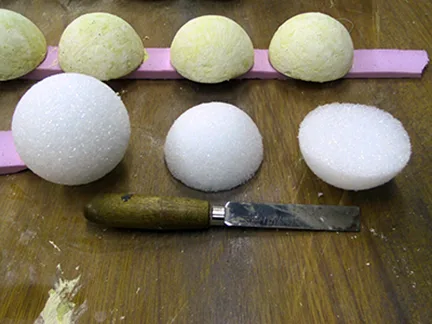
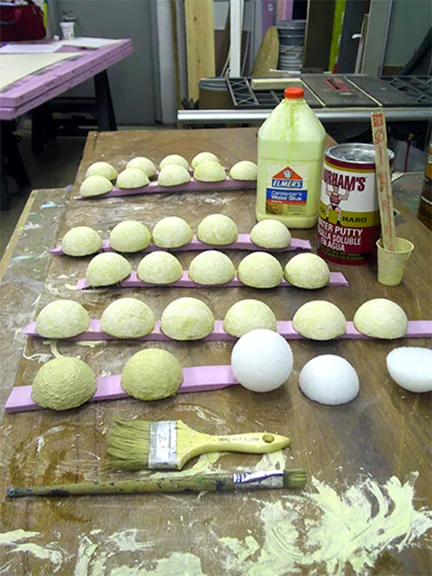
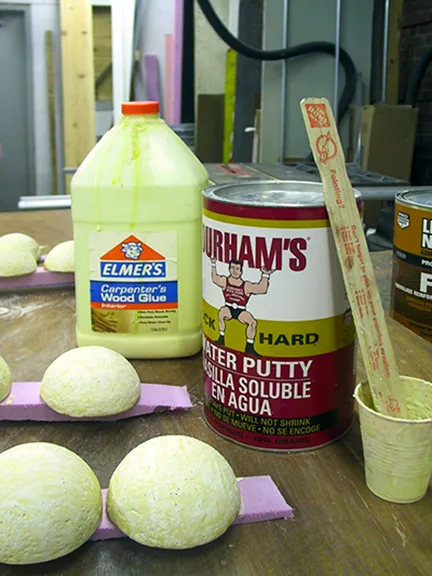
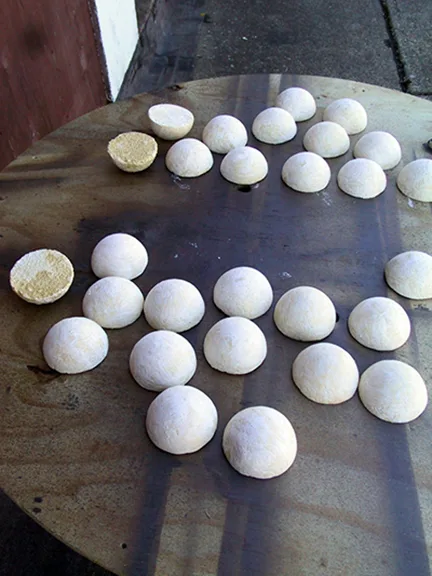
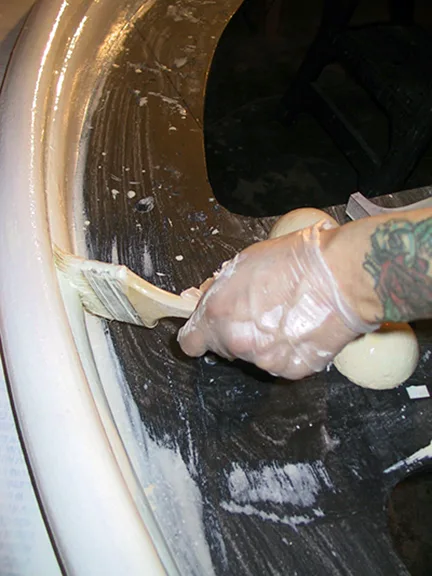
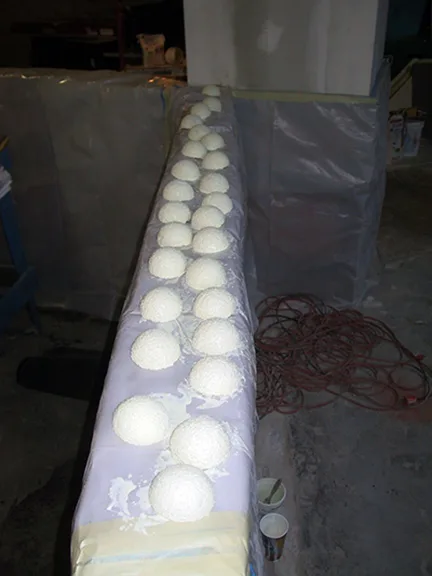
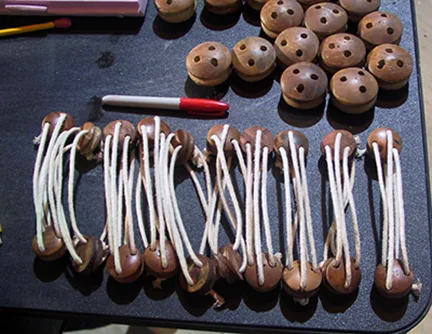
At the shop, my son Alex was working on the compass' ring components. The design has 24 dome-shape decorative bottoms on the ring and one at the center. To create them, styrofoam balls were cut in half and then coated them with a mixture of glue and wood filler. Several coatings of the mixture were applied with a brush. After the coating dried, the "domes" were sanded smooth. Then they were stored in a cardboard box to be later transported to the site. They would eventually be painted with solvent-base gold paint. The solvent in the paint (xylene) disolves styrofoam as if it were an acid. So the hard coating was necessary to seal in the foam surface and achieve a smooth surface for the gold paint finish.
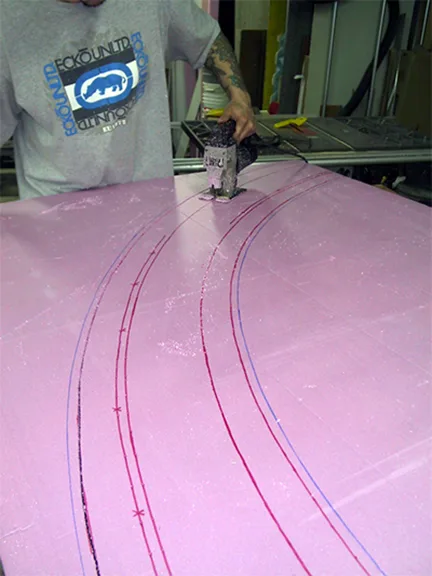
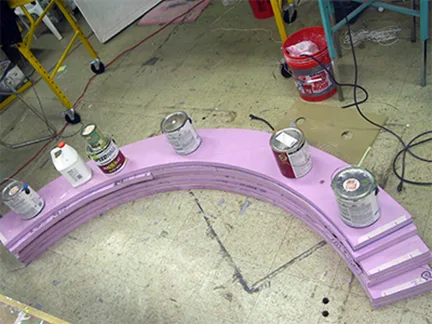
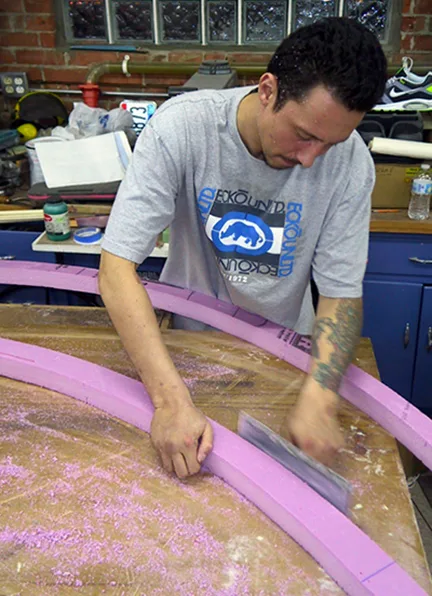
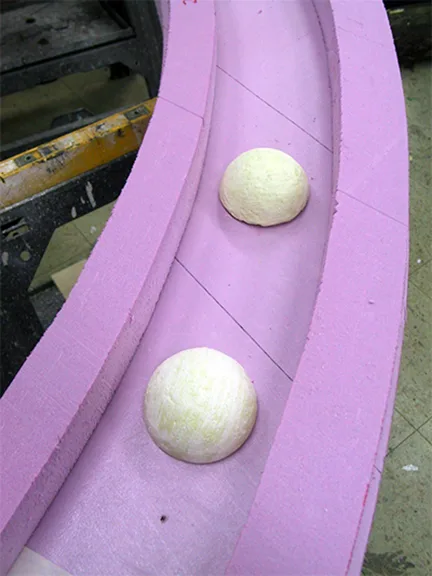
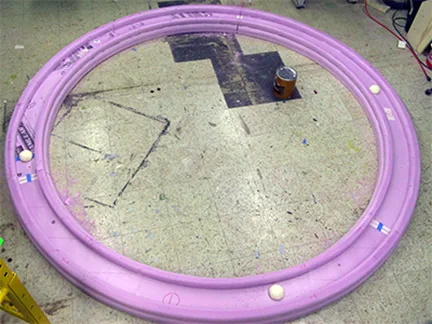
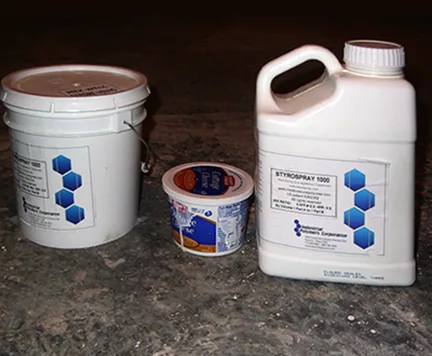
With the shaping of the compass ring completed, everything we had worked on at the shop -sails, masts, yards and props, was transported to the site. Once there, the styrofoam ring was placed over the plywood base making sure it was a perfect fit. Then it was brush-coated with several layers of Styrospray 1000, a two part polymer that dried to a hard plastic finish that enhances the strength and durability of finished parts. The half domes and the compass letters were also coated with styrspray 1000. The letters for the mirror face of the compass, were ordered from an online letter supplier. The letter were one-foot in height and cut from Gatorboard -a type of display board with a dense inner core made of foam and a rigid exterior made of wood-fiber veneer. We could have cut the letters at the shop as we have done for other jobs, but the ones sold online were machine cut to perfection, cost effect, and saved us construction time.
The letters for the compass' mirror face, were ordered from an online letter supplier. The letter were one-foot in height and cut from Gatorboard -a type of display board with a dense inner core made of foam and a rigid exterior made of wood-fiber veneer. We could have cut the letters at the shop as we have done for other jobs, but the ones sold online were machine cut to perfection, cost effect, and saved us construction time. They were the perfect alternative.
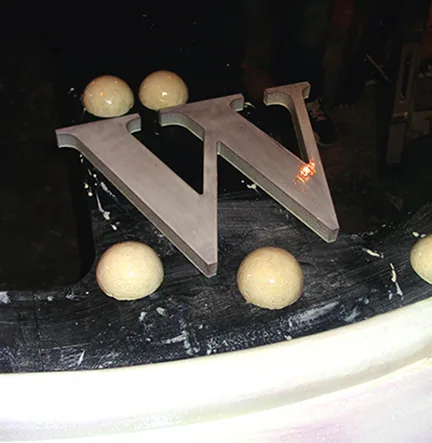
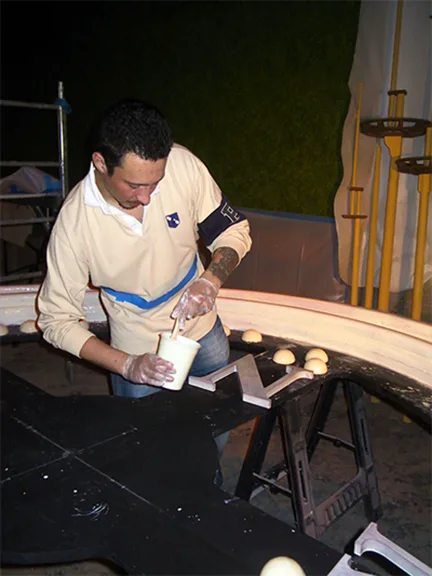
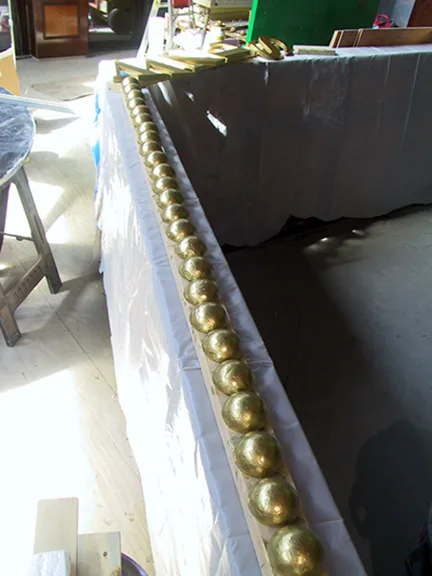
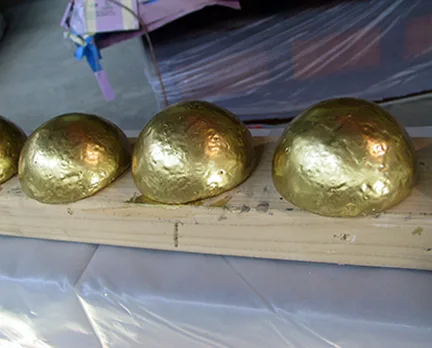
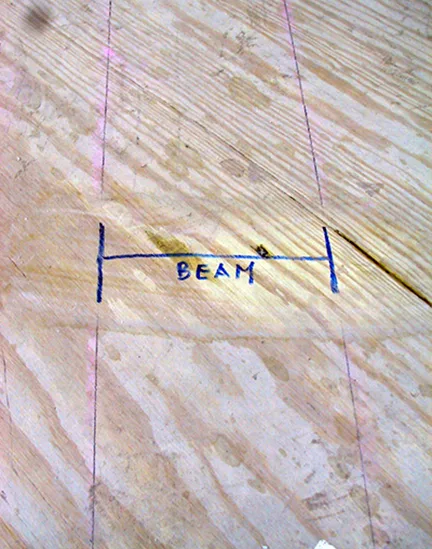
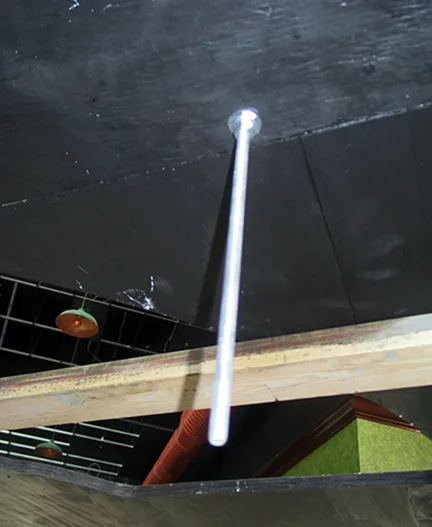
After all the compass' components had been gilded, we proceeded to add the hanging hardware to the wooden base. Two steel slotted strut channel bars would be bolted to the ceiling beams and the compass secured with threaded rods to the channels. Aided with a laser level, an exact diagram of the ceiling beams had been drawn on the floor panels. Placing the bars on the floor diagram guaranteed perfect placement of bars on the beams as well as the positioning of the threaded rods on the compass's base. We also marked the position of the right placement of the cardinal letters using a compass.
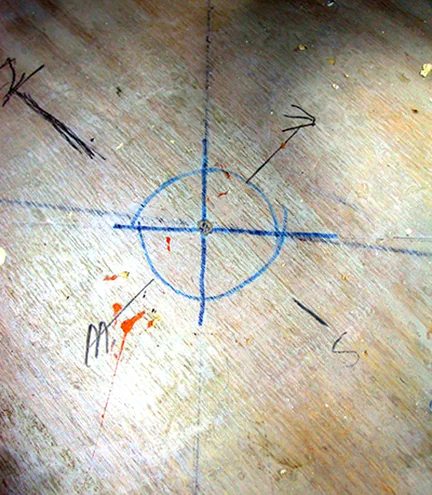
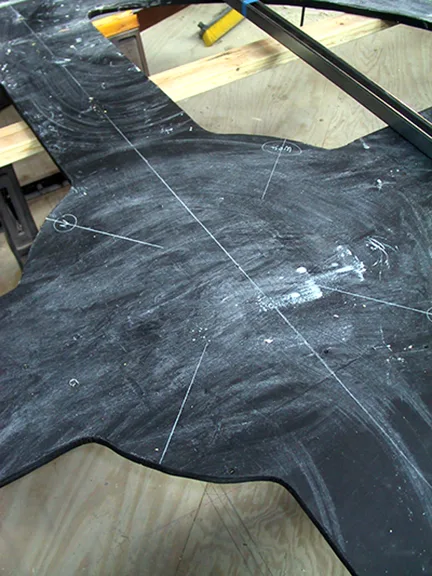
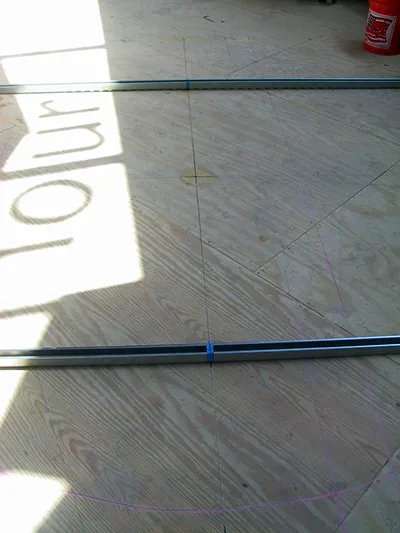
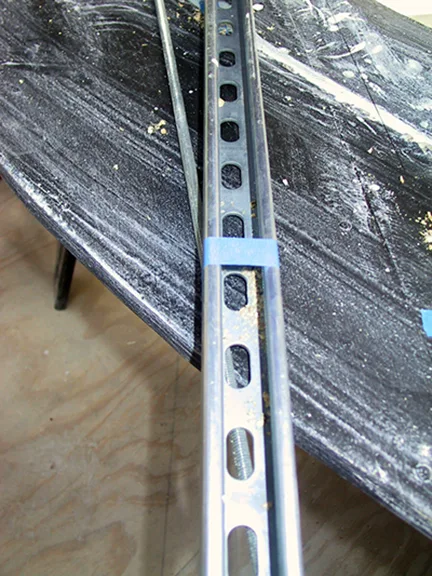
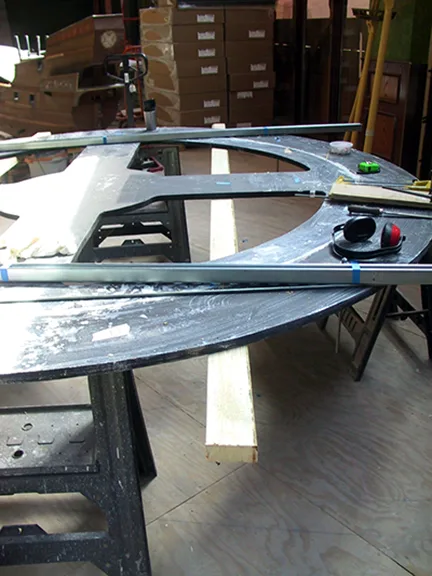
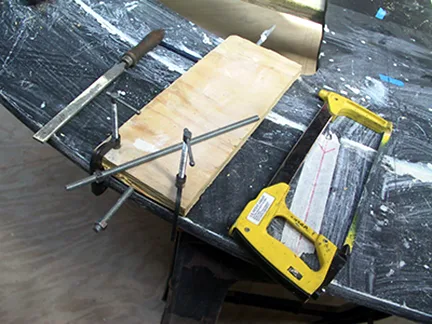
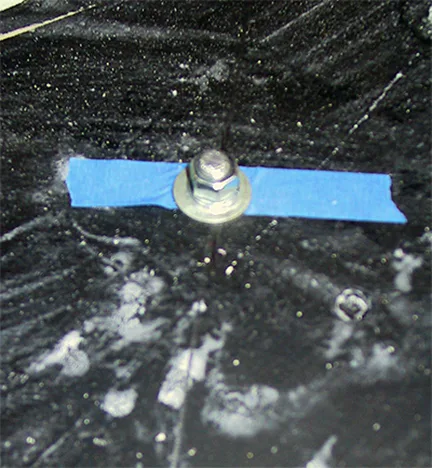
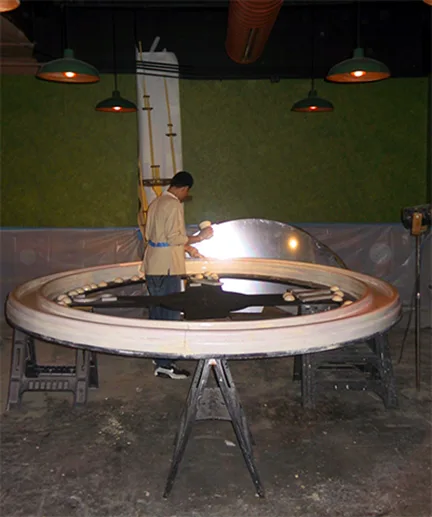
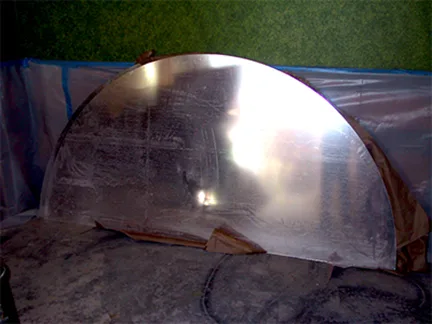
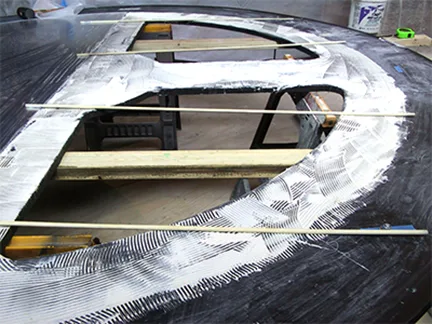
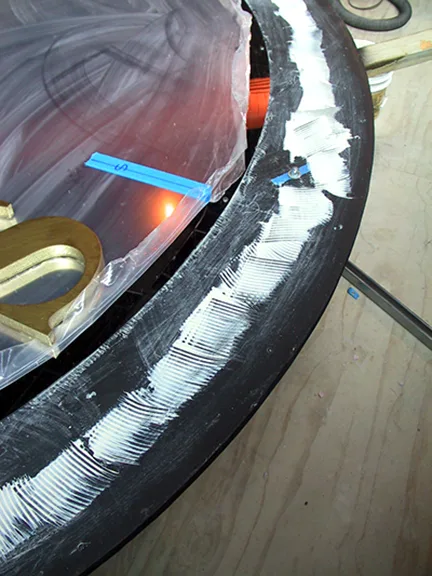
The plastic mirror was made from two 4 x 8 ft. acrylic mirror panels. They were cut with a jig saw using a special blade designed to cut plastic. The mirror halves were bonded to the compass base with construction adhesive. The sections were placed over wooden rods to get them in position. Once adjustments were made, the rods were removed one by one until the mirror was perfectly placed. In addition to the glue, the mirror was screwed around the outer edge. The holes on the plastic were made slightly larger than the screw's diameter to allow for some expansion and contraction of the material.
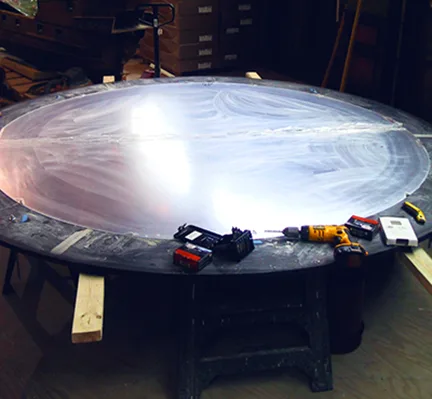
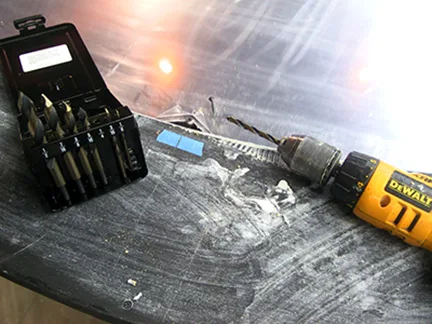
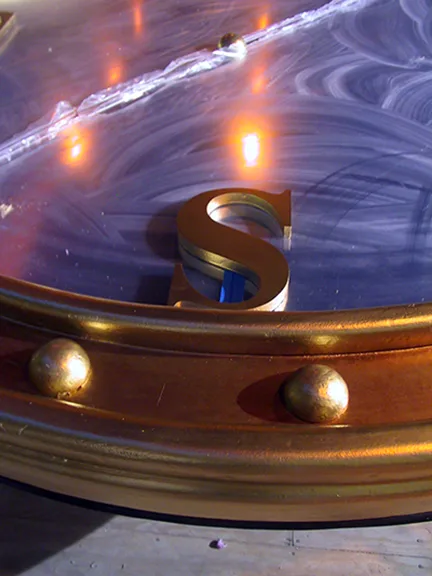
With the mirror in place, we proceeded to add the gilded ring. This was done by gluing the ring pieces to the base and further securing them with drywall screws. Next, the domes were positioned and glued in place. Finally, the cardinal letters were attached using a double contact tape specially designed for that purpose. After the glue was allowed to dry for 24 hours, the mirror's protective plastic was peeled off and the compass was ready for installation. It turned out to be a gorgeous looking piece that looked a lot heavier than it really was.
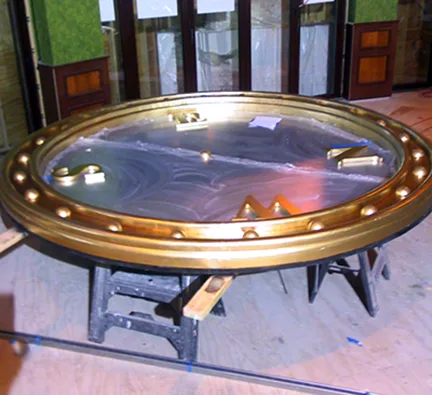
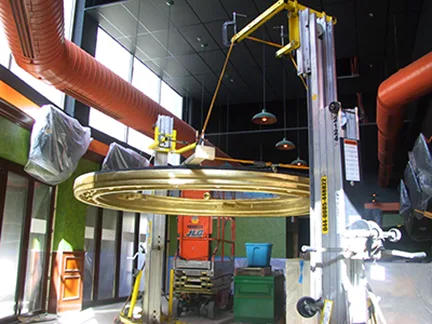
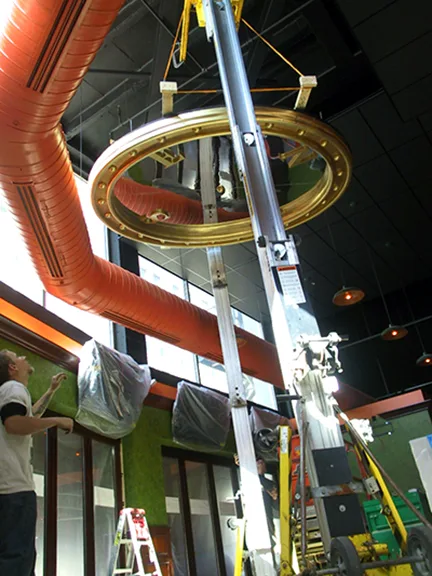
Then, with the help of two hand-crank jacks and plenty of hands, the compass was turned over, straps were secured to the ends of the 2x4s, and then the piece was slowly lifted into position. Next workers on the scissor lift secured the treated rods to the hanging bars and lastly removed the 2x4s to complete the operation. Everything worked out as planned without a hitch.
Reconstructing the ship's hull
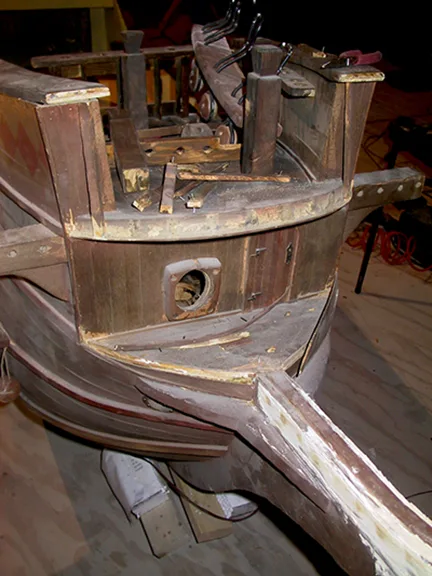
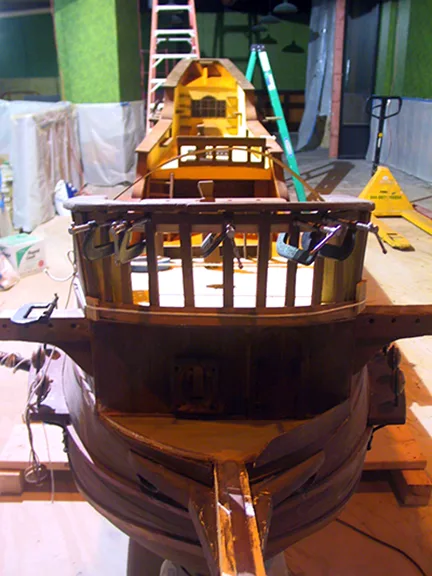
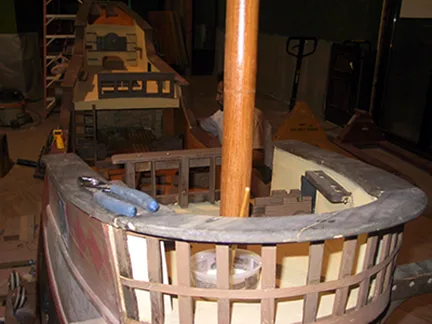
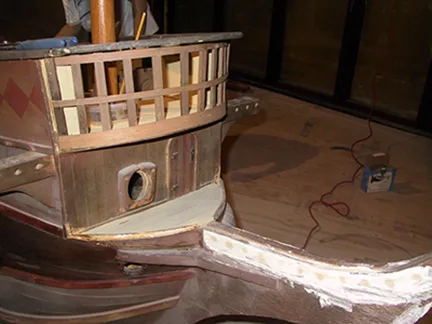
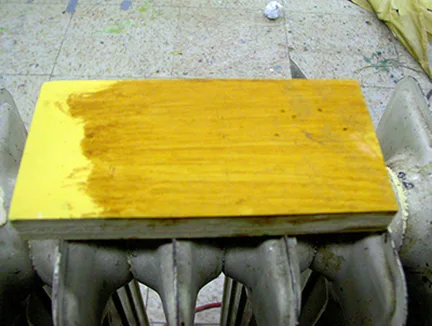
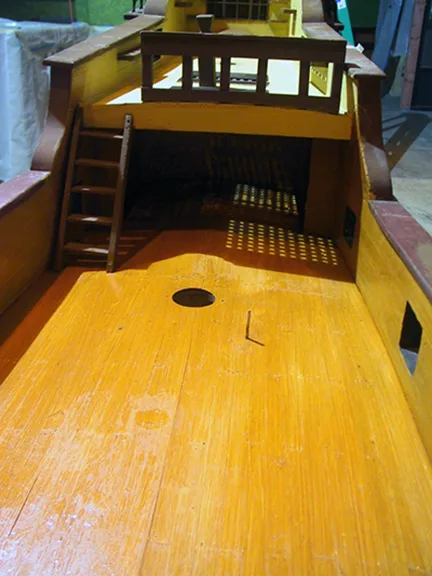
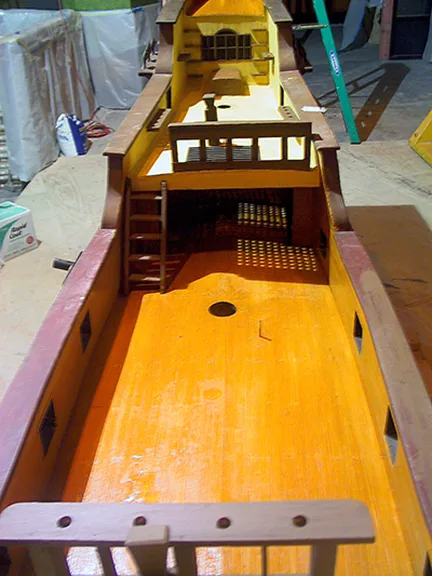
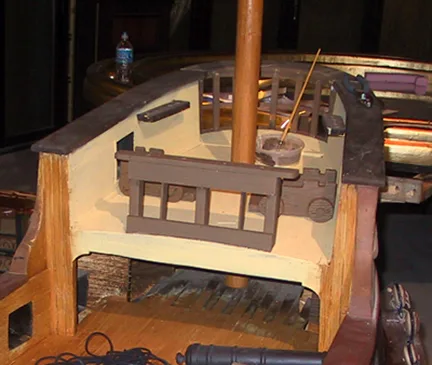
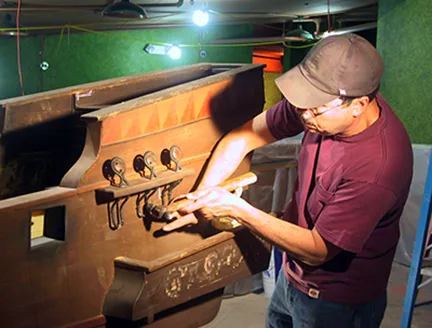
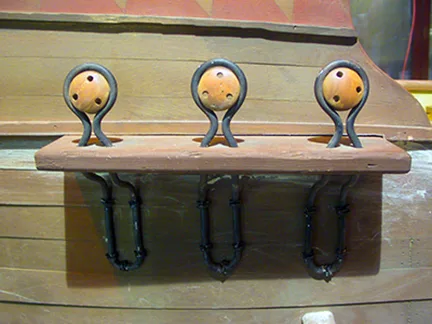
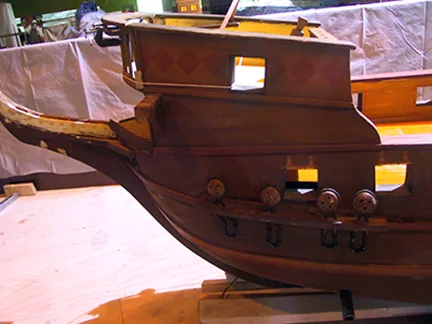
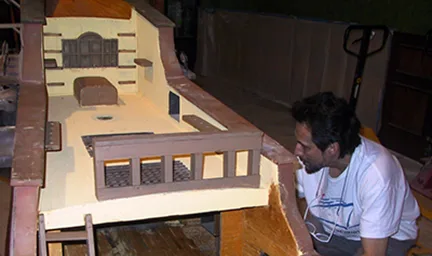
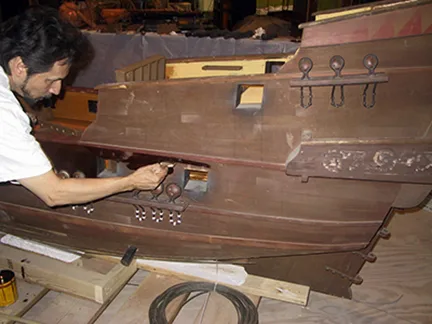
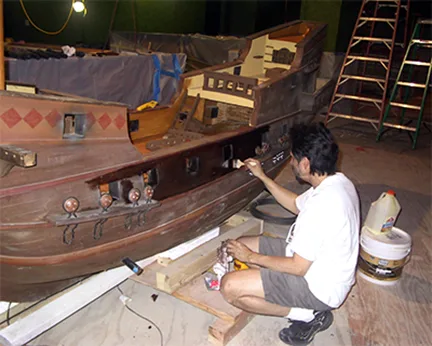
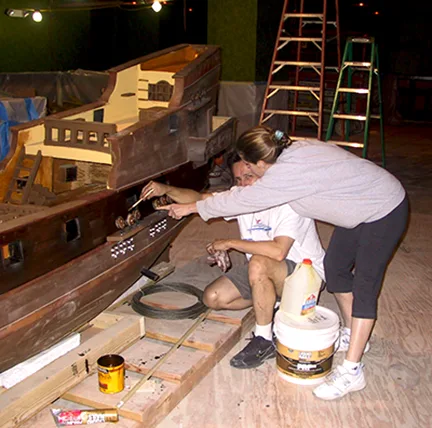
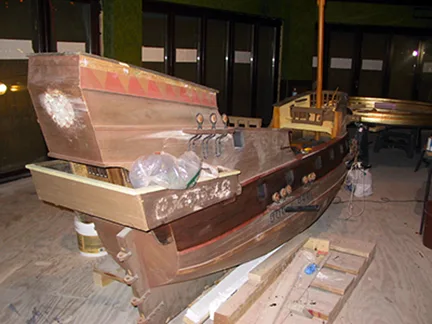
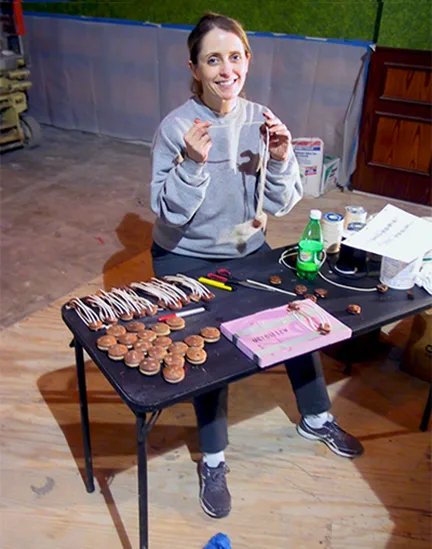
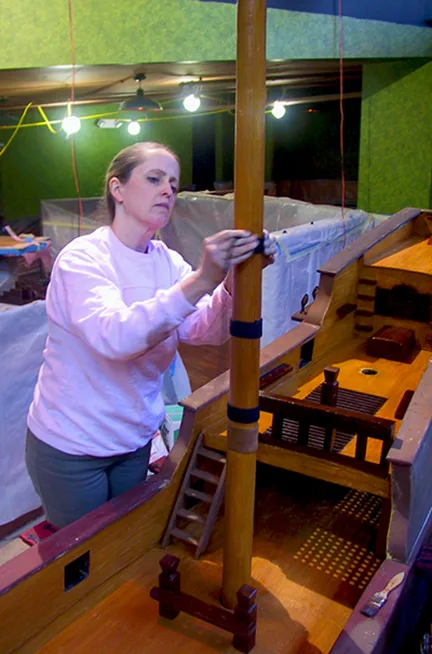
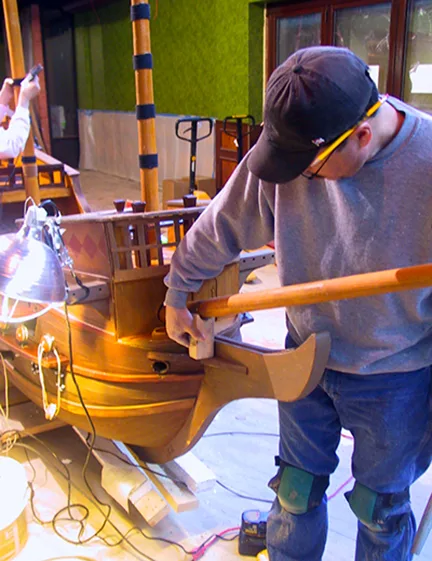
Our attention turned next to the ship. We began with reconstructing the forecastle deck, the main deck, the quarter deck, and the poop deck. Most pieces of wood were pre-cut at our shop and then glued and secure with clamps and a few brads or small wooden pegs. Wood filler was used to fill in dozens of holes that had been drilled by previous owners to add rigging in all the wrong places. Then all surfaces were sanded, cleaned and prepared for painting, some with a coating water-base yellow-beige tinted primer, and other areas with wood stains. The following photographs both explain and document the reconstruction process.
Adding props and detailing
The gun deck aboard a ship was primarily used for the mounting of cannon to be fired in broadsides. This galleon replica is an earlier period -the Age of Exploration, with only one gun deck, -with guns placed on the upper deck, forecastle and quarterdeck. The gun deck was later applied mostly to ships with decks enclosed under roofs, such as ships-of-the-line. Water-tight gun ports along the side of the hull opened up for guns to show through. The guns were placed on wheeled carriages, which were held in place by breeching -a rope system that controlled the backward recoil of cannons. The next set of photographs show the deck assembly.
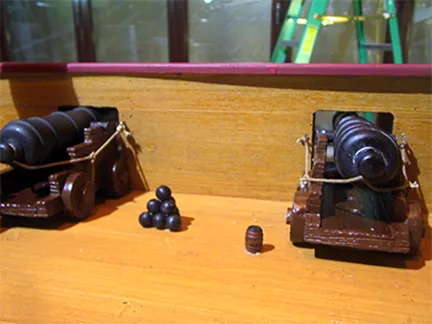
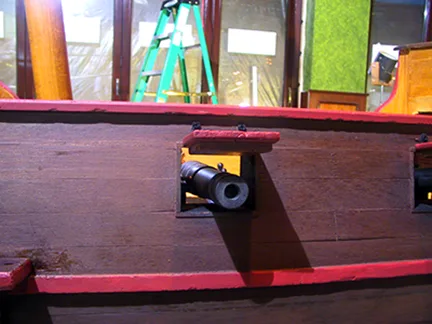
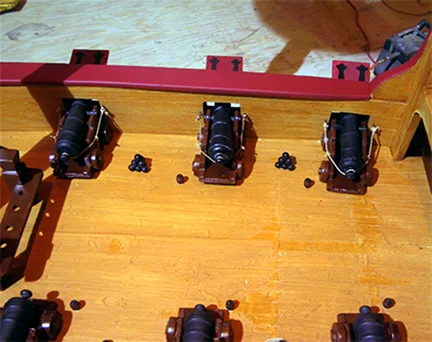
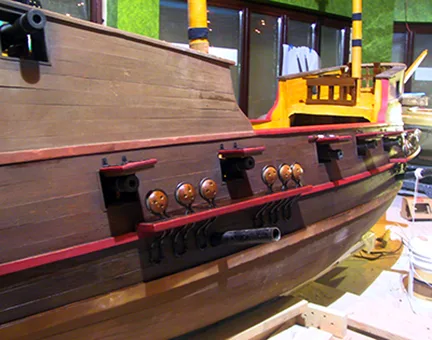
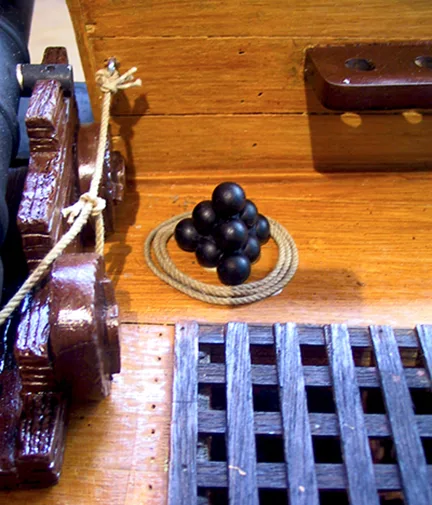
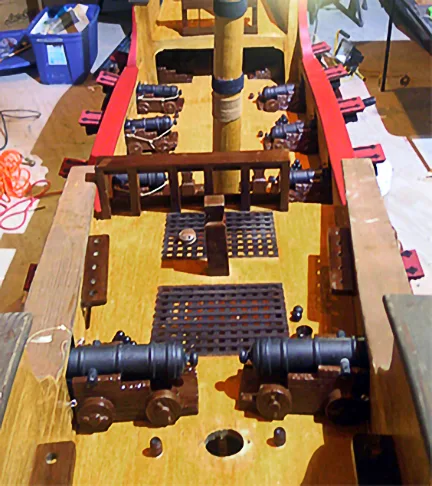
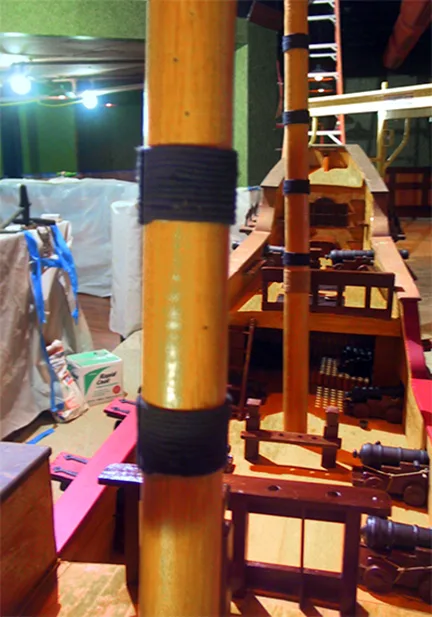
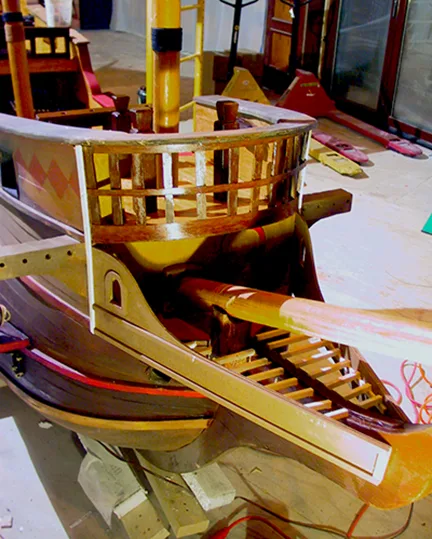
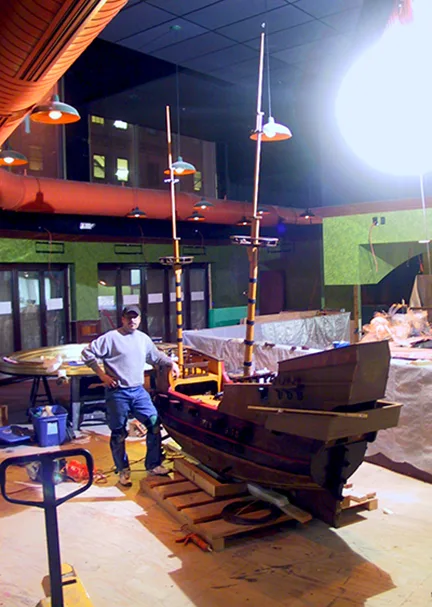
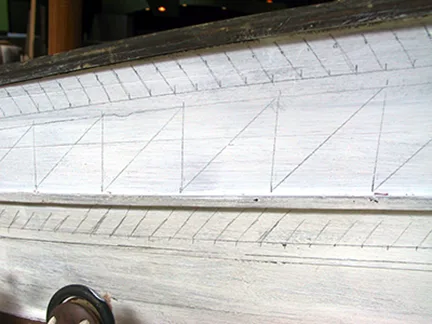
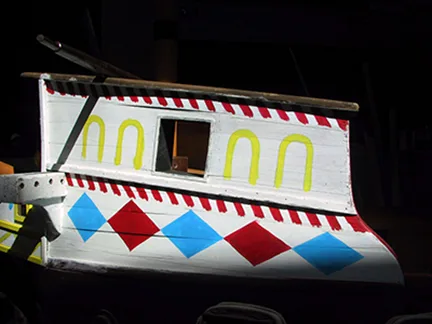
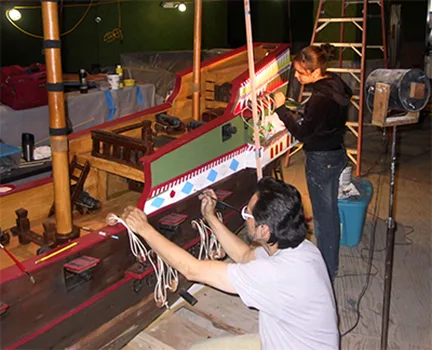
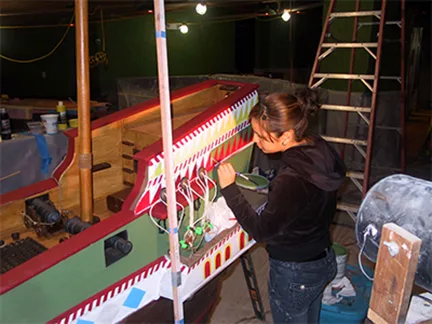
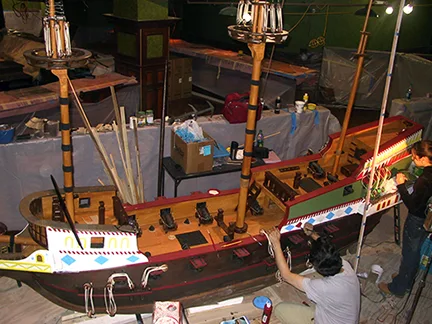
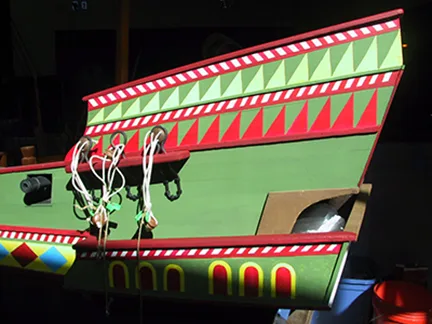
After making repairs and reconstructions, completing the decks and staining the hull above the waterline, we began the fun task of painting colorful decorations on the ship. Historically, the interior of galleons was left unpainted, while the upper portions of the outer hull and superstructure were often, as in this replica, painted in bands of bright colors. With historical references to guide us, we initiated the decoration with the application of white primer and a base-coating of green paint. Then the design pattern was carefully penciled on the primed areas and then painted.
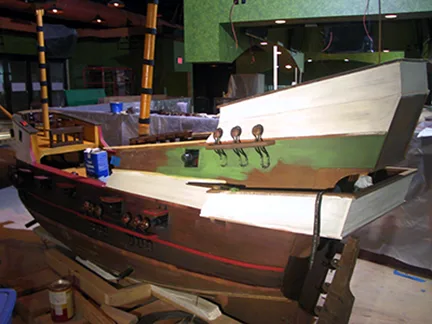
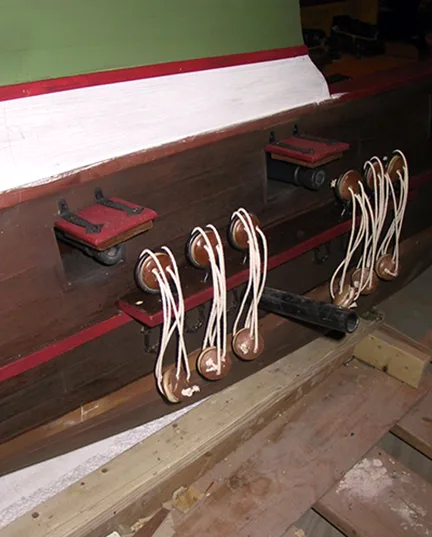
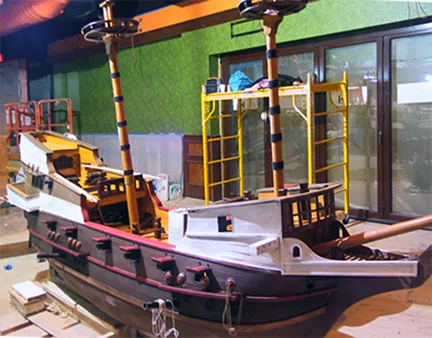
Note that the point of priming over the dark wood is because color paint is not entirely opaque. So, without priming first, it would have required more than one coat of paint to achieve full color saturation. This would have forced us to paint the same design several times over -and that's a lot of work. With the assistance of the lovely Denise Aviles-DeNoble (who has the patience of biblical Job), the ship was transformed into a thing of beauty by a colorful banding of geometric shapes.
Rigging the masts
The complexity of rigging a large sailing ship is enormous. Rigging is the system of ropes, cables, or chains employed to support a ship's masts (standing rigging) and to control or set the yards and sails (running rigging). By the end of this project, we had used over seven-hundred feet of cord -and this was after keeping it simple! Naturally, we had great visual aids helping us along the way. I can not overestimate the importance of doing extensive research "before" you start a project. I selected a variety of cords that best match the scale of the ship. Then Nancy helped with most of the standing rigging. She actually loved doing this kind of work. Looking at the following photographs shows without a doubt how attention to detail really added to the quality of the work.
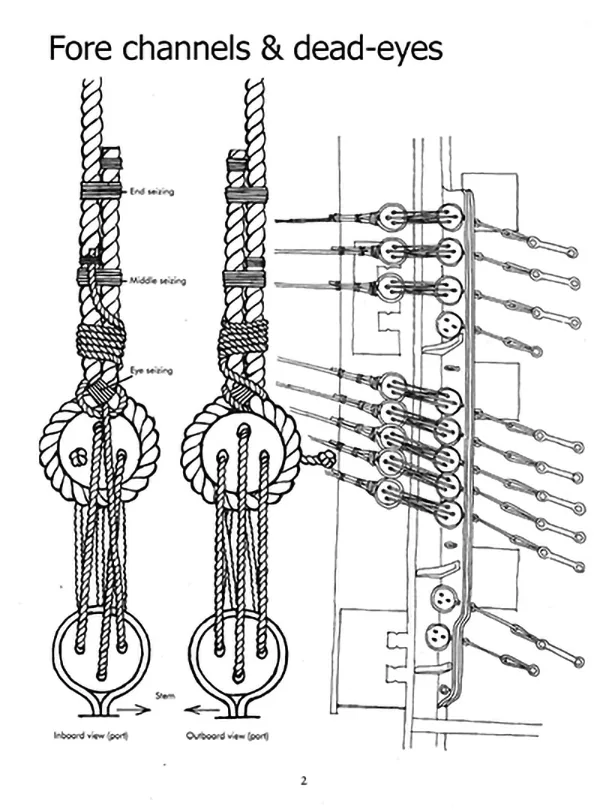
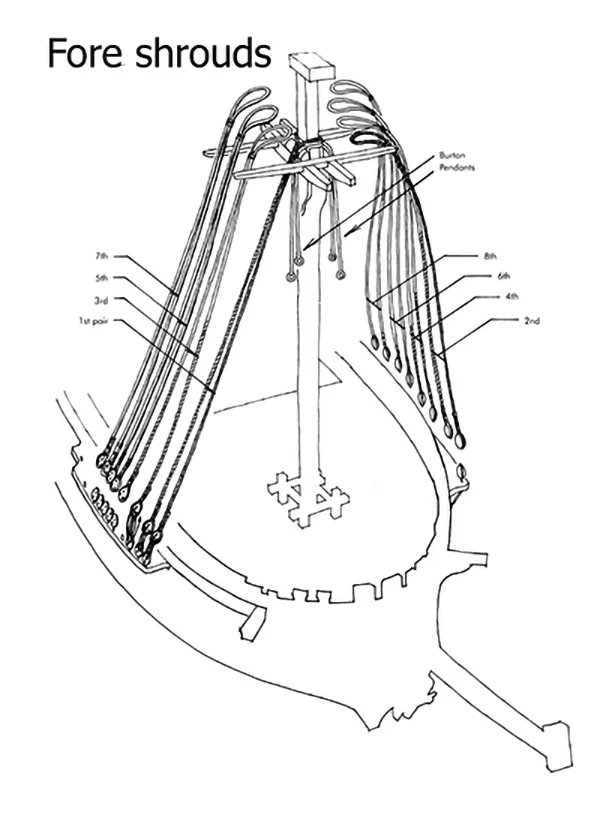
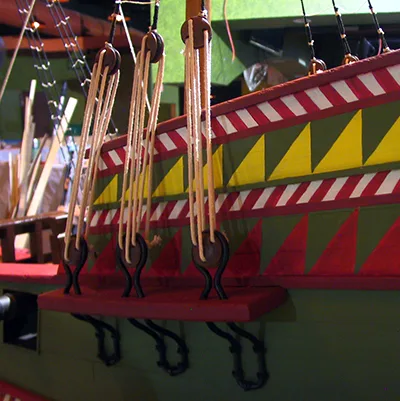
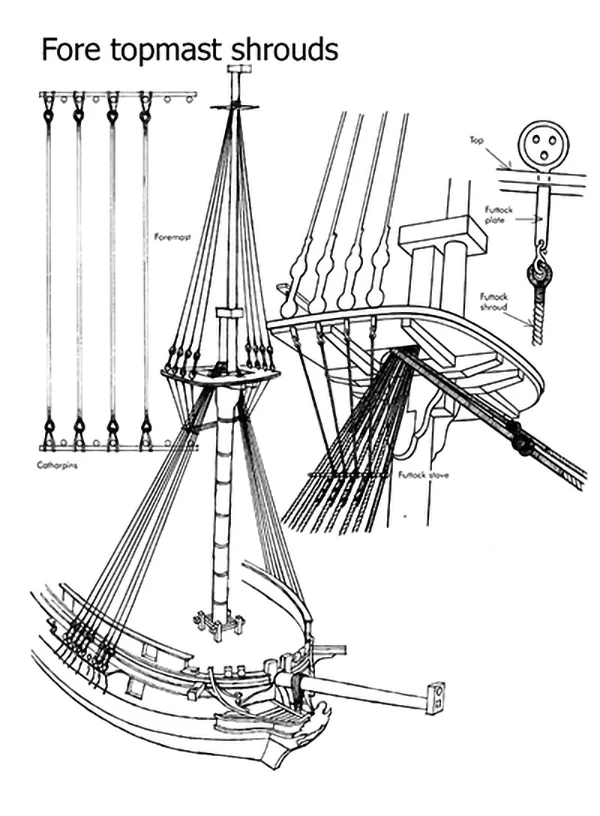
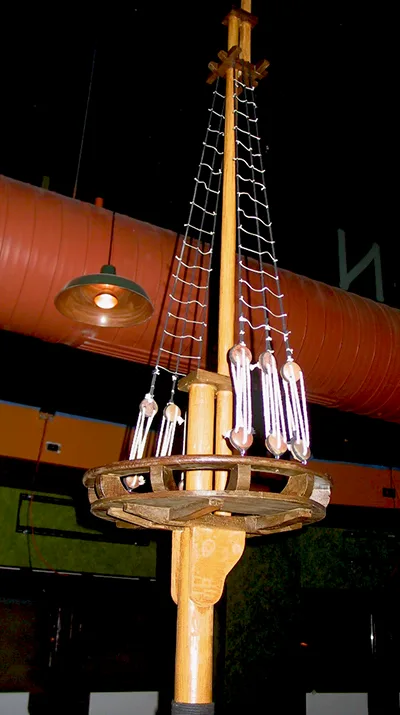
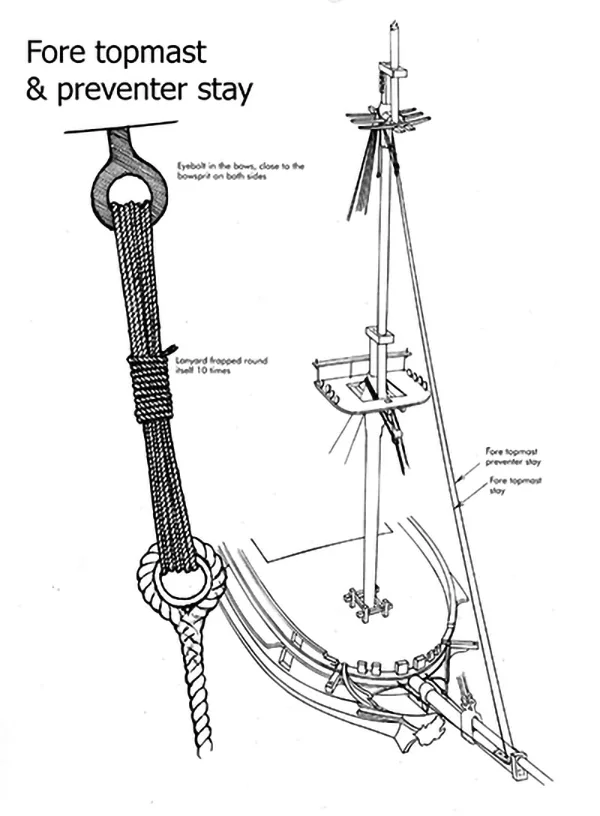
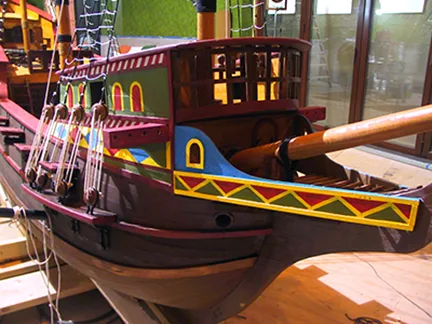
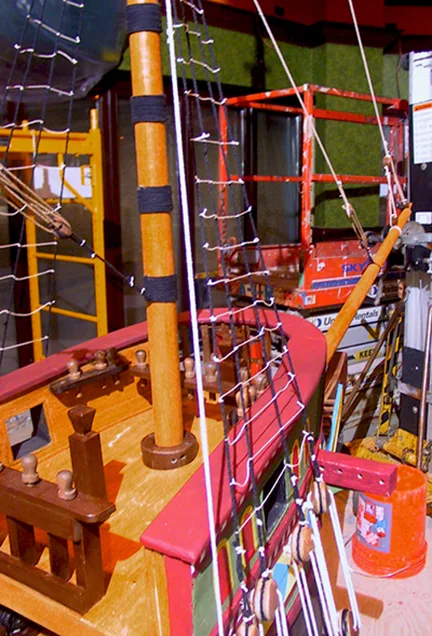
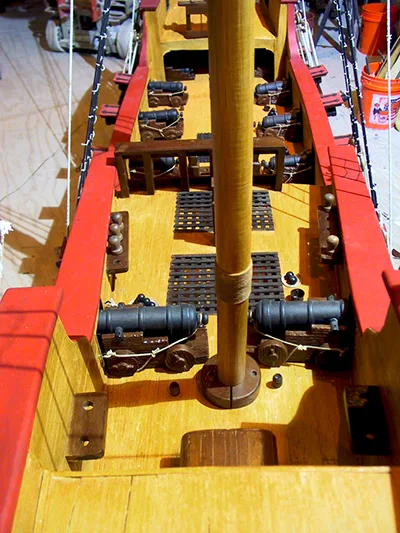
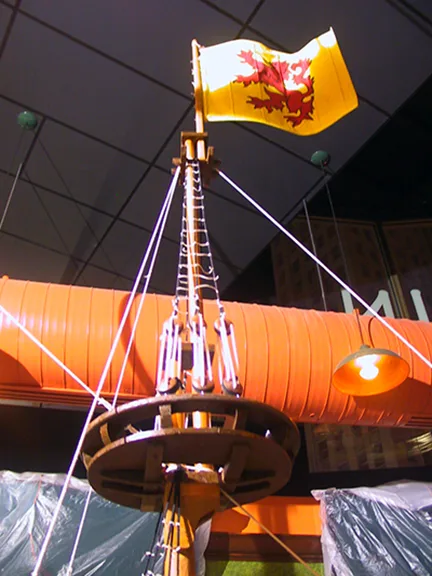
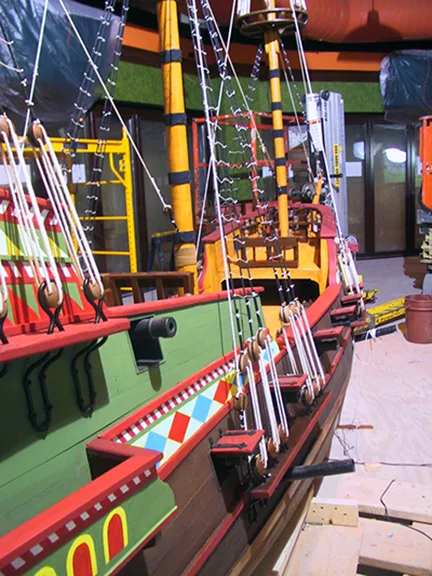
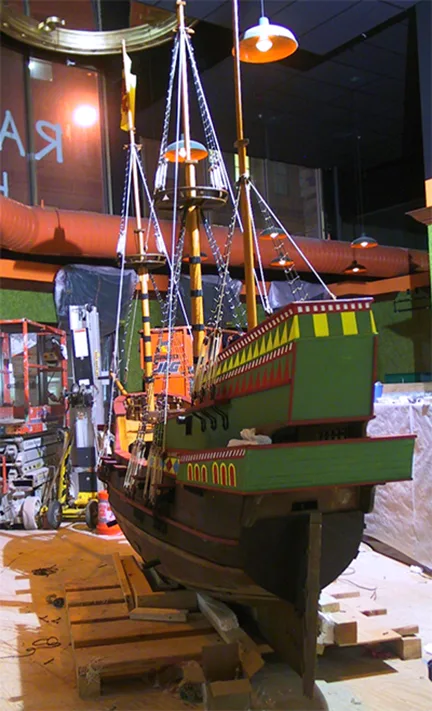
Doing the standing rigging was actually a lot of fun, almost like doing a puzzle. You begin to see with clarity how every line and tackle, every block and sail has a purpose in the operation of a sailing ship. The beauty of symmetry reveals itself as you build up the rigging. There's a science to it that is amazingly simple in its practicality. Everything is a tension act where forces work back and forth to achieve a balance. And, as you begin to understand the science behind the rigging, you develop an appreciation for the level of training and discipline required of a sailing crew to to operate and maintain that system.
Adding sails
Immediately after completing the standing rigging, we started adding sails and running rigging. Even with plenty of references, the rigging proved challenging. The ropes in the system used for raising, lowering, shaping and controlling the sails on a sailing vessel have names that identify the task they perform. For example, halyards (or haulyards) raise sails and control tension, and topping lifts hold booms and yards aloft, while the brails, buntlinesm, lifts, leechlines, bowlines, clewlines, braces, sheets, tacks, and so on, also perform specific tasks for controlling sails. As a result, it took us a while to complete the rigging.
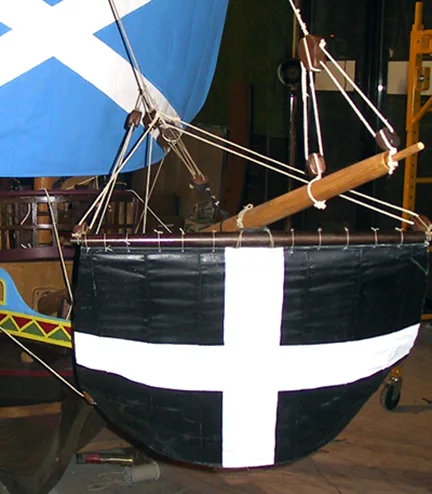
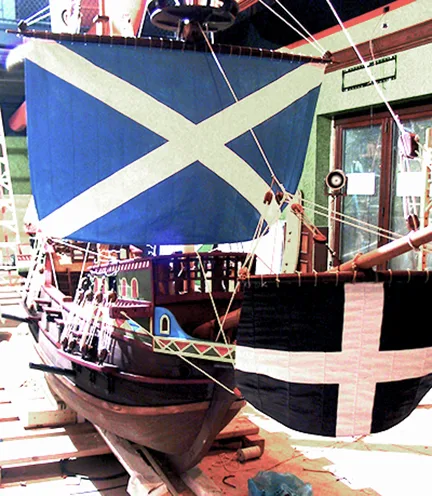
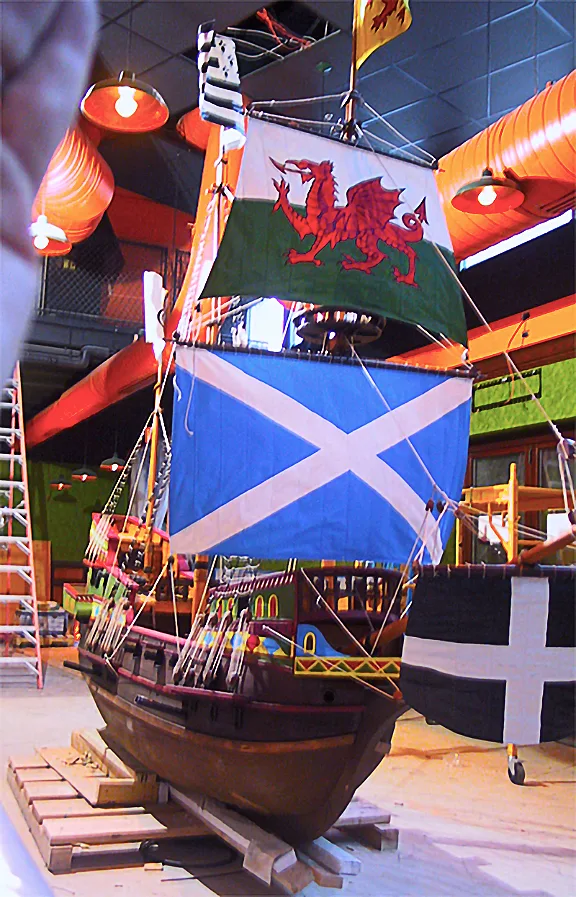
Before we could finish installing all the sails, the ship was raised to its hanging position, suspended from stainless steel cables. A new floor was being installed in the restaurant and the task could not be delayed on the construction schedule. So, with the aid of tower scaffolds, ladders and planks, Ricky and I completed the difficult task while the boat was in the air. The next series of photographs show the work progression. After installing all the sails and completing the rigging, we repaired the bottom of the hull and the rudder, added chained anchors at the bow and decorations to the back of the stern, and adjusted the ships tilt so the top pennant was almost touching the face of the mirrored compass.
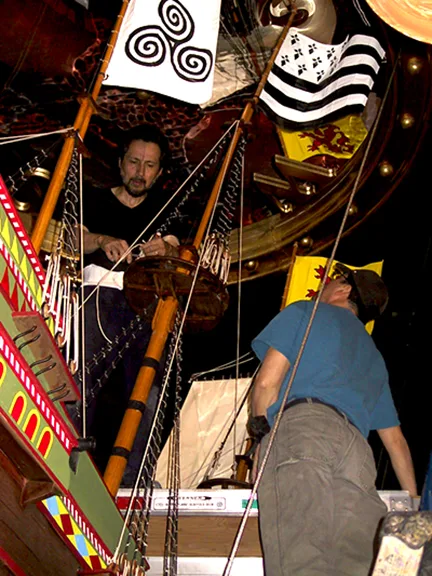
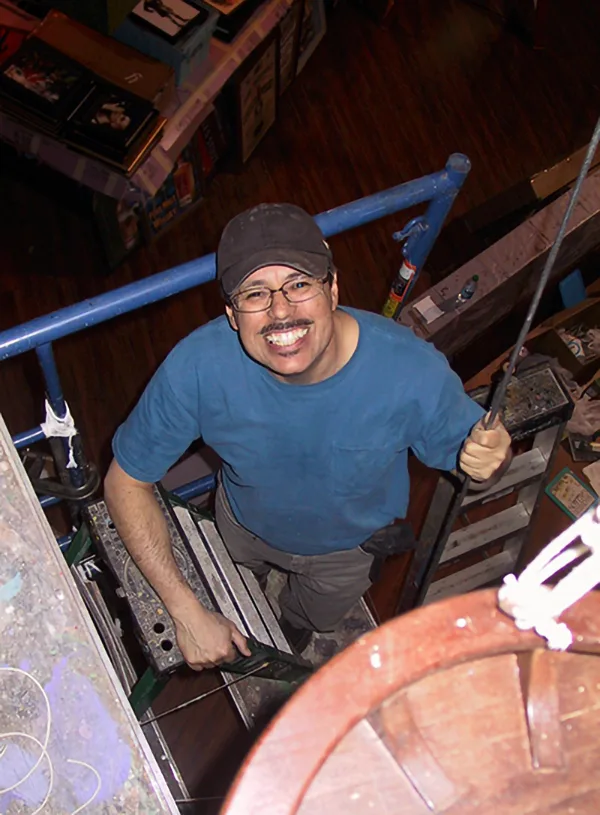
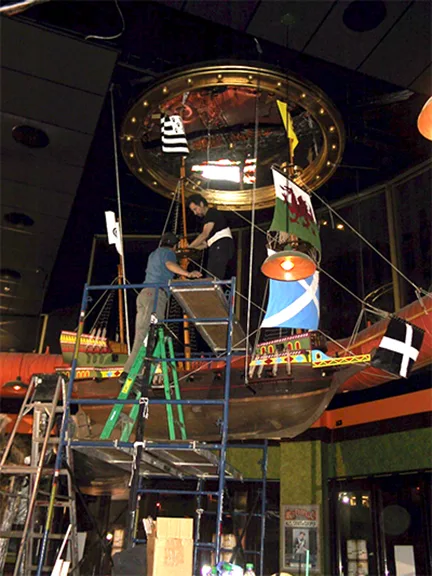
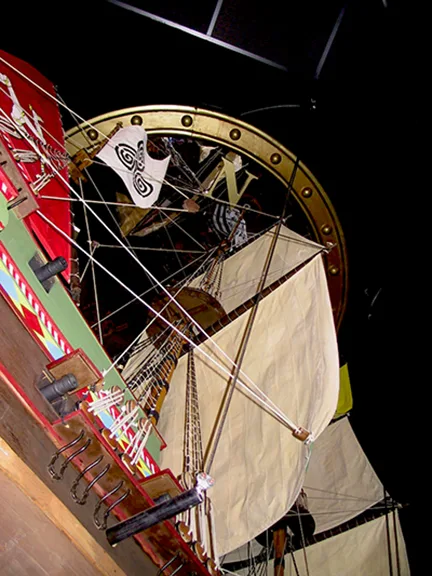
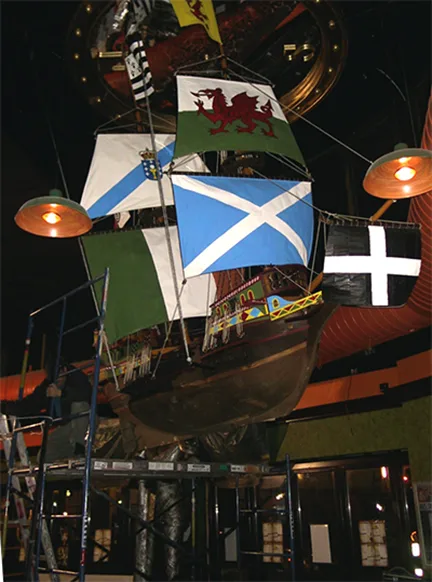
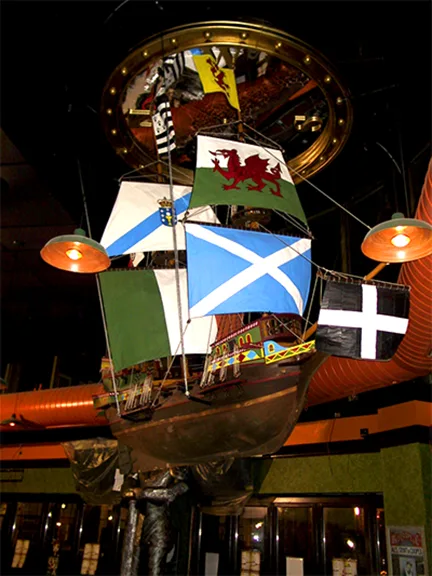
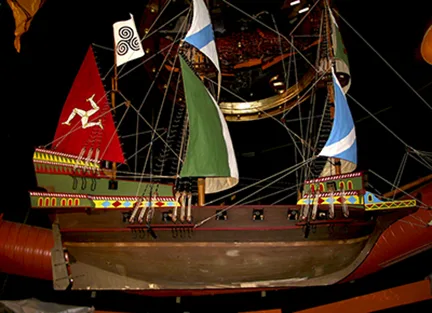
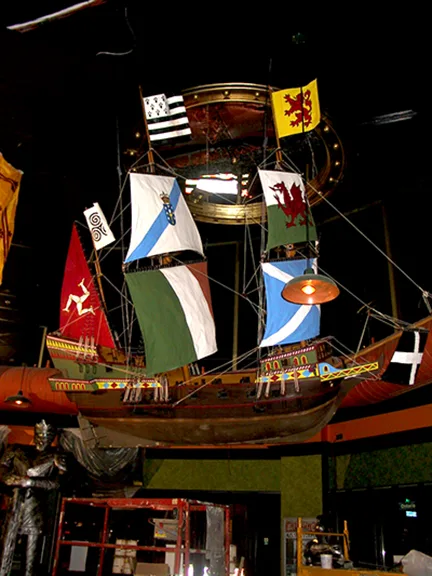
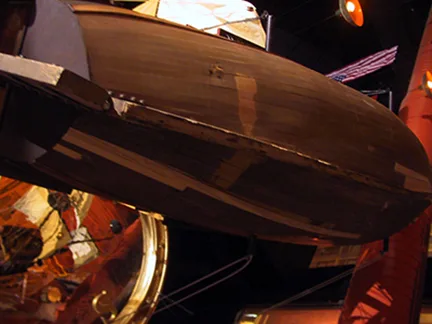
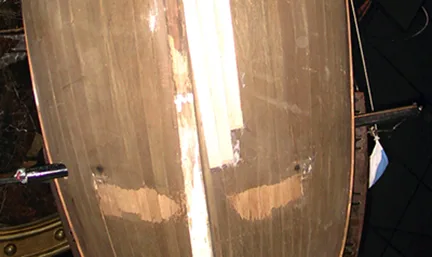
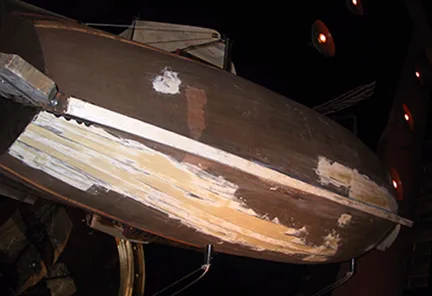
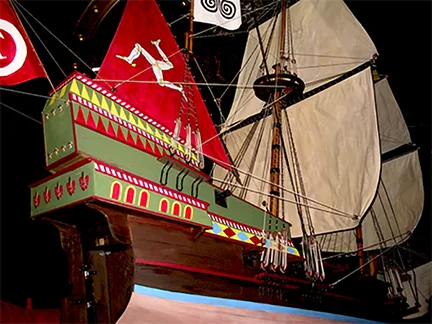
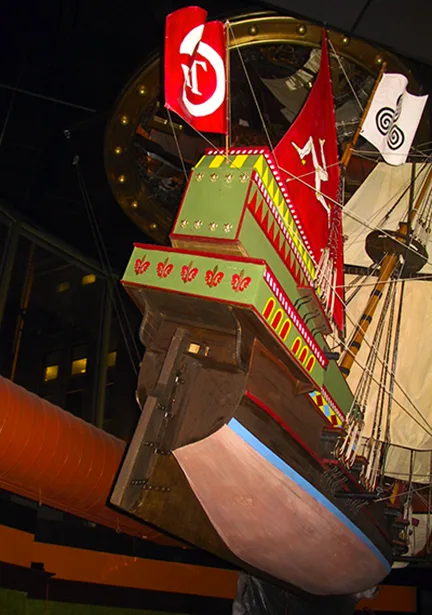
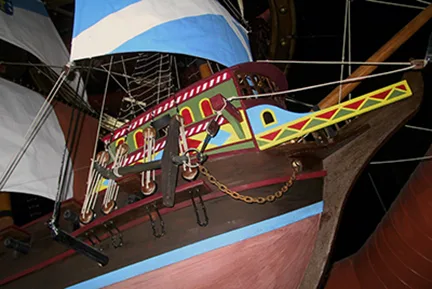
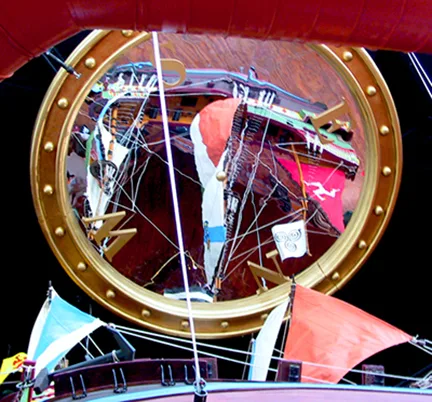
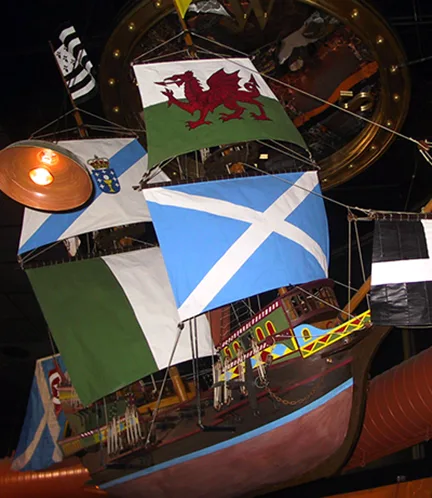
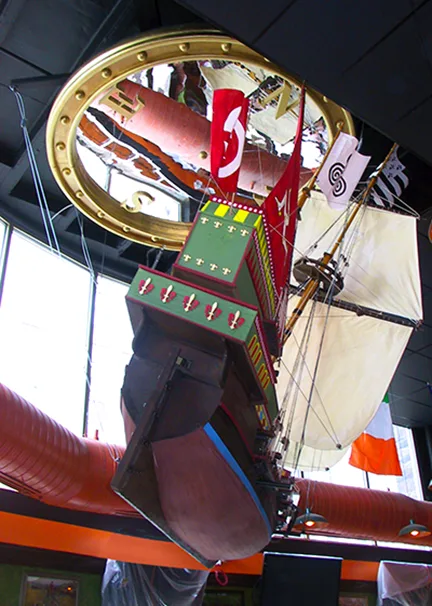
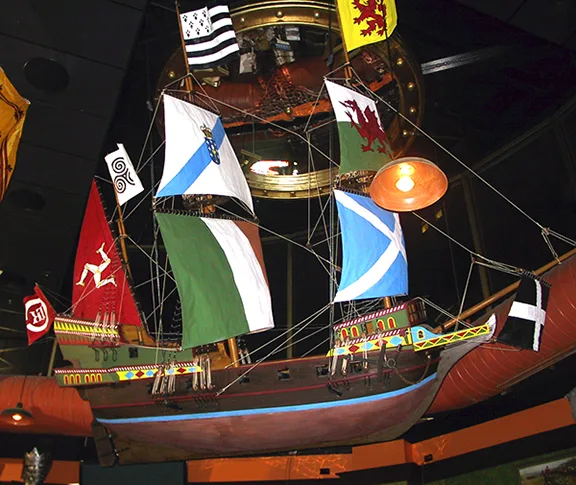
On April 8, 2012 -exactly three months after we started, the project was completed. Three weeks later, the Tilted Kilt opened for business. I must confess that I greatly enjoyed doing this project. I found the change of pace relaxing when compared to mural painting. This type of commission only comes around once in a great while and I was glad I had the chance to do it. Everyone who worked on it loved the experience. The ship looked fantastic and turned out to be a one-of-a-kind display. I was very fortunate this job landed on my lap.
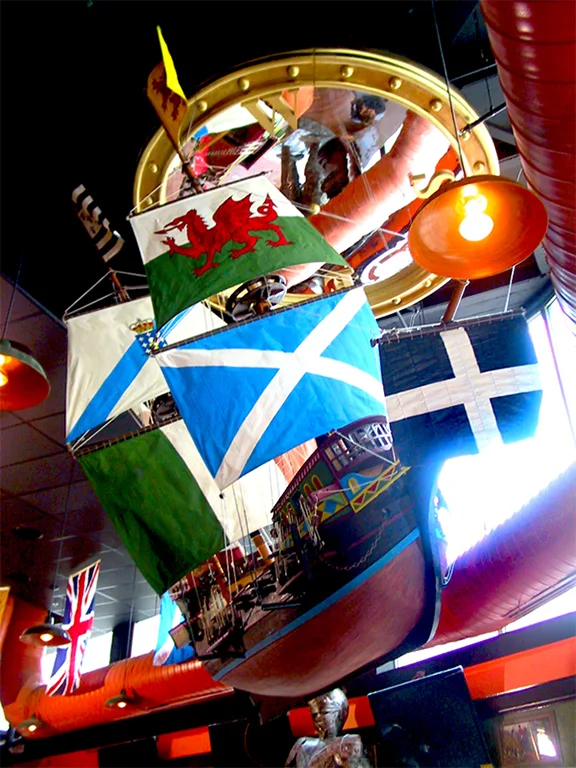
After six years in business, the Tilted Kilt was transformed into a Panini's Bar & Grill by the owners. Public tastes had changed during the six years that the Kilt was in business, so moving to a proven Cleveland sports bar/restaurant franchise was the wiser move. To read and view images of the transformation, see the page in the "Rest & Bar Design" Menu link.