The Cuyahoga County Juvenile Detention Center Dome Mural
A word to my readers:
My intention in this narrative is to show you how I do large scale projects. Along the way you will learn all the juicy and unvarnished details
about how certain commissions land on my lap, how I interact with clients and other professionals involved in a project, how I navigate the politics
and issues that invariably come along with the job, what technical and practical problems I have to solve, and how I arrive to solutions that at
first look, appear to make no sense whatsoever.
But you can bypass reading the text by simply looking at the images -there are a lot of them! They will give you not only a step-by-step chronology of how the project
was done, but also a detailed explanation of my art process. So to be clear, the images will show you how it's all done. But if you are interested in
following in my professional footsteps as a muralist and an artist, reading the text will make you wiser. Either way, I believe you will enjoy this
page.
Re-shaping my career -and my lifestyle!
I had just gotten married. Well, it had been five months since our December 2009 wedding in gorgeous Puerto Rico, but it felt like it had been yesterday.
The future seemed a little uncertain since now I had to be a "responsible man", one with a wife, old and new bills to pay, habits that needed tweaking,
and all sorts of unknowns that come along when you start a new chapter in your life in the company of someone new. My bohemian days were over. No more taking
off at a moments notice without a care in the world, with no worries about tomorrow because living in the present was all that mattered. It was time to
become "respectable" -sort off.
|
|
|
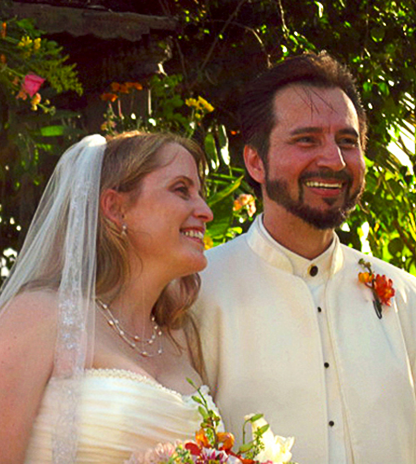
The "blessed day" -John Rivera-Resto and his lovely bride Nancy Anne Lewis. December 10, 2009 wedding with the gorgeous
backdrop of the Puerto Rican rain forest.
|
|
I had joked with Nancy, my lovely bride, that in marrying her I killed three-quarters of my clientele. Okay, you got me, I was "half-joking" because there
was a lot of truth to it. I have never sought out a career in the arts; I never cared much for painting. But my lifestyle, which was very much pushed along
by my sense of curiosity, placed me in situations were I met individuals who -for better or worse, became clients. You must understand that for every mural
I do, there are many more pieces of small art produced to fulfill private requests. And, the majority of these commissions were from female clients. So, you
begin to see how marriage placed a dam on my traffic flow.
|
|
|
January 2010. I was fifty-one, facing major changes in my life. But no one expected things to be boring.
|
|
But don't get me wrong. I was fifty-one years old and welcomed slowing down to a manageable state of being. I had grown tired of the old thrills and the
passions of my youth didn't appeal to me anymore -for the most part. Now I had a terrific wife -though I couldn't fully understand what she saw in me,
especially since she could have done so much better for herself, and my world now revolved around her. My new calling in life was to keep my wife happy
and, the past few months since "that blessed day" (in case she reads this), had been relatively peacefull and uneventful. Not... exactly good.
|
|
|
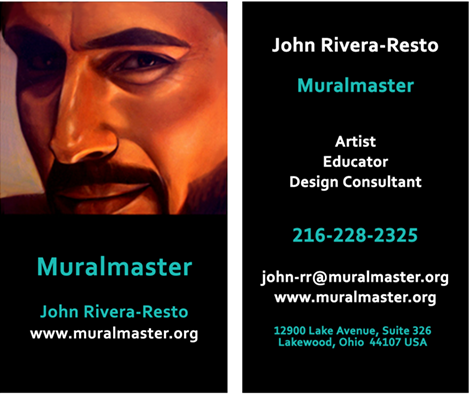
Front and back of my business card in 2010. It was catchy, the print was large and legible, and it said all it needed to say about me. This card proved an indispensable tool, along with my website, in reshaping my career.
|
|
You see, I needed to start generating a steady stream of money but didn't exactly know how to go about it without having to promote my services as an artist.
In other words, I had to do what I had never done before: build a career and find new clients. Now that was a scary thought. The way my life worked
was that I would busy myself with the latest thing that caught my fancy until the phone rang with a job offer. Since my needs were frugal I didn't need
much to be happy and still get my way. So I talked things over with my business partner -my wife, and came up with a plan.
|

|
|
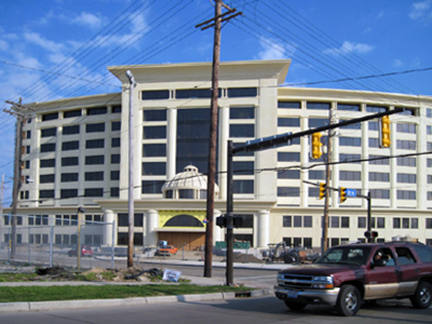
March 2010. The Cuyahoga County Juvenile Detention Center and Juvenile Court Building under construction at 9300 Quincy Avenue, Cleveland, Ohio.
When I fist saw the new Juvenile Justice Center, it looked to me more like a luxury hotel than a detention center.
|
|
|

|
|
Once completed,
it was listed among the "Thirty Most Architecturally Impressive Prisons in the World" (Google it). Rear view of the construction site.
|
|
The plan was to put together a promotional package and send it to every designer and designing firm within an hour drive, thus covering all of greater
Cleveland and surrounding smaller cities such as Akron, Kent and Lorain. The package included color images of my work, a small bio and client list, a couple of
business cards, and a one-page letter of introduction informing them how I could greatly increase their income by providing a mural and faux paint service to their clients without adding any expenditure to them. All I was requesting at this time was a face to face meeting for a presentation.
|
|
|
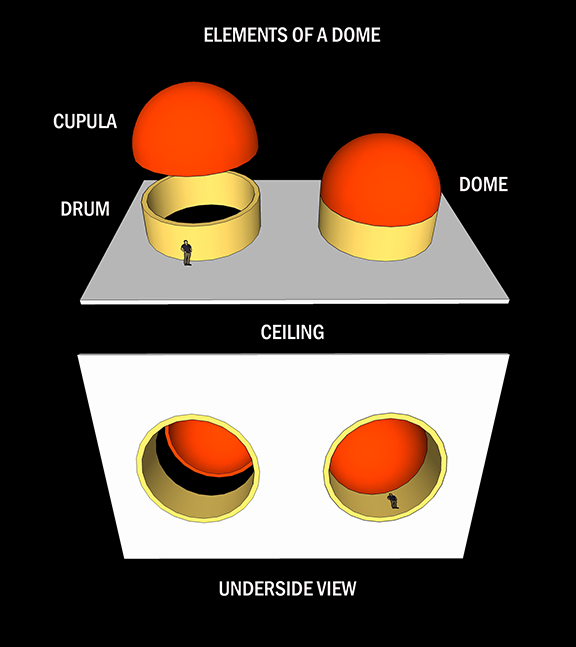
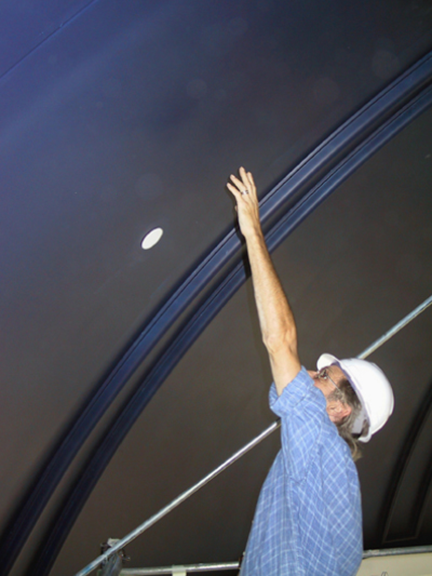
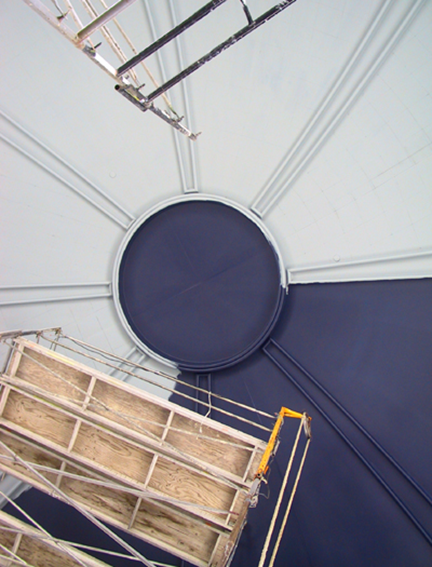
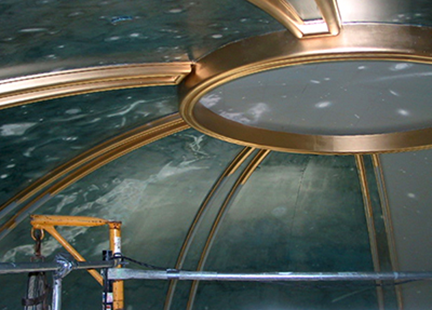
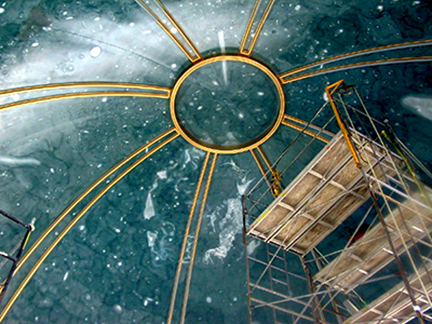
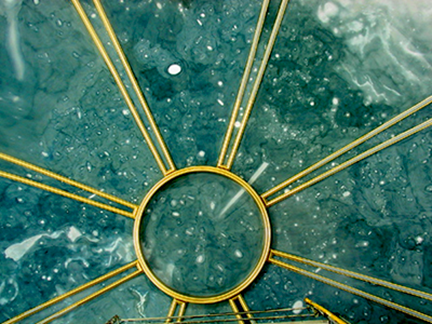
On top of the roof of the two-story entrance, sits the "cupola" -though many people today refer to it as a dome. A dome is considered to
be a roof and structural part of a building, while a cupola sits on a roof -or on top of a dome! But the terms can be confusing. For example,
the word dome in many languages like Spanish and Italian, is cúpula and cupola. So to keep things simple, I will refer to it in
passing as a dome (though it is not).
|
|
|

|
|
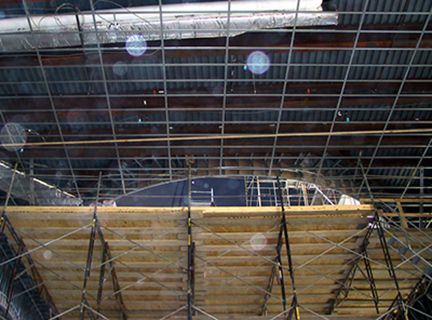
Exterior view of the cupola -ehem, the dome, during construction. From a distance the scale looks deceivingly small until you get a closer view.
|
|
We felt we had an attractive package and mailed about fifty large white promotional envelopes with addresses hand written by me in beautify caligraphy. We even
picked the postage stamp with care to that it would also look attractive. And then we waited for responses and inquiries to start coming in.
And we waited. And waited... for two months... and we got not one call or reply. It was disheartening -though I should note that in years later, when I was designing,
consulting and doing work
in million-dollar projects, several of these designers I had sent the mailing to approached me to inquire how I had managed to get those jobs. Karma is a bitch.
But that's another story. The point was that, back in May 2010, things were not going my way. So to cheer me up I got back to what I do when I'm not busy - play strategy video
games on my pc.
|
|
|
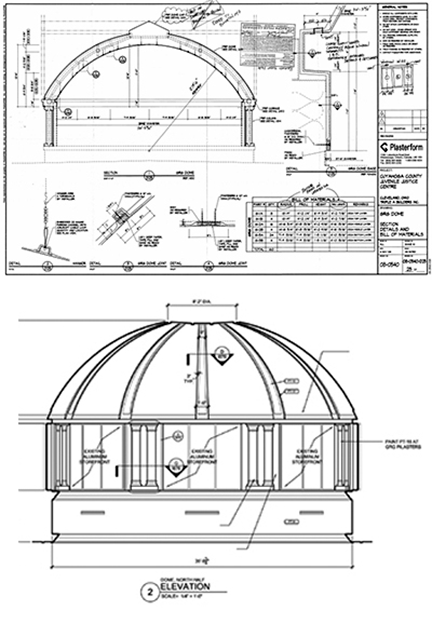
Construction plans for the dome. Anytime you are doing a mural, you need floor plans and elevations to plan the job. A traditional mural is an extension of the architecture; they complement each other. Architectural plans help to construct the design so that placement and compositional elements become a harmonious part of the space.
|
|
|

|
|
The underside of the structure was made out composed of 56 pre-fabricated 'Plasterform' panels
resting on a drum with eight sets of triple glass windows. Plasterers would later
fill in the joints to make it smooth. Then, to make it a "melon or umbrella" style dome, a
the center ring and sectional double ribs would be added to
complete the structure. Total surface area: 1,347.74 square feet.
|
|
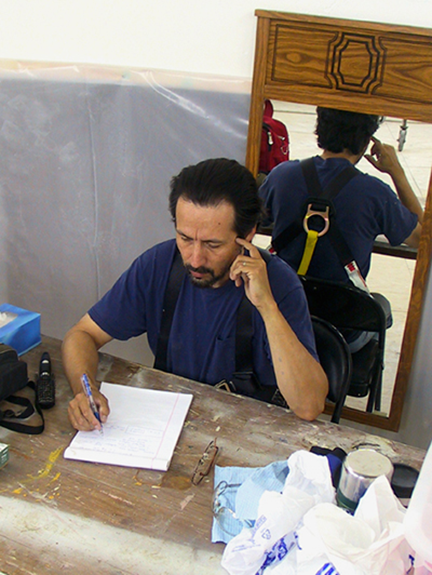
Nancy was at work and I was home alone and in the middle of conquering a city when the phone rang. I'm thinking: "Oh, what the hell!
Interruptions -but maybe it is my lovely wife
calling from work." So I paused the game and picked up the phone: -"John speaking, how can I help you." This happened on a a sunny afternoon at
about 2:00 pm. And by 5:00 pm I had the largest mural painting contract of the year: the dome mural for the new Cuyahoga
County Juvenile Detention Center.
|
|
|
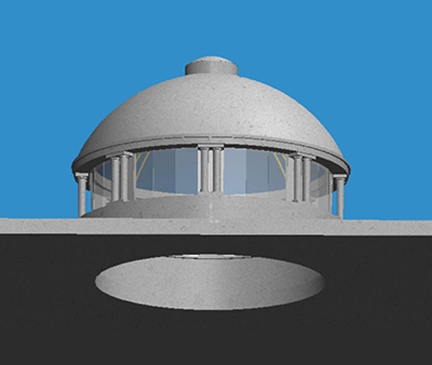
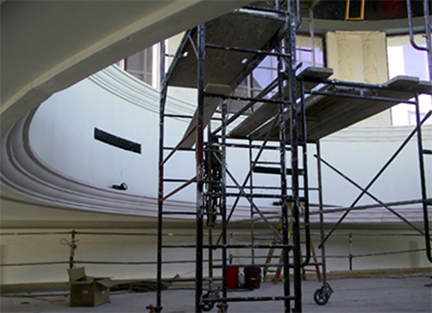
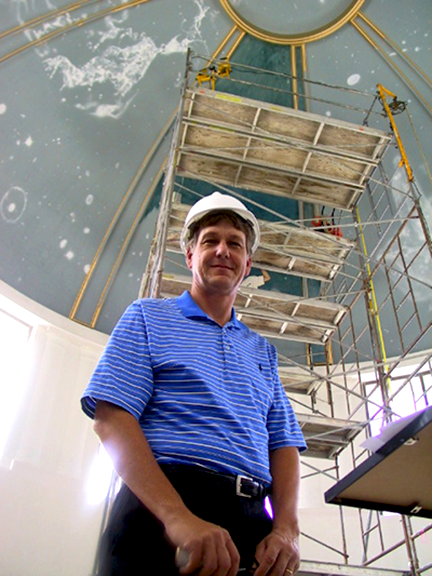
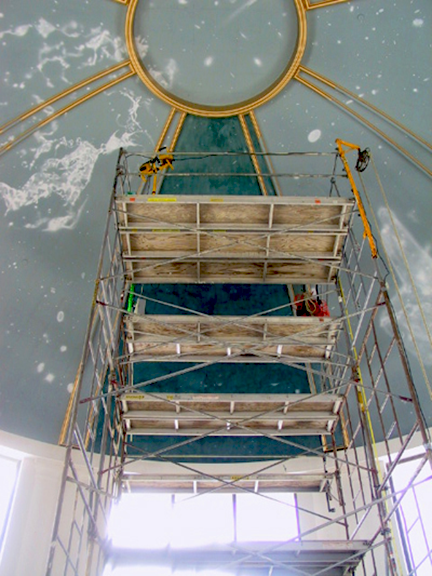
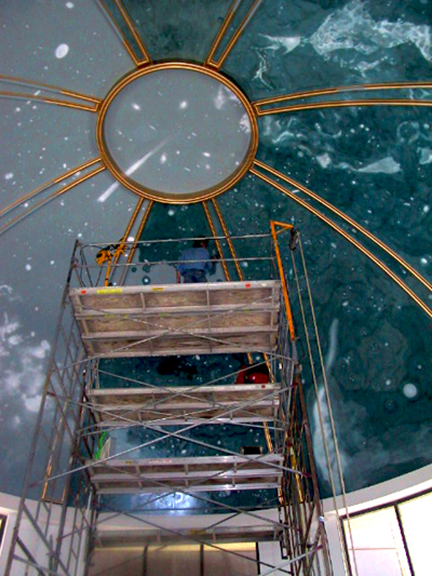
Architectural rendering showing the position of the cupola on within the Great Hall.
|
|
|

|
|
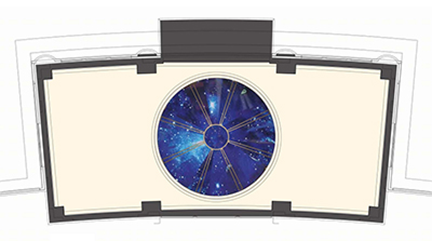
Justice Planning Associates Inc. designer's conceptual rendering for the dome mural. This 'Exhibit A' image is not a rendering of the finished art, but rather a visual "place-mat" to give an idea of the intended art.
|
|
The New Client
The Cuyahoga County Juvenile Detention Center (CCJDC) is a youth detention center located in Cleveland, Ohio. It is the oldest detention center for youths
in the United States dating back to 1931. But by the early 2000s the center was overcrowded and out of date. So a new $189 million budget juvenile detention
center and nine-story juvenile courts building was being constructed and ultimately inaugurated in 2011 at East 93rd Street and Quincy Avenue.
|
|
|
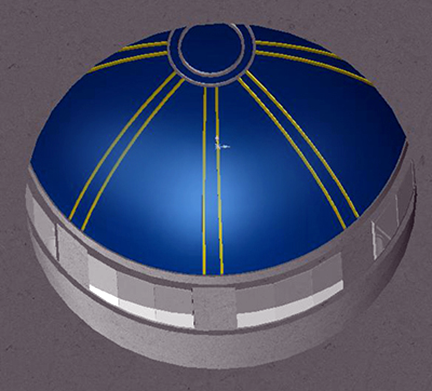
Using the architectural plans, my brother Ricky constructed this 3D version of the dome. A computer generated image like this one is ideal to study
the space from every angle. Before computers I used to built scale models for the same purpose. One great advantage of the computer
software is that you can do light simulations. The first simulation revealed a mayor problem.
|
|
|
|
|
I discovered that the roof top where the dome sat acted as a reflector.
In other words, during certain hours sunlight hit the roof and bounced right back
into the glass windows. As a result, the glass windows refract light into the dome's interior
-right were the mural was supposed to be. And as expected, glare was a huge problem during the execution of this mural.
|
|
I knew practically nothing about this new construction except for a few snippets of local news that usually plague this type of project: controversy,
cost overruns and delays. I believe that there had also been a few indictments relating to fraud by a county commissioner involved with the project.
In short, the usual menagerie of ills associated with any tax-funded multi-million dollar enterprise. But all things being said, this project was not
even near my radar of interest.
|

|
|
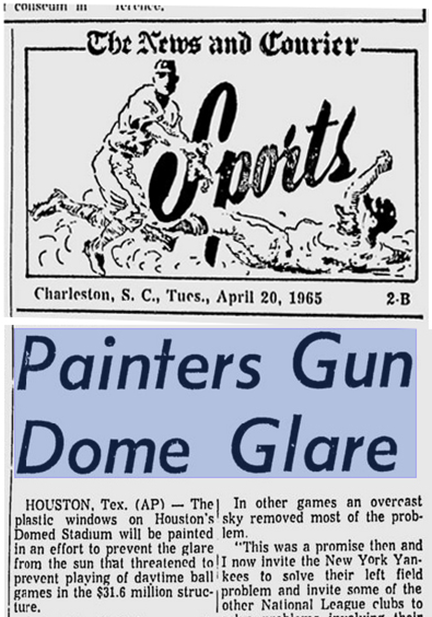
When initially constructed (1962-65), the Harris County Domed Stadium, better known as the Houston Astrodome and nicknamed the
"Eighth Wonder of the World", was the world's first multi-purpose, domed sports stadium. But it was almost a failure.
|
|
|
|
|
Built at a cost of $259 million in 2014 dollars, the glare of the sun on the dome's glass panels prevented playing daytime ballgames.
The solution was to paint all the windows on the roof, which solve the glare problem, but killed the grass. So, how did they solved
the grass problem? By inventing 'AstroTurf'. Glare and dust are also the worst enemies of an artist, though I think glare is worse
because it detracts from the appreciation of the work. You cannot enjoy what you can't see. Glare is a HUGE problem.
|
|
As I later learned, while I was conquering villages from the comfort of my Lakewood apartment, a drama was going on at
the Juvenile Detention site concerning the painting of a mural on the dome's cupola. Mr. Michael
"Mike" Thomas, founder and President of Justice Planning Associates, Inc. (JPA), and also the principal designer of the
project knew exactly what he wanted painted on the dome: a mural depicting the majesty of outer space (or "the heavens"
-if that was your take), and he was not getting it.
|
|
|
My first instinct to begin research for this project was to refresh my visual memory of the works of Ohio-born artist
Robert McCall
(December 23, 1919-February 26, 2010). Bob was an exceptional conceptual artist, known particularly for his works of space art.
For three months during a Washington DC internship, I used to pay a weekly visit to the National Air and Space Museum to study his
six-story mural masterpiece "The Space Mural - A Cosmic View". Unfortunately for me, deep space was represented only as a background
in Bob's work. While still impressive, it did not provide a parallel to what I had in mind.
|
|
|

|
|
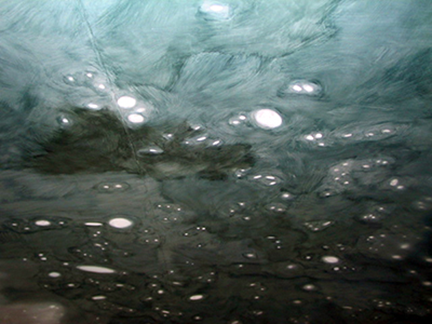
The problem with all the space theme artworks I found during my research was their opacity. Even when deep space looks entirely black,
it has depth. Stars seem to float in and out of the dark. So I embarked in a course of action by which I would use the latest photographs
of deep space and other celestial bodies as my design models, and then figure out a painting technique that would be me the visual depth
and shimmering colors I envisioned.
|
|
That's when my phone rang. The gentleman on the other side of the line was the affable Mr. Mark Ricchiuto,
Project Executive for Marous Brothers Construction who had previously worked for the City of Cleveland. Marous Brothers
Construction
was the local firm contracted to do the building's interiors in this gigantic project. The reason I received the phone call was that
Mark had been searching for a mural artist and came across my website. And the reason he was looking for a muralist was because at
the work-site the dome mural part of the project had come to a standstill.
|

|
|
The Hubble Space Telescope is a project of international co-operation between NASA and the European Space Agency (ESA).
It was carried into orbit by a Space Shuttle in 1990 and remains in operation to this day. The imagery of space it has
produced has revolutionized the way we see and understand deep space. For artists like me, it has been a godsend.
|
|
|
|
|
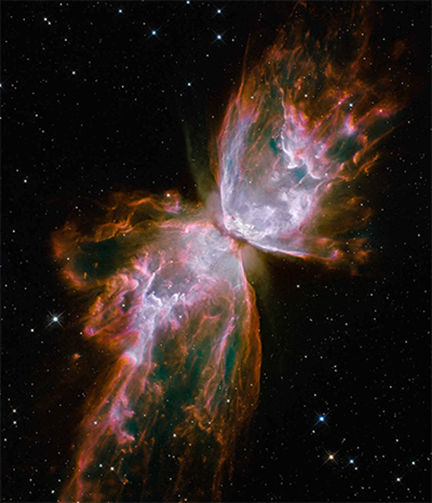
Hubble image of the Butterfly Nebula (credit NASA, ESA).
Gas released by a dying star race across space forming delicate shapes like this one. Hubble photos are actually sensor recordings of light readings. In Hubble images,
color is used as a tool, whether it is to enhance an object's detail or to visualize what ordinarily could never be seen by the human eye.
|
|
I lived twenty minutes away from the work-site. This proved fortuitous. An important meeting was happening that very day and Mark was running
out of short-time options. So we arranged to meet that same day at the construction site and an hour later I was shaking Mark's hand in front of the place.
He filled me in quickly on the situation: there is a meeting of all department heads along with Mr. Michael Thomas and the representative
of the Painter's Union; every other painter/artist that had been proposed to do a dome mural had not gained Mr. Thomas' confidence
or approval; that the company was paying $15,000 a month for the already erected scaffolding system; and that deadlines needed to be met.
|
|
|
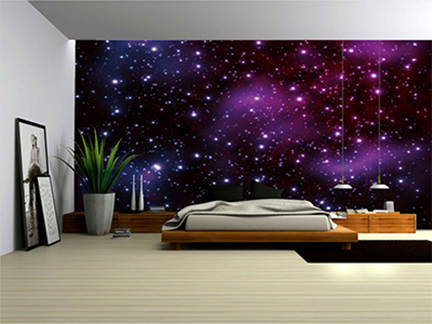
This is a 'photo mural' of deep space. This type of mural is mechanically reproduced like wallpaper using actual photographs,
usually with additional color enhancements. Except for the fact that they are permanently glued to a wall to qualify as murals,
there is nothing traditional about them. They are simply enlargement of photographs; no painting is involved. Because of the
speed and relatively low cost of the process, I have used this technology to reproduce some of my own designs for decorative
projects.
|
|
|

|
|
This is an artist's illustration of a planet (credit L. Calzada). When "solid objects" are the main focus of a composition, it is easier to recreate
spatial depth and simulate a feeling of photographic reality. Deep space becomes nothing more than a secondary background.
There are many artistic techniques to create this convincing effect when working on a small scale. Most of these techniques,
however, become useless when working on large scale projects like murals. For example, you could use the bristles of a toothbrush
to spatter white paint on a dark background and recreate a convincing image of deep space. Now, can you imaging the size of that
toothbrush to do the same on a 1,300 square foot mural?
|
|
Well, this new information didn't tell me a thing about the mural itself but as we entered the building and were fitted with the
needed safety helmet and batch I told him not to worry, I would take care of everything. When you think about it, a mural is
nothing more than paint on a wall, so regardless of the arrangement of that paint on a wall to create a composition of any
given theme, the process for a trained painter is pretty much the same. My bravado was based on confidence gained by years of
experience. So, what's the one thing that always changes from job to job: the politics. Bingo!
|
|
|
Since 1940, when it was originally published, The Artist's Handbook has been
indispensable for thousands of practicing
artists and art students. The book has remained continuously in print through many editions and has some more than a
quarter of a million copies. It is, as American Artist Magazine calls it, the "artist's bible,"
an invaluable reference for the painter, sculptor, and printmaker. If you are seriously interested in traditional
painting and can only afford only one book for your personal collection, this is the one you should have.
|
|
|
|
|
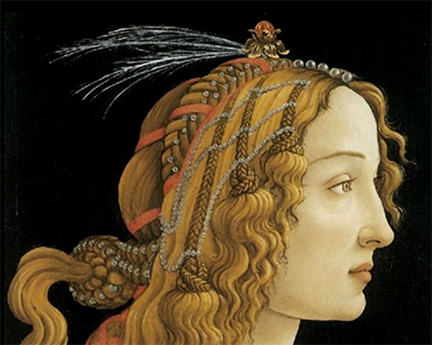
Sandro Botticelli, portrait of Simonetta Vespucci, detail. This is an example of an exceptional master working paint in opaque layers.
Today we use acrylic paints for this kind of painting. Since these paints dry very fast, are water-base and is almost odorless,
they have become the medium of choice for most muralists, myself included. It is excellent for working on large scale projects
and the medium allows for many more creative techniques.
|
|
|
|
|
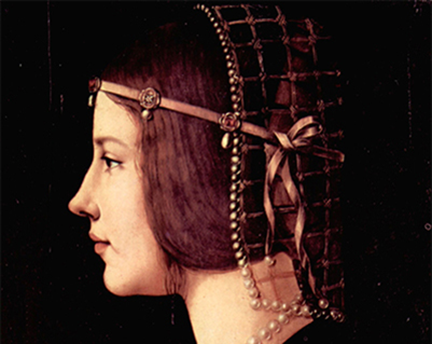
Leonardo da Vinci, portrait of Beatrice d'Este, detail. This is an example of a masterwork done in oil glazes by Botticelli's
contemporary and fellow countryman. The technique helped facilitate a more 'photo realistic' finish.
I decide to use this glazing technique to do the mural because it served best the subject matter. It would take longer to do
and demand more patience from the artist. But the results would be superior to doing the job with water-base paints.
|
|
The Negotiations
First, we took a peek at the dome's cupola, which had already been put together from a series of individual panels and was ready
for the plasterers to move in and take over the finishing. It was big and it was high up and it was exciting. And the scaffold
was huge. Good, I like big things; I was interested. Mark gave me a few more tidbits, I asked a few questions concerning
deadlines, and then we were off to a meeting.
|
|
|
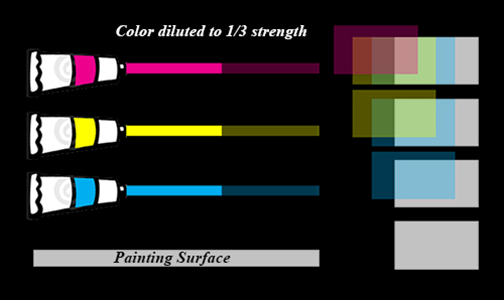
Oil glazing technique -by applying paint in thin, transparent tinted layers
(color pigments floating in a viscous clear medium), the color tints in all visible
layers appear to combine into new color variations.
A glaze must dry before another is applied so color saturation and tones build slowly.
This facilitates the delicate rendering
of details since oil mediums dry slowly thus allowing the artist more time to work.
|
|
|
|
|
Oil glazing technique -luminescence is achieved when light travels through the color glazes and is reflected
back from the light color base layer. This increases color brightness and depth.
|
|
We entered a large room with tables arranged in a large square formation with people already sitting around and others joining in.
I sat and nodded quietly as I was introduced trying to determined who did what and how they fitted into the puzzle. And then
I listened. To my astonishment I learned that the Painter's Union had made a bid for doing the mural but they had actually priced
literally reproducing the sketch as shown on the designer's conceptual rendering and not on actually designing and producing the original
work of art it was supposed to be! I managed not to break into laughter.
|

|
|
This shows the mural design being created in Adobe Photoshop. The image on the
computer screen is projected
on a wall. The composing process now becomes a collaboration between the artist and the designer, and a large scale
view allows a better feel of the details. Each element of the design is rendered on a separate layer that
can be moved, rotated, or scaled independently without affecting the rest of the composition until the desired image
is achieved.
|
|
It gets better. They had no trained muralist to do it. As the facts kept pouring in, I surmised the closest they had to an art concept
was to do an airbrush job like the ones you would do on a car. I have nothing against airbrush artists and many of them do phenomenal
work. Even the idea of doing a "wrap" (an image printed on vinyl and then attached to a wall with heat guns) was mentioned and quickly
discarded as impractical. But I felt this was not what the designer had in mind especially when you take into consideration that the
dome mural was going to be his centerpiece. The Union representative argued that they had another artist that might be able to do the
job, a gentleman named Victor -a very nice artist who I later met in the course of the project. Victor was an immigrant from Russia but
his skill-set was painting icons and miniatures, a uniquely specialized form of painting but not one that necessarily makes you a muralist.
|
|
|
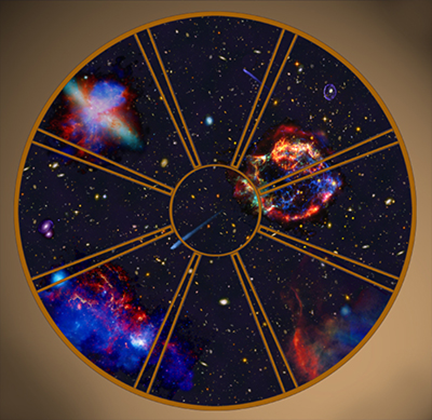
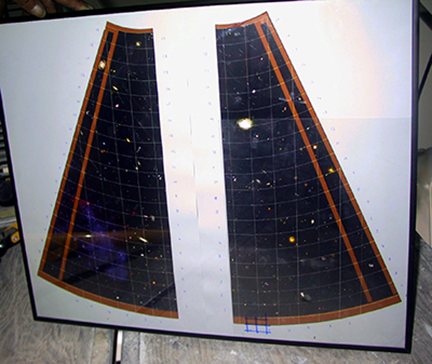
The final design: a composite view of deep space (that's the space beyond the limits
or the solar system) with four nebulae (clouds of gas and dust in outer space). With
the mural design completed, the next step is to make large scale color copies of each
of the eight sections in the composition. Then each section is gridded to provide the
coordinates for a precise transferring of the image to the painting surface.
|
|
My initial impression upon entering the building had been based on the architecture itself. As Mark commented on some of the architectural
features that would eventually complete the main hall where the dome was situated, a clear mental image of the designer's intention for the space
began to form. And the one thing that jumped out at me was that the designer's original concept had been formulated around classical lines.
This person knew art history, architectural styles, the juxtaposition of visual elements and so forth, and consequently, would settle
for nothing less that a painting that followed the best practices of traditional western art. This gave me even greater confidence
because I knew we had a common artistic language.
|
|
|
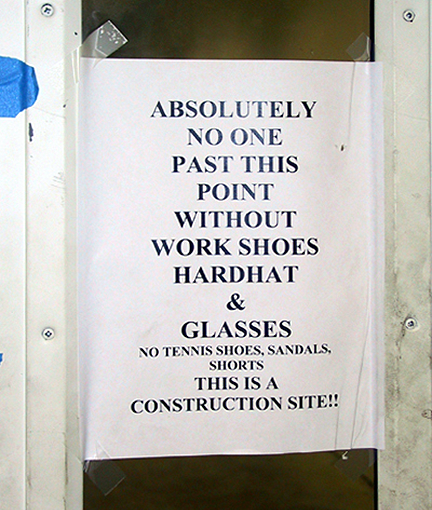
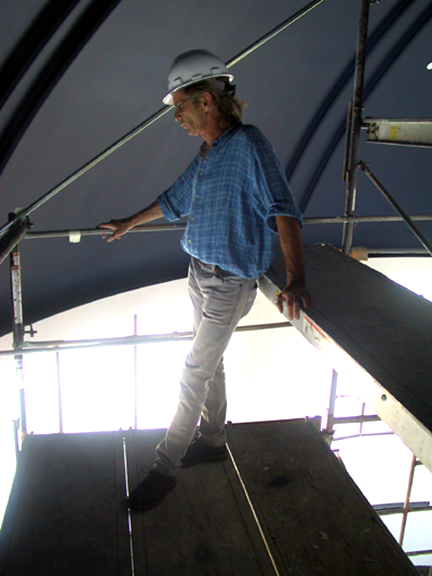
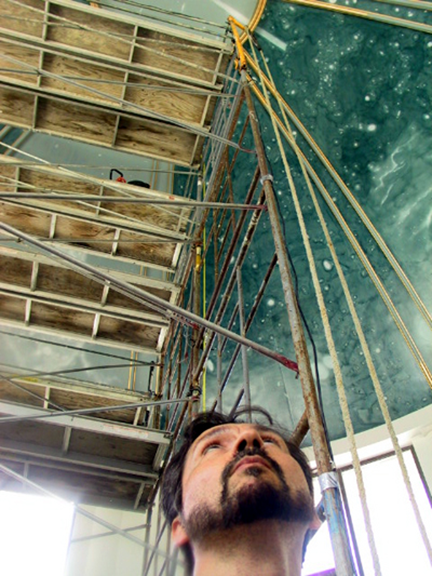
The law at a construction site. This is strictly enforced for good reasons.
The safety of the workers is most important rule at any job. Period. We also
followed this rule while on site, but once inside "the penthouse", our working
reality forced us to make changes. At the top of the cupola the heat became so
unbearable that I took to changing into shorts. And, the top hardhats kept falling off
everytime we tilted our heads. Chin straps were restrictive so we ended up taking
off the hats completely in our working area.
|
|
|
|
|
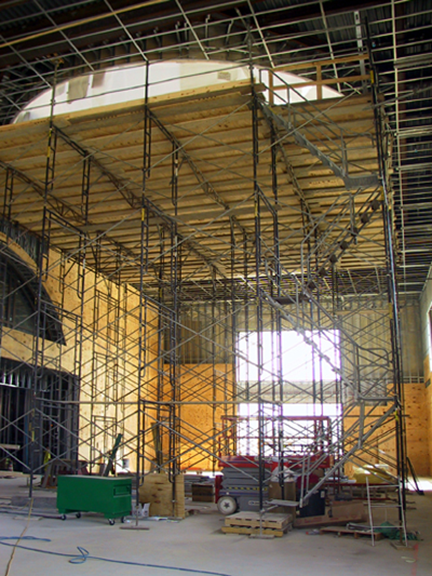
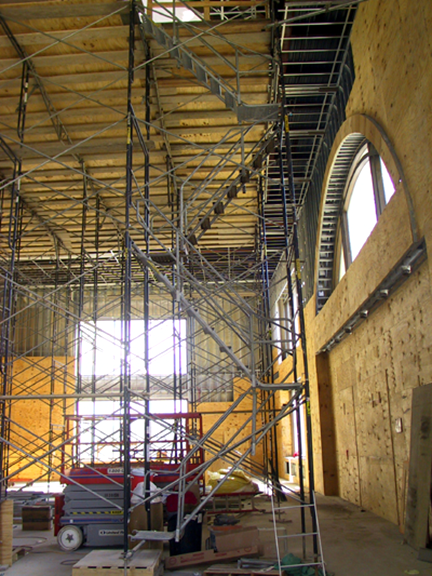
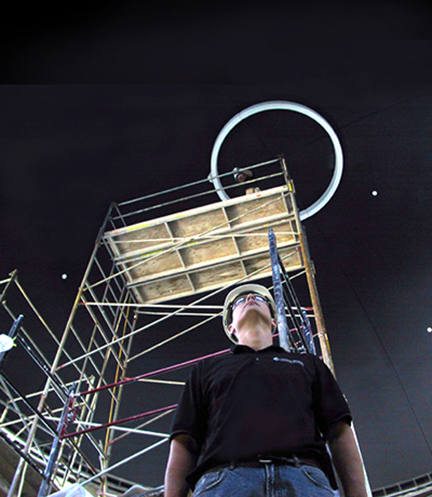
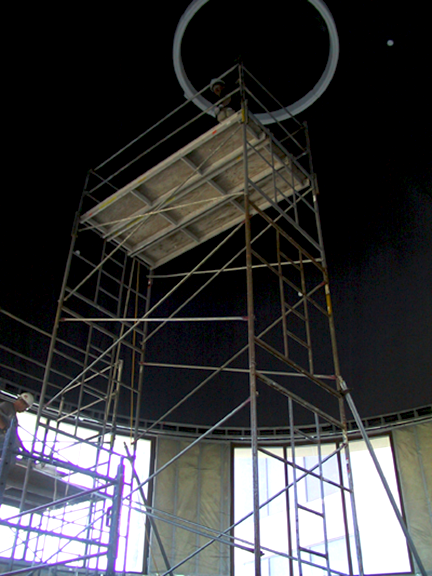
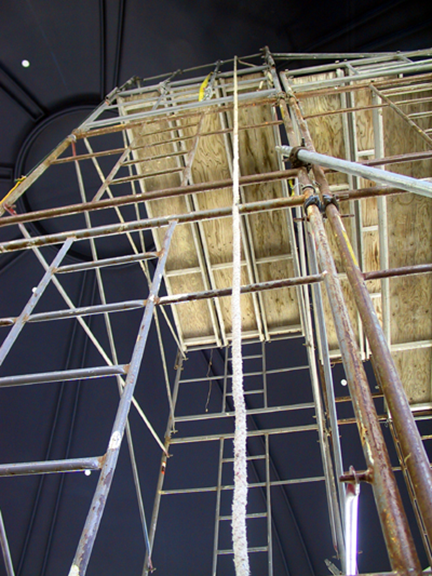
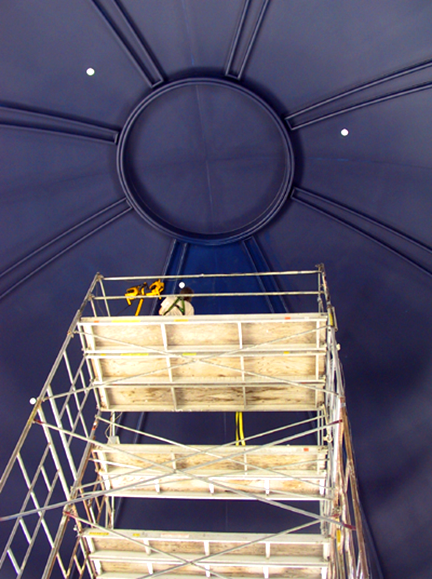
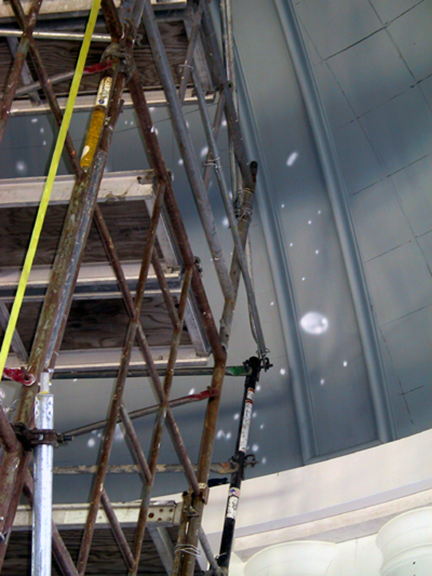
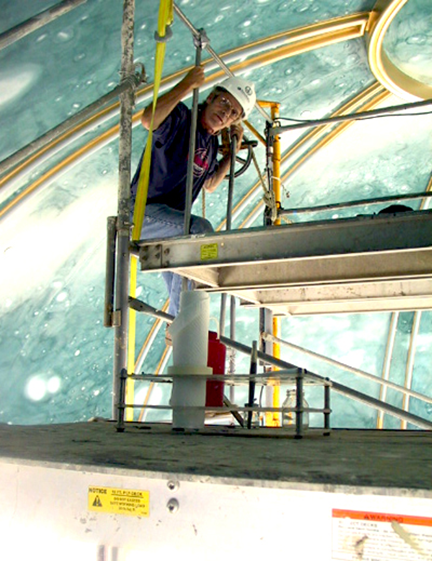
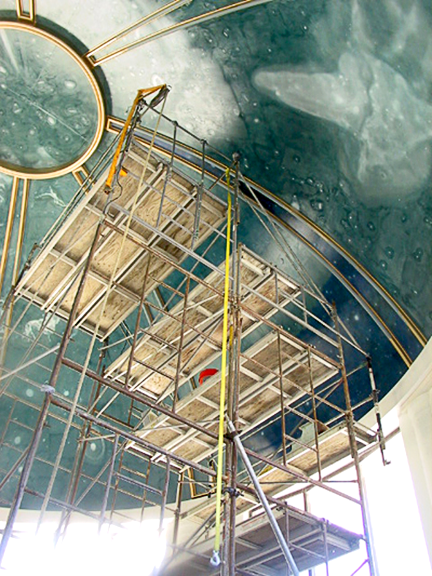
A $15,000 a month scaffolding system created a stable platform just below the drum
of the dome. With the crown of the cupola sixty feet (over 18 m) from the ground floor, this
platform got us up half of the way.
|
|
|

|
|
I kept my metal lockbox with tools and supplies on the ground floor below the platform.
|
|
As I continued listening to the exchange, I also realized that other artists had been approached for the job,
though not many, and some from further away. But for some reason or another, they had "crashed" (muralist term)
during the initial interview. By this I mean, they had not met with expectations. Mark's web-search had been a blind search. He didn't
know about me -and it so happened that I was a local that lived a few miles away. As I sat there until it was my turn to speak and say how
I would approach the job, it became obvious that hardly any of the gentlemen present (it was and all male group), had any knowledge of
how artistic painting worked. That is except for Mike Thomas.
|
|
|
A view of the drum opening just above the platform.
|
|
|
|
|
A view from the platform to the ground floor below.
|
|
Mike and I exchanged in a back and forth of questions and responses in a language that confirmed our
deep understanding of traditional painting methods. Then, after I gave a PowerPoint presentation
of my previous work in which the Thinker's Mural proved to be a highlight (this was an example of
classical painting as good as it gets) that everyone understood that I was up to the task. In fact,
Mike commented to Mark if he had noticed the difference in the way we used the same terminology to express
our ideas, a sign that I knew what I was talking about (I guess as opposed to others that may have come before me).
|
|
|
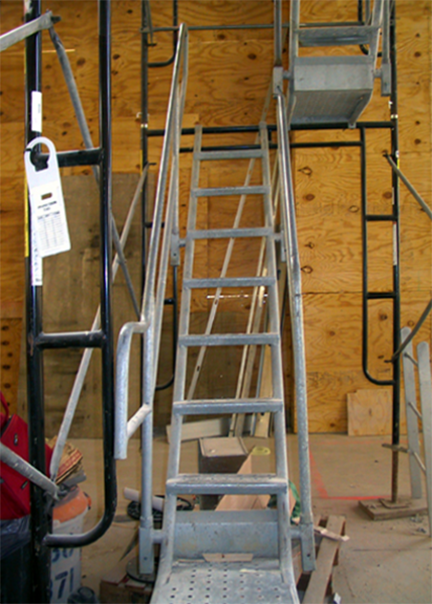
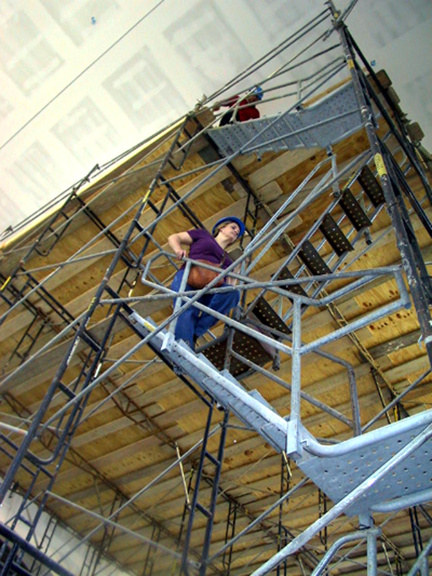
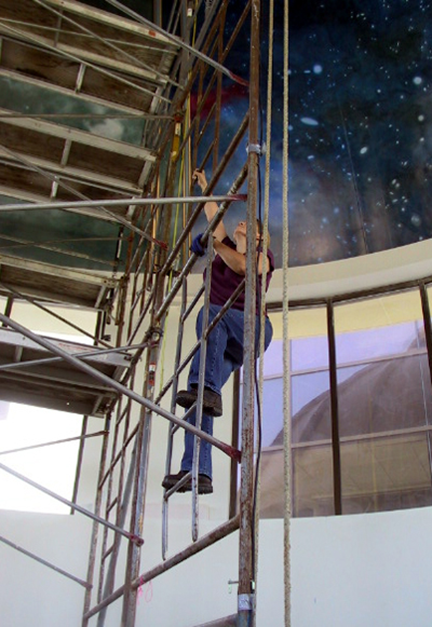
The stairway to the top of the platform. That's a total of 39 steps.
|
|
|
|
|
A close up view of the ladder.
|
|
The issue was settled with Mike -I was it. This reassured Mark as he was step closer to solving his problem.
Now all that was left to solve was the roadblock: the Painter's Union and the cost. Mike Thomas left the meeting
since the rest of the negotiations were not his concern. That was Mark's department. My first question was
addressed in detail. How much time did I have? Three months at most. The mural had to be finished by then,
and the plasterers, contract painters and finishers had to complete the drum area before the scaffolding came down
so that the floors on the ground floor could be laid. This was doable.
|
|
|
By the end of the project I had made it up those steps 684 time (I kept
a tally). And that's not counting the climb up the scaffold on top of
the platform. This is one of the reasons that mural painting is for the
ones that stay in good physical shape.
|
|
|
|
|
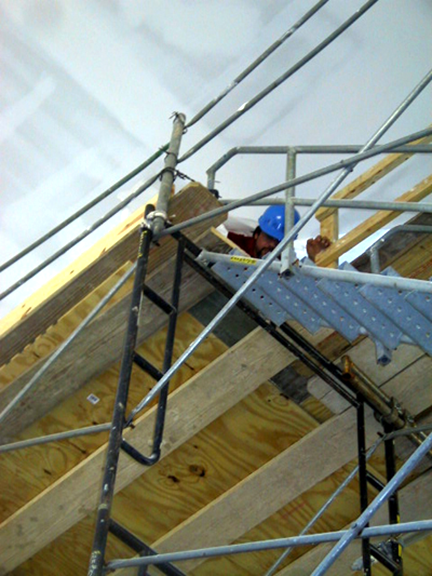
At the top landing access to the work area was through a plastic curtain.
|
|
I knew from experience how long it would take me to do the job, the estimated cost of materials and supplies, and the cost
of additional assistants. I had an answer right there and then. I should add that the one thing you don't
want to do in this type of negotiation is drag your feet and make people wait for a quote. The longer you wait for a solid
response the greater the chance that someone else my take the opportunity away from you. But before giving my quote, I asked
what had the Union quoted on the job. Ten thousand dollars was the answer. In my mind I laughed so hard I fell of my chair.
They had really given a quote to recreate the sketch of the mural! That amount would barely cover for supplies and assistant
artist's fee for a real mural of this size over a three month period. And, like the saying goes: -"You get what for you pay for."
|
|
|
The platform reached to about four feet (1.22m) short from the circumference of the drum. It was surrounded with a safety tubular railing.
|
|
|
|
|
The floor of the platform was made of sheets of 3/4 inch (19mm) plywood. It was strong and stable enough to support
the weight of the heavy scaffolding towers needed to reach the cupola.
|
|
I had my quote ready for Mark (that was his department) but we still needed to solve the issue with the Painter's Union.
So as soon as Mike Thomas left the meeting and doors were closed, I addressed the gathering directly. It went something like this: - "Okay gentlemen,
cards on the table. What's the issue?" There were two: firstly, that I was not a Union painter. And secondly, that they would lose out
their Union fee they expected to get for the job. I nodded and replied, - "What's the fee?" Out came a number. I
countered, - "I'll join the Painter's Union and give you the fee.
Problem solved." And that's how it happened. A few weeks later my assisting artist and I went over to the Union office, got a couple
of cardboard Union cards, and left a check for one thousand dollars.
|
|
|
This rendering illustrate the two elements that made up this simple dome: a cupola supported by a drum.
The word cupola comes the lower Latin cupula which means a "small cup" (Latin cupa), indicating a vault
resembling an upside down cup. A dome (from the Latin domus which means "house") is therefore an architectural
element that resembles the hollow upper half of a sphere.
|
|
|
|
|
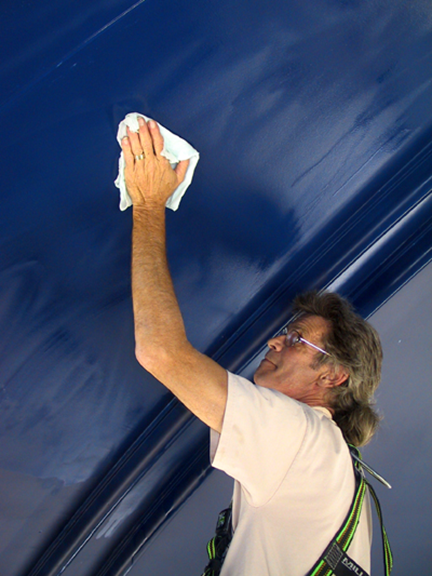
After the plasterers had finished smoothing the underside of the of the cupola, following my color selection,
the painters sprayed it with dark blue primer. The center ring was added later. The white dots are plactic caps
covering the heads of the sprinkler system.
|
|
Truth be told, I didn't have to join the Painter's Union. I'm a fine artist and my own contractor. Our specialties do not even conflict.
I paint murals in multicolor, they paint building walls in a color or two. But that's the politics of the game. I have paid extortion
in other countries, but at least I got protection. In this situation, I got a cardboard card, and a - "Let's not fuck around with this
guy" pass. And so, we were all friends moving forward with a project that needed to be completed. As soon as we were all smiles, Mark
Ricchiuto gave a sigh of relief. As for the Union, as of this 2019 edit to this page, I haven't heard from them since or kept membership.
|

|
|
I asked the contractor to create a barrier between the platform and the bottom of the drum to
seal the work area. This was necessary to keep the place cool (we had an air conditioned feed),
dust free and insulated from some of the construction noise happening below. Then we swept and
mopped the platform clean before proceeding to setup our equipment which was hauled with the
help of a lift.
|
|
|

|
|
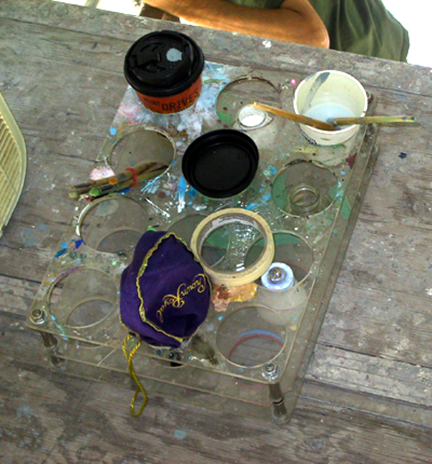
Our supplies and tools were stored in blue plastic containers. A table with chairs served as
desk and planning area. Reference images, diagrams and notices were taped on the surrounding walls.
I'm very keen on keeping a working area organized and free of clutter.
|
|
|
|
|
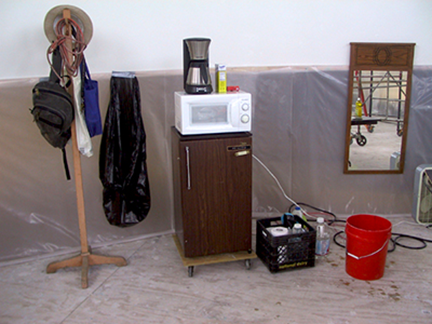
My other "must have" essentials were a small refrigerator (place on a movable platform with wheels), a microwave, a coffee maker,
a free standing coat hanger and a large mirror. The mirror was used to see the work above. Instead of craning your neck
to look up (which gets painfully uncomfortable really fast), you place the mirror flat on the floor and then you look
down into it to study the reflected above image.
|
|
|
|
|
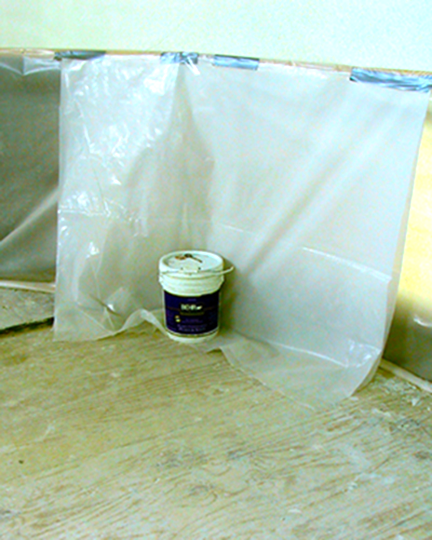
A plastic curtain was used to seal the entryway between the platform and the stairs. With our
working space isolated from distractions, it felt very peaceful and relaxed.
|
|
|
|
|
All in all, I was very satisfied with our working arrangement. I had told curious workers
hauling the mini-fridge, the microwave and a coffee maker up to the platform: "If I'm going
to spend three months up here, then I better get comfortable." Since that day they started
referring to our working area as "the penthouse". I liked that!
|
|
Negotiations then proceeded in the usual way: Mark and I agreed on a fee (which was probably lower than he expected),
I made out a contract, they handed me theirs,
a provisional time schedule was worked out, and, a few weeks later, I got my initial check to begin the project. My next moves were
to do research, gather references, come up with the final art rendering for the mural, get it approved, buy the necessary
supplies, tools and materials -and find an assisting artist that could do the job that needed to be done in a timely
manner. Time to Rock-n-Roll!
|
|
|
The first scaffold tower proved unstable and unpractical. It swayed and only allowed reach to a
portion of the cupola. But the people at Marous Construction were accommodating and ingenious.
We had a meeting and in fifteen minutes I had sketched out what I needed. By the next day, it was done.
|
|
|

|
|
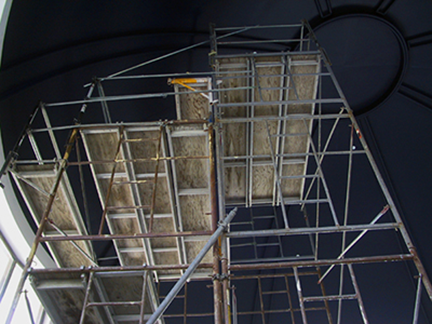
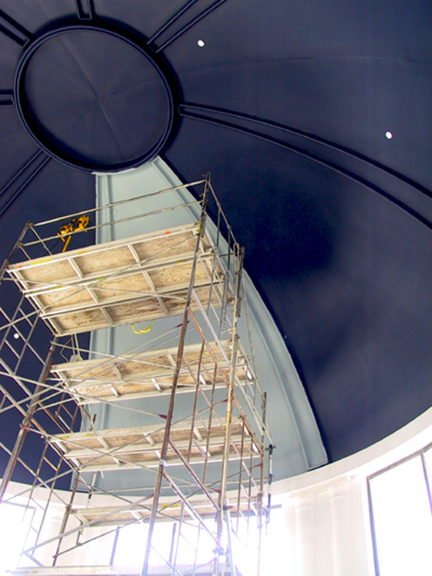
Initially there were three scaffold towers on top of the platform.
|
|
|
|
|
My idea was to join the towers into a step configuration that allowed us to work an entire section from top to bottom.
|
|
|
|
|
The new configuration was sturdy and secure. I felt like being on top of a step pyramid.
|
|
|
|
|
We now had reach to any portion of the cupola's sections, from top to bottom, without having to make any
further changes to the scaffold.
|
|
Research, Design and Planning
I initiate any project by making a written list of all the things I need to research and what references I need to collect.
Before Google Images I spent long hours for days at the library scouring through entire collections of books and magazines
in search of the perfect visual reference. I can not underestimate the importance of good source material before you begin
to finalize any design or idea. And it goes without saying, you have to read a lot, take notes and do sketches.
|
|
|
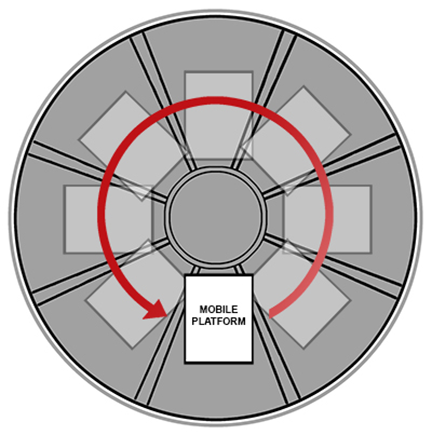
Our working plan was to rotate the scaffold from one section of the cupola to the next. So by
the time we completed a rotation through the eight sections, the first section had dried completely.
|
|
|
|
|
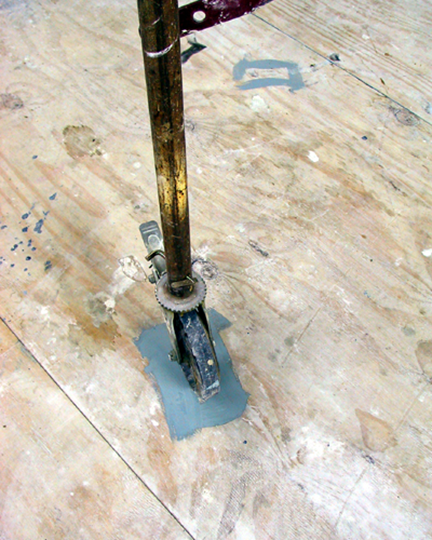
The resting position of each caster wheel was marked on the floor so that on
repeated moves we could have exact placement of the scaffold. Moving the heavy unit
took some doing but we managed to make it work. Once in place, the wheels were locked
by pushing down a back level.
|
|
You begin by obtaining a general knowledge of the subject and then specialize knowledge as you begin to hone
in on specifics that further illuminate any tangents your research has uncovered. Sometimes many of these
"hunting expeditions" result in dead ends because they lead to information which you may deem irrelevant.
But the time is never wasted because accumulated knowledge will serve you well on other occasions and it gives
you better understanding of things that otherwise may had never peaked your interest.
|
|
|
Inexpensive rubber balls proved ideal in solving a big problem.
|
|
|

|
|
We had to rotate the heavy scaffold many times with little control of precise movement.
The metal corner pipes extending at the top could do great damage to if pushed against the cupula.
Complicating things was the fact that we could not see or guage how close the corners were to the
cupula's surface. Our solution to the problem was to attach rubber balls to the corner pipes at
the top. So if we got too close and bump the surface -as it happened on many occasions, the rubber
ball would absorb the shock and protect the painting from damage. Simple but very effective.
|
|
|
|
|
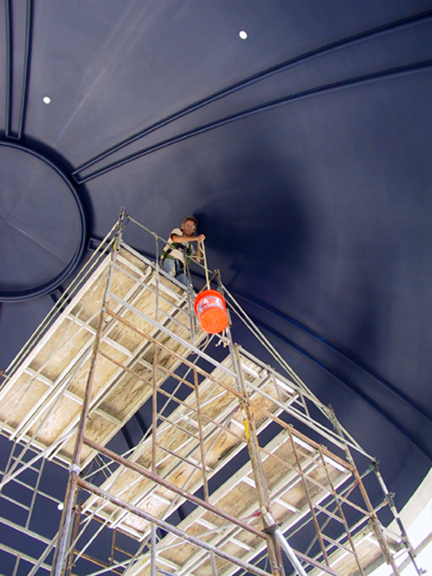
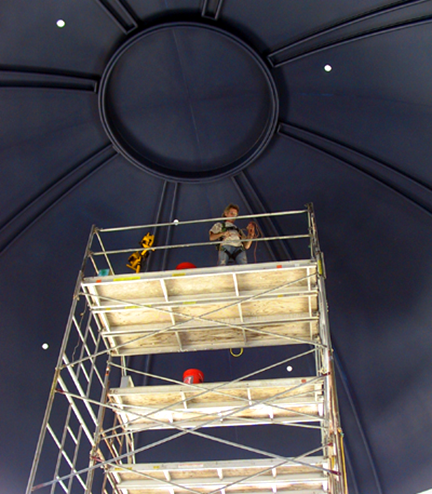
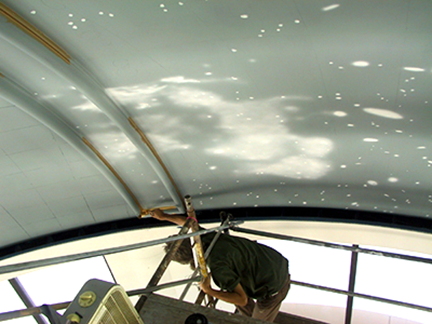
Artist James Todd climbing the tower for the first time. Some of members of the Marous management
team were with me as James made the climb. One of them leaned closer and asked me: "Is he the other artist?"
To which I answer softly without taking my eyes off Jim: -"If he makes it to the top." Well, he did!
And I'm happy for it. Jim was perfect for the job and in no time learned my painting process with oils.
To beat the deadline I needed an artist that could work independantly from me on the vast amount of minute
detail so I could concentrate on working the larger elements like the four nebulae.
|
|
|

|
|
View from the top of the tower to the platform below. This is
another reason why mural painting may not be for everyone.
|
|
|
|
|
We had safety harnesses. In fact, the Occupational Safety and Health Administration (OCHA),
created by the US Department of Labor, is responsible for worker safety and health protection.
They keep a close eye on construction projects and this one was no exception. They can close
down any project for violations so contractors are very strict at upholding Ocha rules. However,
not all Ocha rules fit all scenarios -like painting a dome mural. We had an issue with the Ocha inspector: he required
safety lines secured above our heads.
|
|
|
|
|
Safety line secured on the side of the scaffold proved to be a work
hazard when we got entangled in the lines moving back and forth. The problem came to a head when I
asked for a meeting of the management team and the Ocha inspector. He wanted the safety line to be secured
on the cupola above our heads. I tried to explain that we could not make holes on the cupola to place hooks
and then patch holes on the painting. But he was not getting it. Finally I said: "I tell you what, please
climb up here and show us how you would do it." That was the end of the conversation. We were allowed to
proceed at our discretion. And so, except for a few occasions were we deem our safety required them, we
put aside the harnesses.
|
|
For this project I read a lot on outer space, galaxies, stars, comets, and so forth to increase my general knowledge in those areas
(I have always been a science and a history nerd). I also began collecting published images acquired from the Hubble telescope. I
read on the telescope itself and the kind of photography, filters and enhancements used to achieve such spectacular images. This
led me into thinking about the importance of color in representing distances, temperatures and traveling speeds. By the time you
wrap your research, you feel like an expert on the subject and your level of confidence increases exponentially.
|
|
|
The first other of business was to clean the cupola. It had been primed fairly recently,
but in that short amount of time it had also accumulated a fair amount of dust due to the
ongoing construction. And in
painting, dust is your enemy because it prevents paint from property adhering to a primed surface.
|
|
|
|
|
Tools, water, equipment and materials were placed in buckets tied to a rope and
hauled up and down the side of the scaffold. But this hand-over-hand process was not ideal.
|
|
|
|
|
We needed lots of water. But pulling heavy buckets of water up the scaffold places
a lot of strain on a person's back. We needed a better method. But first, we needed
a way to get water to the plaform.
|
|
|
|
|
At first, we had to climb down the platform, carry buckets to an utility tap
far away and then carry buckets of water back up the platform and up to the tower.
I asked the site supervisor to come up with a better solution and they connected water hoses
from the tap to the top of the platform. Now all we had to do was go to the tap, connect the
hose and turn on the water until all our buckets on the platform were filled.
|
|
|
|
|
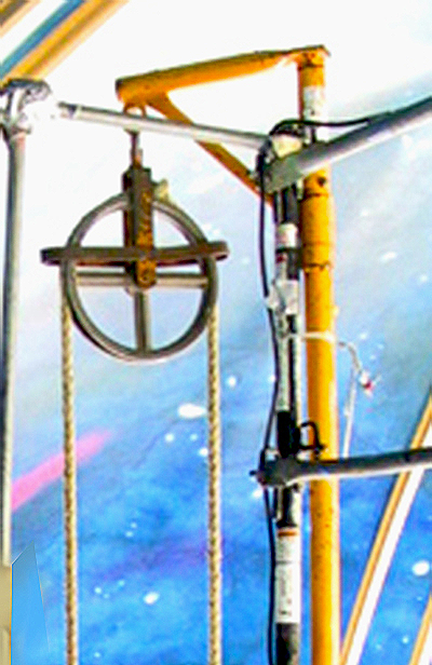
Now what was needed was a practical system to haul things up the tower. Their first
ideas was to place a metal arm extending out from the side of the top of the scaffold
with a rope sliding over the top. It took less than a minute to deduce this would
not work well.
|
|
|
|
|
The next day, they hit pay dirt (those Marous boys were crafty)! They installed a wheel hoist that we could pull from the bottom
or the top of the tower. This did the trick. Everyone was happy and I had fun hosting things
up and down!
|
|
As you are progressing with your subject research, you begin to fill another file with a separate research on anything related to
the production of the mural. This may include articles on paints, mediums, tools, materials, and suppliers as well as stories from other artist
that have worked on similar projects. You always keep your eyes open for anything that can be of use to you as well as anything that
could go wrong and thus should be avoided. It always pays to be diligent; mural painting is not for the lazy. This particular file is one
that is going to come in handy in just about any future project. Keep in mind to update it periodically since there is always something new to include.
|
|
|
For cleaning the cupola we use a mild solution of water and tsp cleaning agent
(I never use household cleansers like dish-soaps because many contain wax). Then we rinse
well constantly changing the water.
|
|
|
|
|
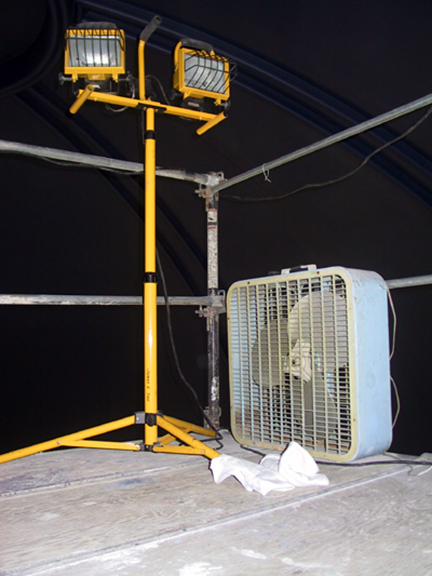
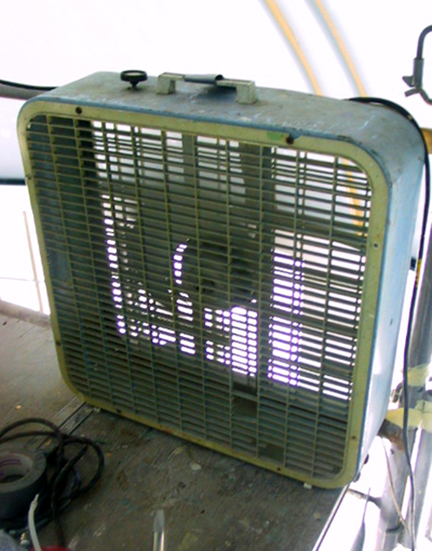
We ran an electrical extension up the scaffold to operate lights and a fans.
Every piece of equipment was secured in place to prevent accidents.
|
|
|
|
|
A couple of fans helped circulate air to dissipate paint fumes, speed up drying time and also keep the place cool.
|
|
|
|
|
We began the task by cleaning each section of the cupola one at a time, from top to bottom.
|
|
|
|
|
We took care to smooth any rough patches on the surface with a sanding block and to rinse well
with clear water and cotton rags. Psychologically, it's a good feeling to physically touch the
wall one intends to transform into a work of art. By beginning a large and complex task with the relatively
simple task of cleaning, you ease yourself into the job and gain a measure of confidence. With the entire
cupola thoroughly cleaned, we moved to the next step: priming the surface in light gray.
|
|
|
|
|
Immediately I was confronted with a dilemna: the round covers of the sprinkler heads. I soon discovered there is a virtual scam
with the handling of these covers. They are nothing more than a thin disc of plastic that snaps on the head of a
sprinkler head. However, you are not allowed to touch them. On a mural this presented a challenge.
|
|
By the time I had completed my research, I had a very good idea of what I intended to do and how to go about it.
In painting there are many roads that lead to the same place, each road being a different method or technique used
to render a visual interpretation. The artist decides which of these roads to take depending on what he or she is
trying to achieve in the final form. For this mural I wanted the stars to shine radiantly bright and deep space
to recede into infinity. I had a flat wall as my starting point (well, it was actually curved but you get my meaning).
But paint pigments do not emit light. There is no discharge of energy. So, you have to select the technique that
best replicates this natural phenomenon.
|
|
|
I wanted them painted or they would
stand out like light bulbs thus destroying the effect I wanted to achieve. But to do so only a "certified" shop could do this for the
incredible sum of $700 each. The reason for this robbery, I was told, was that one could ruin the effectiveness of the lids in case of a fire.
|
|
|

|
|
Well, I didn't fall for this bullshit. The covers were painted as part of the mural. We took care that the paint would not glue
the covers in place. If anyone had any objections, they could make their way up the dome and change them back. So far, no one has
even noticed.
|
|
|
|
|
Rotating the scaffold tower around the center from section to section, the entire cupola was primed.
My preferred primer is called "The Gripper", sold under the paint brand Glidden, manufacture by PPG industries
which is the second largest coating company in the world. This primer is water-base, less odorous than oil-base primers,
dries firm in about an hour with proper ventilation (we had fans), and brush cleanup only required soap and water. I should
note here that the reason I requested the initial primer to be dark gray-blue was so that when we applied the light gray coating,
we could easily see if we missed a spot.
|
|
|
|
|
We applied the primer with three-inch brushes. I personally like the "tooth" that brush bristles leave behind
(as oppose to the uniformity of texture left by a roller) because it provides a good hold for successive
layers of paint and variations in the way light is refracted from the surface when you paint in semi-transparent layers.
|
|
|
|
|
In the long run, brushes cost more than paint so we take fastidious care to preserve them, even the inexpensive ones. Another of
my painting habits is to rinse brushes every twenty minutes or so to avoid paint drying on the outer bristles. When paint does this, the
brush drags on the surface instead of flowing easily. So by following this practice, at the end of the day, your arm muscles will thank you.
|
|
I even considered using phosphorescent paints (paints mixed with strontium aluminate and a dopant agent
to make them photo-luminescence). But you need almost complete darkness for the effect to be noticed. So,
this thought was dropped fast and I went back to traditional paints and their respective painting methodologies.
These paints can be simplified to just two choices: artist's acrylics or oils. But before making up mind on
which of these two options would serve the mural best, I did more research to see what other artists did in
similar situations.
|
|
|
Color copies of each of the eight sections that made up the mural composition were printed, gridded, numbered
and framed with a protective plastic facing instead of a glass for safety reasons. The grid is made of one-inch
squares with the horizontals following the curve of the outer circumference. This
is the reference we keep at the top of the tower, changing the section copies as needed. In addition, we also printed several
enlargement of other sections heavy with detail.
|
|
|
|
|
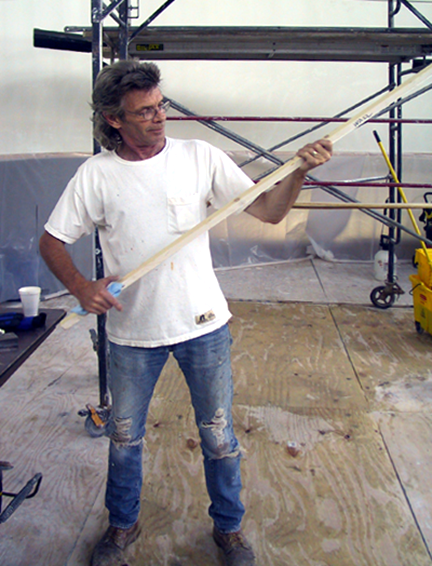
We used flexible wooden rulers to draw lines. They are essential on a curved surface where string chalklines don't work. Even though
they are painted white to seal the grain, we constantly smooth the edges with fine-grit sandpaper to avoid the occasional splinter.
For this job we marked the rulers with lines one-foot apart. Our working scale was 1-inch equals 1-foot.
|
|
|
|
|
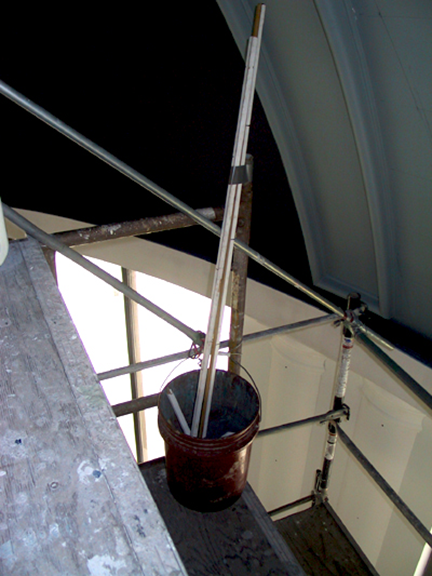
Rulers are kept in a bucket and secured to the scaffold. After use, they go back immediately to the bucket. The one thing you have
to take care of is to not leave objects on the platform that can trip you or be kicked down to the floor below.
|
|
|
|
|
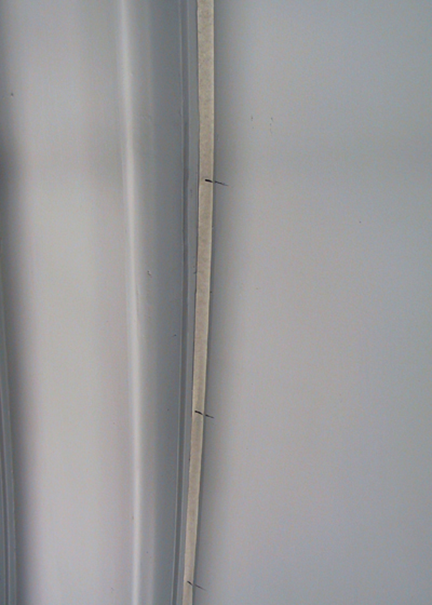
To create a grid we began by attaching sections of general purpose masking tape (also know as painter's
adhesive tape) to the surface. The strips are pre-marked every one-foot with a black permanent marker.
|
|
|
|
|
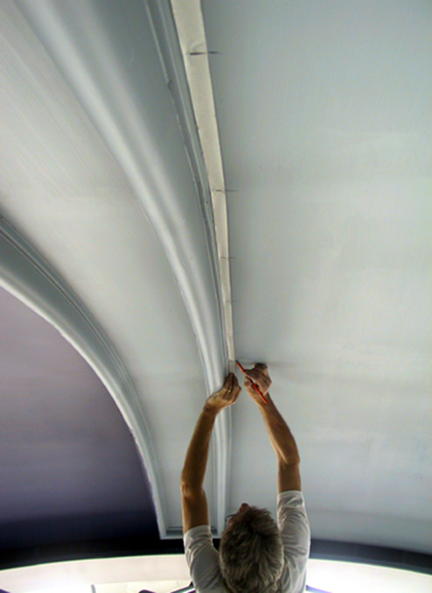
With the tape in place, the markings are transferred to the surface using a charcoal pencil.
Charcoal marking can be easily wiped off with a cloth and leave no greasy residue behind. We grid each section
after the primer dries completing it before moving the scaffold tower to the next.
|
|
|
|
|
After measurement markings are transferred to the surface along the edges of each section,
rulers are used to draw lines from marking to marking, vertically and horizontally to create
a one-foot grid.
|
|
|

|
|
The horizontal and vertical spaces are numbered along the edges to create coordinates
by which each square on the grid can be identified.
|
|
|
|
|
The priming and the grid were simultaneously completed. Note: the time of day and the ever-changing overcast affects
the way natural light is capture in each photograph. Some were also taken with the addition of artificial lighting or with a
camera flash. As a result colors look very different from photo to photo.
|
|
Some examples of this research and my observations can be seen in the series of images above and their accompanying commentary so
I will not elaborate further. What was important was my conclusion to do this mural using Artist's Oils. Once again, I will ask
readers to review the two charts on oil glazing techniques included in the images to understand the advantages of settling for oils.
The only detriment that gave me pause was the fact that oils take longer to dry and I had a do-or-die deadline. But there were
several solutions I could use to speed things up.
|

|
|
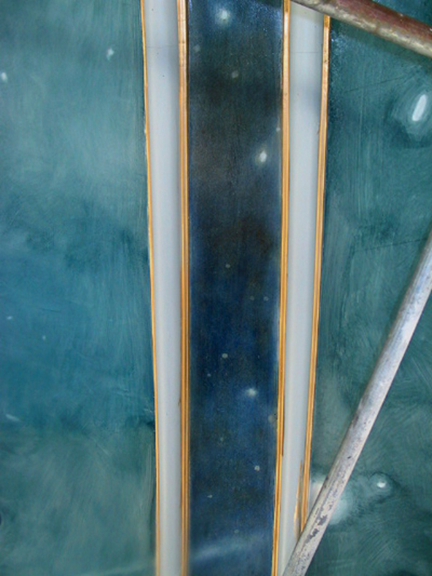
A this point we decided to start applying the first of two coats of gold paint to the sectional ribs.
I had previously tested over five different brands of gold paint not satisfied with any. Then
Jim suggested a brand he had used before with great effect: Sheffield metallic paint.
|
|
|
|
|
It so
happened that Sheffield Bronze Paint Corporation, the producers of this paint, were only half
an hour drive from Cleveland and sold the product at a local hardware store about five minutes
away. We drove immediately and purchased a quart of Pale Gold, Gold Leaf finish. Then we tested
the paint and it was like magic! The solvent-base paint dried almost immediately leaving a gold finish
that looked like the real thing and not like paint. The only drawback was that the solvent in this
paint was xylene, a petrochemical that releases a very toxic vapor that required adequate protection.
But damn, the gold look good!
|
|
|
|
|
Now the laborious part of the job began: transferring the design to the surface. This was done
by painting each star and celestial body on a square on the surface grid matching the identical square
in the design grid. So any marking in a one-inch square in design was recreated to scale on the
corresponding one-foot square on the surface.
|
|
|

|
|
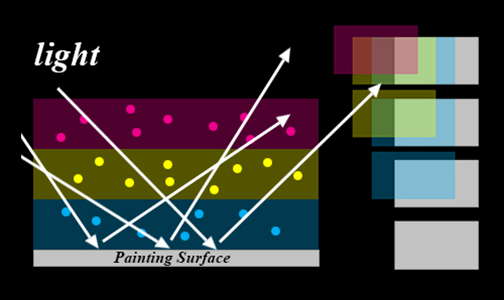
Like this chart illustrates, celestial bodies have different shapes.
Many artists represent them as perfect circles of light. But we had excellent
photographic references. We were going to get it right.
|
|
|
|
|
The design was done using fluid acrylics white paint. This coating was going to act as a light reflector
when we glazed color over them. Once a section was completed and the thin paint had dried, we dusted
off the charcoal grid line leaving behind a clean rendering. Acrylics being water-base meant that the paint
would dry fast. In fact, I use acrylic paint as underpaint is most of my oil paintings for the sake of speed. It works great.
|
|
|
|
|
The dome ribs were composed of two paralleled curved beams running vertically from the base of
the cupula to the crown's circle. the deep space background was extended to the area between the beams.
|
|
|
|
|
In this photograph I am wiping off the charcoal grid lines. My practice is to never use
regular lead pencils for markings on any of my mural jobs -with rare exceptions. Here's why.
Pencil leads are a mixture of clay and graphite. The clay is there to give rigidity to the lead;
it is what holds the form. The graphite is what leaves a mark. But graphite is an oily carbon-base
mineral that stains paints -or your fingers. Erazing pencil lines is too much of a chore.
|
|
|

|
|
We took our time making sure that we got every single star just right. Unlike paintings where you can make up
things as you go along -because no one will notice, I wanted to make sure that astronomers didn't feel cheated! I never
approach a painting as fiction, but as real-to-life, so I strive to get things right.
|
|
|

|
|
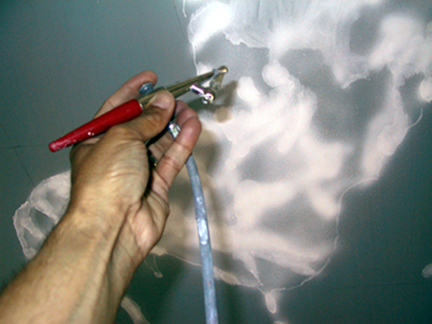
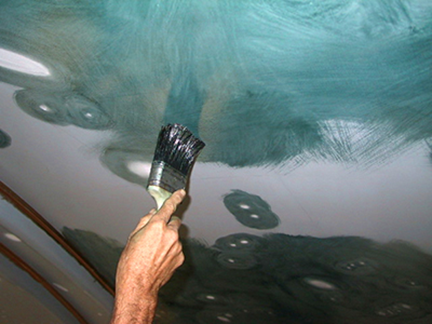
We hauled up my air compressor so I could airbrush gas clouds, blur some stars or shape others as required. The one thing
we were really careful about was to tie down the compressor to the scaffold. That's one heavy piece of equipment that could
create a lot of havoc if it fell from such heights.
|
|
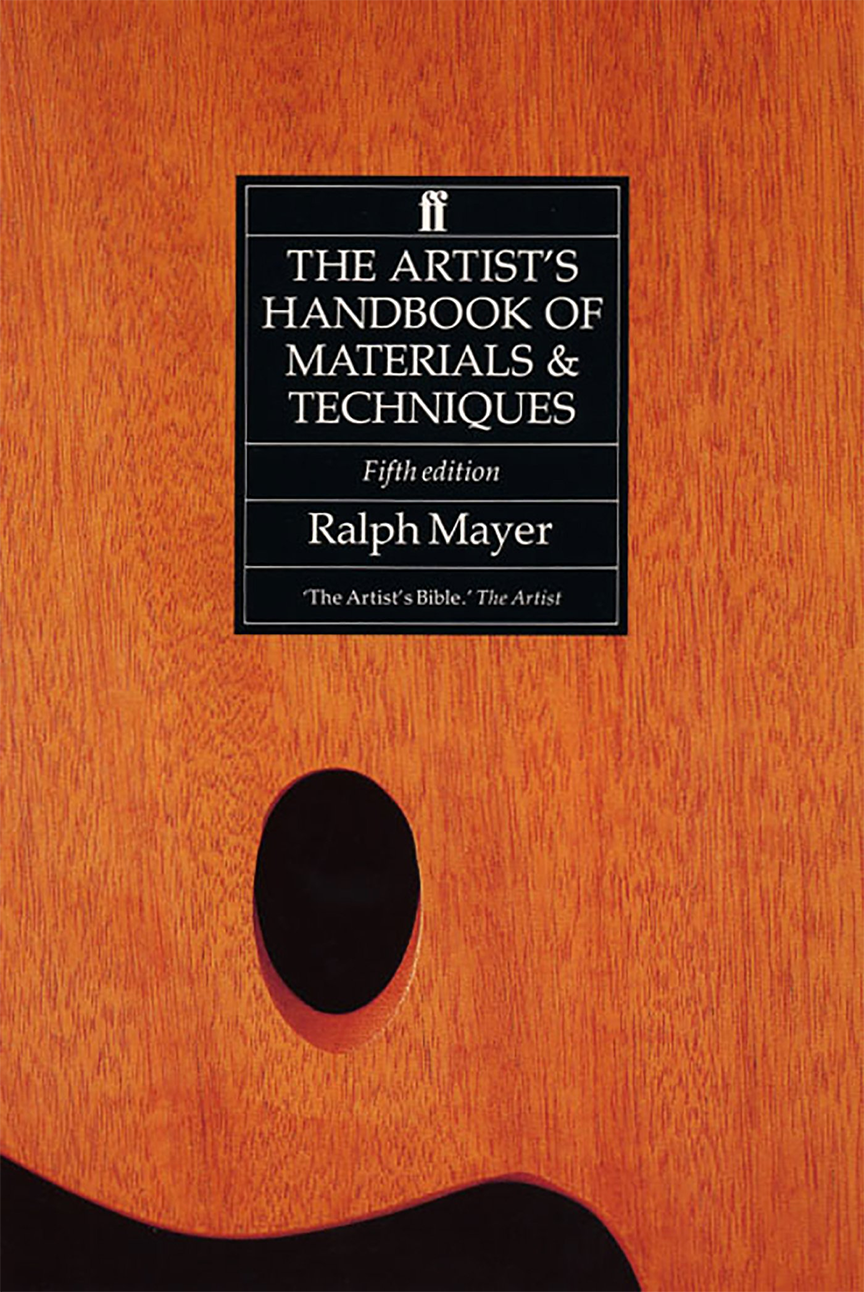
For any artist doing traditional painting and interested in traditional painting techniques, I highly recommend acquiring a
copy of The Artist's Handbook of Materials & Techniques, by Ralph Meyer. It was first published in 1940 and the latest
revision was (as of this writing) in 1991. I don't think you can call yourself a serious professional artist without studying
this book in detail. It is encyclopedic and scholarly, but the writing style is very accessible, the appendix and bibliography
extremely useful. Bottom line, to be truly professional and to become an expert on anything requires time and practice -and this
includes dedication to reading and learning.
|
|
|
I used a double action Paasche VL airbrush with a number 5 head (1.05 mm). After painting an area I used the airbrush without
the paint cup to blow air and speed up drying time. But I also used just air to push paint wet paint around for other effects. Since
this was the underpaint stage, I didn't have to worry about detailing at all. I would take care of that with the color glazes later on.
|
|
|
|
|
Paint mixes and tools like the Passche 3-oz glass bottles are kept in an acrylic cup-holder tray.
Our brush set for this phase of the painting were a combination of stiff pure hog bristle rounds and
filberts, about a dozen total.
|
|
|
|
|
Once a section was completed, we finished gilding the ribs with the first of two coats. It took between a day to a day and a half
to complete a section before rotating the scaffold to the next adjoining section.
|
|
|
|
|
Up-close on the tower you have to trust the process of transferring
the design with the grid method because you have no way of judging scale. You are too close to the painting surface and everything
seems a blurr. It's disorienting. So to get a bird's eye view of its entirety, you have to come down and look up. But if you do
your transfer one square at a time, everything will be just right.
|
|
|

|
|
Work progress was methodical and steady. This stage of the painting is
relatively easy for any experienced painter. But the one thing that always
deceives you, is the scale. It takes time to move things around and for you
to make your way around no matter how simple the job may be. You simply
can not rush this stage because the underpaint stage is really the blueprint
for the entire job.
|
|
|

|
|
Working the area near the crown was always the worse part because you had to tilt
your head all the way up. After a few minutes, that small brush begins to feel like
heavy lead. In this photograph Jim is holding the frame with the designs for that
section and carefully drawing the stars on the corresponding square on the grid. The
center circle of the cupula's crown was the last section to be completed. It was
the highest point of the cupola and to reach it we had to stand a small wooden platform.
It was here that we used our safety harnesses. At times, tilting your head back got
your dizzy and it felt like the ground was moving under you.
|
|
|
|
|
With the design transfer completed, half of the battle was won. Now came the fun
part: glazing layers of color.
|
|
I dusted my copy of "The Handbook" (also known as The Artist's Bible) and did research on driers to speed up the drying time of oils.
I settled for Cobalt Drier after testing other types, noting that I needed to order it from an online supplier since the local art
stores were not carrying it, probably because of its low product demand or because of its high toxicity. This was before Amazon.com
made things easier to find by diversifying into just about everything. So, I ended up buying several jars of the iodine looking
liquid from a supplier in Canada. It was money well spent.
|

|
|
From this point on we only used artist's oil paints. To create the dark rich color of
deep space, we would be applying three to four glazes of
thin semi-transparent paint. Our color mix was made of raw umber, Prussian
blue, and, in final glazes, a touch of Payne's gray.
I varied the mix for each glaze by altering the amount of the colors and the
quantity of medium used. Colors were measured by
squeezing a line of paint on a palette and then "cutting" the needed portion.
|
|
|

|
|
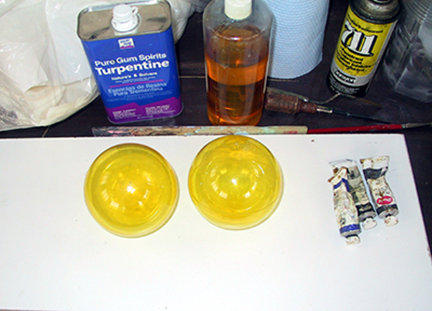
Our glazing medium was a mixture of refined linseed oil, turpentine, and Cobalt drier as our drying agent.
Measuring cups and eyedroppers were used for precision. For the final glazes, Cobalt drier
was eliminated in favor of small quantities of Damar varnish. Note: Cobart drier is very
toxic and harmful if not used properly. Our dark glazes were very thin so small amounts of this agent were
enough to effectively dry the paint from one day to the next.
|
|
|
|
|
I kept a Daily Log of our work progress. Also noted in the log were our mixing formulas
so they could be recreated as needed. For me good record keeping is a must on any project.
From time to time I like to look back and study them. You can learn a lot from them, like
how long it takes to do a particular task, what methods work or didn't work, the changing
cost of material and supplies, or what was your color palette for a particular job in case
you have to go back to it in the future (which has happened to me on several occasions).
|
|
|
|
|
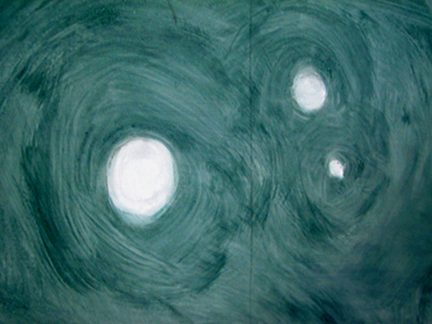
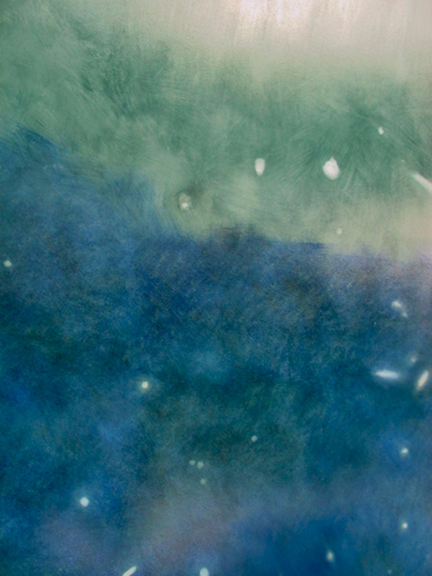
The first glaze we call a 'wash'. This is the initial application of a transparent paint
mix which has been diluted in mostly
solvent. For this first application the medium mix was heavier on turpentine and lighter on
linseed oil. Since Cobalt drier had also been added to the medium, we had about 20 minutes of
working time before the wash became tackier and unworkable. So you work loose and fast.
|
|
|
|
|
Outer Space is not a filtered vacuum of emptiness; it is filled with 'Cosmic Dust' (and gas), also
known as "stardust". Dust is widely present in the galaxy. It shifts form, it moves, it's ever changing.
Ambient radiation heats dust and re-emits radiation into the microwave band. It can be detected with
Infrared light and its signature captured in images. We used directional brushstrokes to represent
these dust patterns.
|
|
|
|
|
We painted around the larger galactic objects taking care to smooth their contours to simulate
their radiation glow. For hundreds of smaller objects we simply painted over for speed of execution.
Since the wash is very transparent, they were clearly visible. Then dabbed with
a cloth to clean off the glaze. This technique also smoothed the edges.
|
|
|
|
|
The application of the wash is very fluid. We made sure to work the brushstrokes in a
random pattern with subtle variations in value. This way we incorporated the one weakness
of this painting method into the design, namely, the blending of edges as the wash dried
and became unworkable. This is always a concern in large scale painting.
|
|
|
|
|
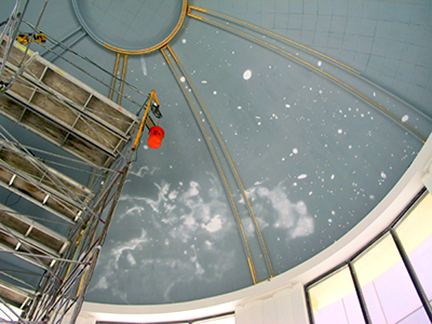
Mr. Cliff Woodard, a consultant with Justice Planning Associates, Inc., paying us a visit.
|
|
With research completed, I started working on the design. This was relatively easy since Mike Thomas had already decided
what the subject was going to be. At this point I want you to consider why this particular subject matter was chosen.
I never asked Mike about it. But one thing I know about working in public projects is that deciding on a subject matter
is like walking blind through a minefield. Since public funds are used, everyone has a say in the decision. No one seems
to know what they want, only what they don't want to see. Let me simplify the things you have to steer clear off: anything religious,
racial or political. In short, nothing that can be offensive to anyone -and this in a time when just about anything is
offensive to someone.
|
|
|
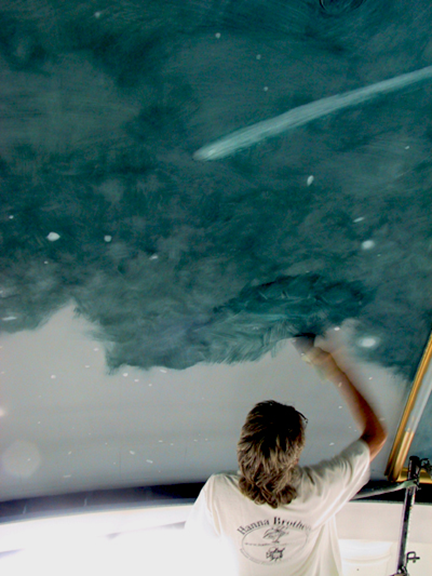
First section wash completed in one day.
|
|
|
|
|
The fans helped with the drying process and the dispersion of strong fumes. It also helped
to cool us down since, in spite of having air conditioning, it was really hot at the top.
|
|
|

|
|
We moved sequentially from one section to the next. The lighten area going from top to
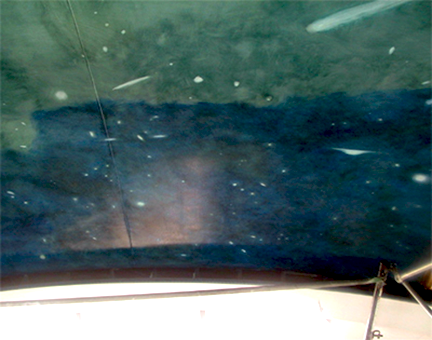
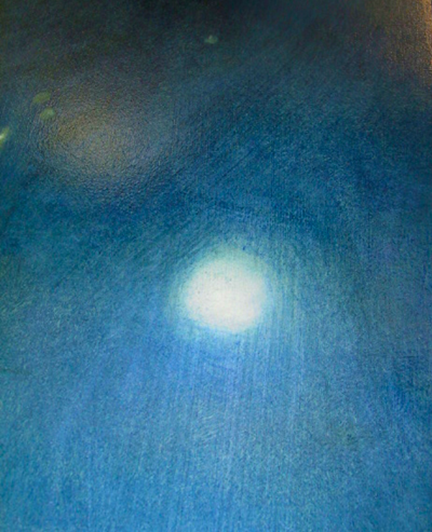
bottom on the right side from the center is actually glare.
|
|
|
|
|
In spite of being a "fast process", it takes time to work the surface. Sections heavy with objects took longer to complete.
|
|
|

|
|
The beauty of working in thin washes and glazes is that you can control tonal value by how thin you spread the paint. This was
ideal for working the gaseous form of the nebulae.
|
|
|
|
|
Since we had gilded the ribs in advance (or at least the sides), it was relatively easy to apply the wash
right up to the edge and then wipe any excess mix with a cloth.
|
|
|
|
|
I knew what the work would look like at
this stage, but still, I couldn't help being impressed by the abstract beauty of it all.
|
|
|
|
|
Getting off the platform to the side ladder took careful practice. After doing so a dozen times a day,
we became expert. The trick was not to look down and to always keep your hands on the holding bars.
|
|
This is way I hate working for "committees" as opposed to working for private individuals that know what they want and do not give a rat's ass
about what anyone else thinks about it. Sure, there are extreme limits to what you are willing to do or not to do, but for the most
part it is easier to design for this type of commissions. I think Mike was brilliant in selecting the subject matter because a view
of outer space and distant galaxies can be interpreted in so many ways that no one can find offense. You can be religious or an atheist;
green, blue or black; a moron or a scholar; color blind or color gifted; from the political left or the extreme right; of any age and
gender, and still find something in the subject that you can claim as your own. Genius!
|
|
|
First glaze completed; two more to go before applying two more finishing glazes. Total number of glazes: six.
The application process is pretty much the same for all except that with the finishing glazes
you take care to carefully model and blend the glaze around the thousands of objects in
deep space.
|
|
|
|
|
Most of the unpainted sections of the ribs now get gilded to complete the first of two coatings. A final section will get completed
once the tower is moved within reach at a later stage (you don't look forward to moving the heavy thing more than you have to).
|
|
In Adobe Photoshop I proceed to paint and manipulate images in several layers. For those of you not familiar with
Photoshop and its amazing possibilities, it is a graphics editor computer program to manipulate any digital image. But to help you visualize
how I use the program, imagine a stack of clear glass sheets -which Photoshop calls "layers". On each of the sheets I painted an object,
such as a galaxy, a star or a comet. The bottom sheet is your "background". My background was a black backdrop. So, by stacking one
glass sheet on top of the other you can see all the objects painted on each glass as one single composite image. And in Photoshop, not only
can I move these objects around in any direction, I can also make them smaller or larger with the press of a bottom. I can even change their
color with a click. That's the general idea for using Photoshop.
|
|
|
The mixing ratios for the next glaze, and the next, are recorded on the log. We continue to use the same colors and medium but the
proportions change. For the second glaze I will add more Prussian Blue to the mix and for the fourth one I will add more raw umber.
Eventually, by the time we apply the final two finish glazes, we would have achieve the deep, rich and more vibrant dark color of
deep space.
|
|
|
|
|
How to achieve the right glaze is a matter of calculation and experimentation. I would make tests by applying layers of
glaze one over the other to judge the results. Glazing is an additive process that works from light to dark, not the other
way around. But one of its main advantages is the value control it gives the artist.
|
|
Guided by photographic references, I first proceeded to create a background of stars in deep space. Celestial bodies are not only round,
but come in a multitude of shapes and colors. Some are single objects while others are made of clusters. The variety seem infinite
and rich and that's exactly what I wanted to reproduce in the mural. I painted and manipulated objects in over thirty layers until I
was satisfied with the final result. Then I "flattened" all these layers into a single one to create the background. This "star backdrop"
with thousands of stars was going to provide the deep-space setting for the mural over which a number of galaxies would float about.
|
|
|
I like to start application of a new glaze in the least noticeable place to judge the results. If adjustments are needed I simply
wipe off the wet glaze, make adjustments, and try again until I'm satisfied with the finish.
|
|
|
|
|
Glazes being semi-transparent, allow you to see the characteristics of the previous one.
This is what I wanted to happen in order to avoid the flat monochromatic look of a solid coat of paint. What's more, by
controlling the concentration of our second glaze -by applying it thinner or thicker in a particular area, you control how much of
the interesting features of the first glaze you want to keep or hide. It can really get interesting for the artist.
|
|
I believe I ended up painting eight or nine galaxies on different layers. However, at this stage I stopped creating the
final image. The person that now needed to take it there was its designer, and that was Mike Thomas. Mike's office was in
South Carolina, where he runs Justice Planning Associates (JPA). But either he or Mr. Cliff Woodard, court planner and
Criminal Justice Consultant at JPA, or both, would visit the building site on a regular basis to conduct business and
supervise work progress. So, I made arrangements with Mark to spend time with Mike to go over the design during his next visit.
|
|
|
Second glaze progression on the first section. Glazes give a rich
depth of field that makes a two-dimensional wall look more three-dimensional
and thus more true to the way our eyes perceive the work around us.
|
|
|
|
|
close up detail of the second glaze over the first one. As with the application, we apply the glaze over everything and then
bring back the objects by wiping if off with a soft cloth. The effect left behind is that of soft sparkles. There is no more need to use an
airbrush to achieve gradual smoothness. In a sense, the application of a glaze over another creates a third glaze because
the final result is the uniquely different child of the first two.
|
|
For this meeting I brought my laptop which I connected to a projector so the screen image could be seen on the wall in larger
scale. Then with Mike as my guide I proceeded to manipulate the galaxy layers until we settled for the four galaxies represented
in the mural. I think Mike had great fun selecting the galaxies and arranging them in a final composition. I was also very
happy with the result, making final adjustments to account for distortions that occur when you see an image on a curved surface
from below. The process took us no longer than an hour since all the preliminary painting had been done in advance.
|
|
|
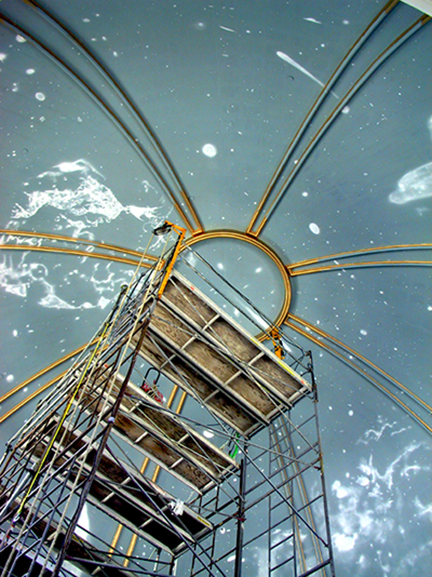
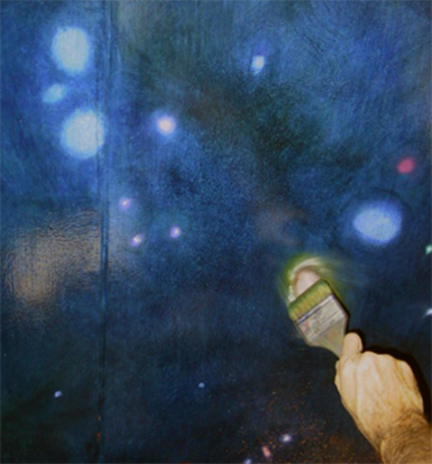
This photograph clearly illustrates our biggest problem: glare. At many times we are painting by instict and educated guess. You
really can't see a thing. At times wearing sun shades work but for the most part you simply have to wait until sunlight changes to
really see what you have done.
|
|
|
|
|
Once the second glaze dries, we began applying a dab of opaque paint over the stars to make them pop. Opaque paints
mean we take the color straight out of the tube without any delusion in medium. All that is required is a miniscule
amount to provide the desired tint. There is no buildup of paint at this stage, only a soft glow. Detailing will come
later.
|
|
At this point
I have to add a commentary that confuses a lot of people. And that is that "easel painters" paint for themselves, but muralists
paint for others. Be it a Madonna, a battle scene, a happy face or a Galaxy, we are told what to do. Our gift is to make it happen
and to please someone else while still getting our imprint into the work. This is a lot more difficult to achieve than doing your own
thing and only what you are good at. Because, since every commission is different in almost every possible way, you have to good at
everything! This is why muralists considered ourselves to be at the top of the food chain. Murals are called "the kings of art" and
we are the king makers. I think this is clear enough.
|
|
|
The color of a star, as
indicated by our reference images of deep space, depended mostly on their surface temperature and their distance from us. Therefore,
stars are multicolored of at least the colors that the human eye can perceive -so greens and purples are not among them. The hotter
a star is, the bluer or white the look. Warmer ones tend to be the reds with yellow ones in between.
|
|
|
|
|
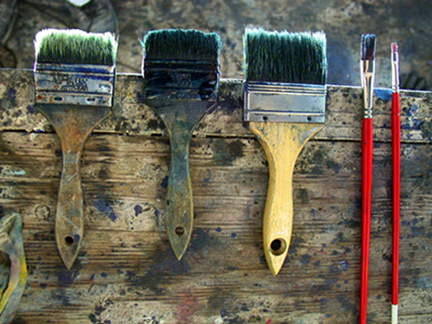
We used inexpensive two and three-inch brushes to apply the initial layers of glaze.
To soften and blend, we used four-inch brushes. Small brushes of synthetic bristles were
used to dab colors unto smaller size stars. Our choice of inexpensive brushes is base on
the fact they are sufficient to do the job at this stage of the painting and because applying
these initial glazes is very harsh on the brushes. By the end of the day friction has eaten
away between a quarter to half an inch of bristles.
|
|
|
|
|
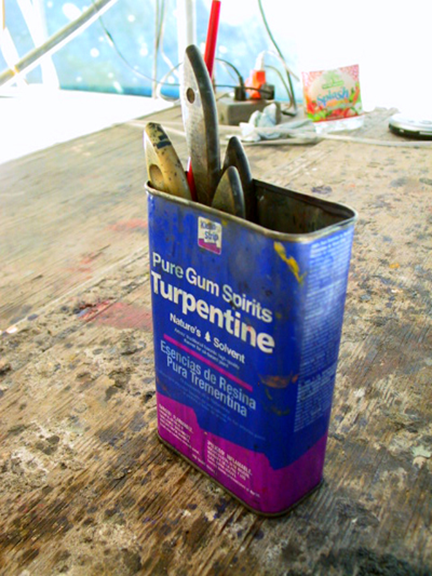
When not in use, dirty brushes are kept inside a can with solvent. There is a wire grill about an
inch from the bottom so the bristles don't rest on waste. Solvent level is kept about an inch above
the grill so the fluid does not go into the brush ferrule. All brushes are cleaned and combed by the
end of the day.
|
|
|
|
|
At this stage of the project, I turned my attention to coloring the nebulae.
Painting over dry glaze is very easy. You simply tint areas of color to the desired intensity.
If something does not suit you, all you need to do is wipe the paint away. To make my colors
flow I used a clear medium mix with a few drops of drier. I needed the colors to dry within
a day so that I could continue adding additional layers of tint. The more layers I added,
the more vibrant colors became.
|
|
|

|
|
Most of the time, I could not see what I was doing because of the glare. Unlike small objects,
the four nebulae in the composition covered a lot of surface. Glare is worse on wet paint.
Fortunately, Jim could take care of the smaller objects so that I could dedicate more time
on the nebulae. This is one of the great advantages of having good painters on the job.
|
|
With the final image completed, I could now begin to plan the logistics for doing the mural. I started by making a list of colors for my
palette, then estimating the amounts of paint needed, same for materials, tools, equipment and so forth. Next, I called suppliers,
visited local stores to make purchases, and finally created a timetable to begin the task. Lastly, I created individualized images
of the mural design, a file of visual references, gridded diagrams for transferring the design to the painting surface, and an
assortment of lists, notes and documents, and burned/recorded everything into a compact disc (this was before USB flash drives became the norm).
Finally I took CD to a nearby fast-copy service to make large size color copies of the material. Then all the paper printouts were secured
in a binder with became the project's "bible". With this I was good to go. Well, almost.
|
|
|
I mixed my colors on a disposable paper palette by adding a small amount of medium. I favour disposable
paper palettes because it simplifies cleaup. When you are done, you simply rip off and discard the paper
and immediately you are left with a clean palette to begin again.
|
|
|
|
|
Work progression. As the glaze cures, it becomes more transparent. So the color will change its intensity
as it dries. They will also look somewhat dull, some more than others depending on the type of paint pigment
contained in a particular color. The vibrancy of oil colors is brought back when you apply a finishing varnish
after the painting is completed.
|
|
|
|
|
Work progression into the next panel...
|
|
|
|
|
...and the next.
|
|
Finding Another Artist to Assist
I needed help to paint the mural. Normally I worked alone but for a job of this scale I need more hands, especially if I was
going to finish on time. Let me be clear, I did not need an assistant. An artist assistant can perform many tasks and even
apply paint. But you need to train them to paint in your own style so they can paint independently from you without looking
over their shoulder. I have trained many assistants and I know from experience that not everyone is good enough to do so. It
takes know-how and experience gained by working in many projects. I needed a trained artist/painter/muralist.
|

|
|
Slowly but surely the design begins to emerge.
|
|
|
|
|
At this stage, everything is still in "underpaint". Just smooth color tints which will be reworked and modeled in detail later on.
|
|
|
|
|
Moving on to the final section.
|
|
There are many artists that can paint but this does not make a muralist. To be a muralist you have to endure a lot of physical discomfort.
First, you have to work on a large scale, you can not be afraid of heights, you need endurance to paint for long hours in uncomfortable positions,
and you need to follow a rigid plan. Murals are not the place to get "inspired". The design is "locked" before you begin
painting and you do not deviate from the methodical plan. This requires discipline and many artists do not have it.
|
|
|
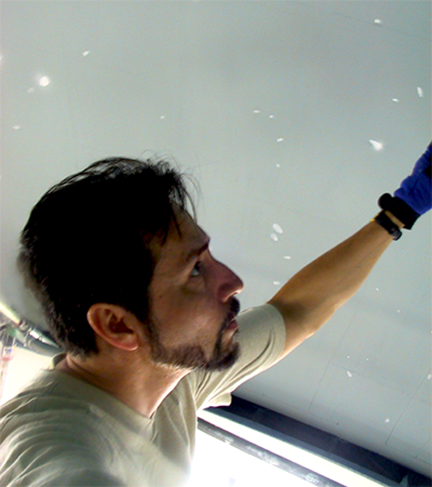
My lovely wife Nancy came in to inspect.
|
|
|
|
|
Naturally, she had to go up for a closer look.
|
|
|
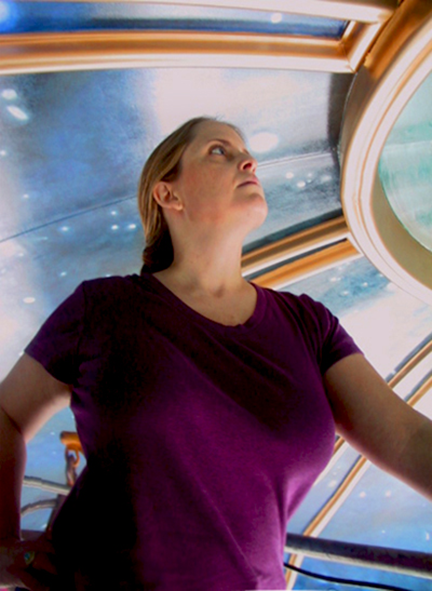
|
|
She is my greatest fan and my worse critic.
|
|
|
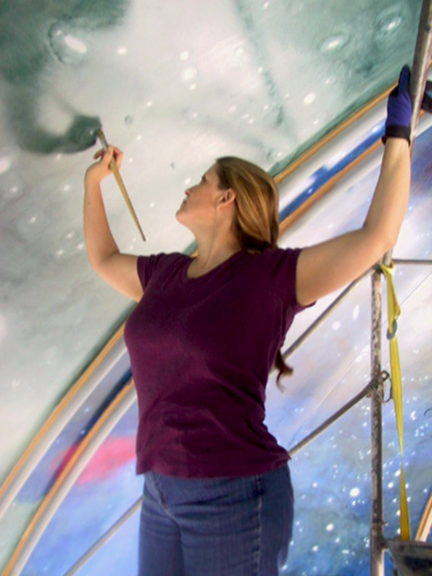
|
|
Upon inspection, she decided to "improve" on a few things.
|
|
What's more, you have to spend a lot of time with other artists which, in case this is news to you, can be temperamental or
just plain quirky/eccentric/unconventional. Luckily most muralist I have known are more like me: business people that paint.
That's our mindset. This results in a matter-of-fact, no-nonsense way of working. We will do whatever it takes to get the
job done in the least amount of time without sacrificing quality. We have very little time for divas, prima donnas, or
"artists" who are not first and foremost "painters". And finally, muralists need to trust each other to watch their backs.
|
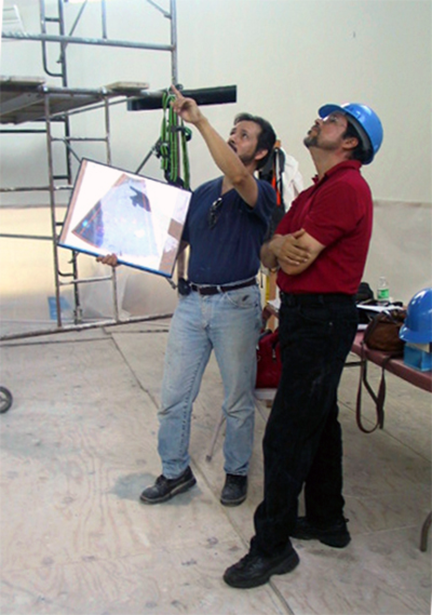
|
|
My brother Ricky hates heights as much I hate water deeper than four feet.
|
|
|

|
|
But challenged by Nancy's teasing, he had to "man-up". Puerto Rican honor was at stake.
|
|
|
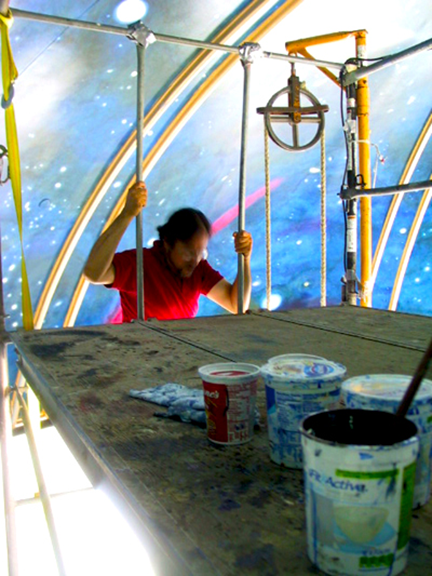
|
|
For those not used to working on scaffolds, climbing up can be a frightening experience.
|
|
|

|
|
Once you make it to the top -and your heart gets back to normal, you feel wonderfully exhilarated.
|
|
|
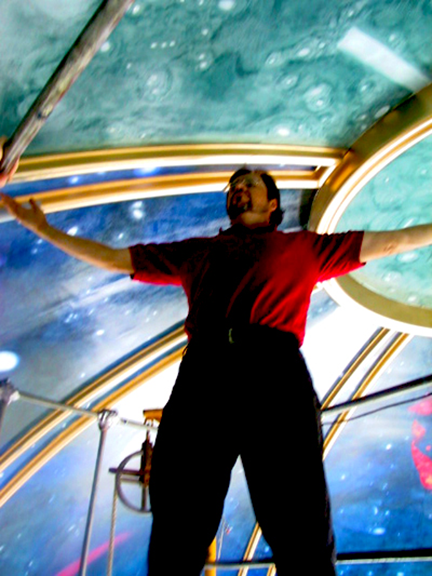
|
|
The king of the universe!
|
|
|
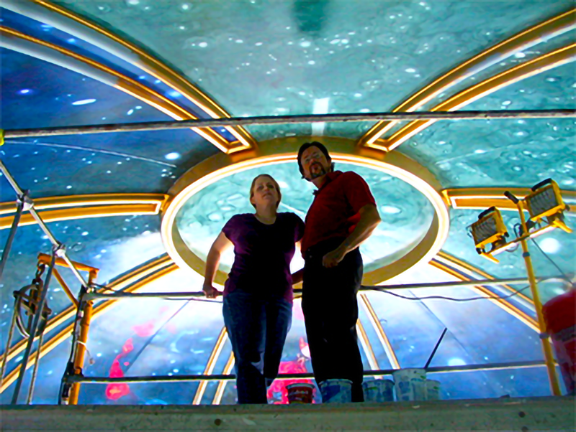
|
|
A fantastic shot to commemorate the moment. After all, how many people can claim to have touched the cupola's crown?
|
|
|
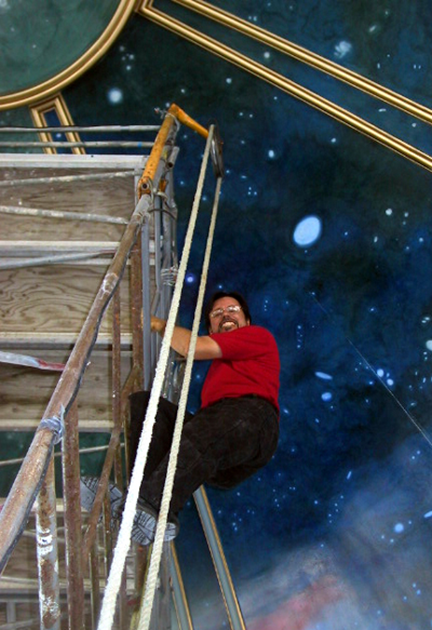
|
|
Having saved the honor of all Puerto Rican men, the climb down is a much happier event.
|
|
|
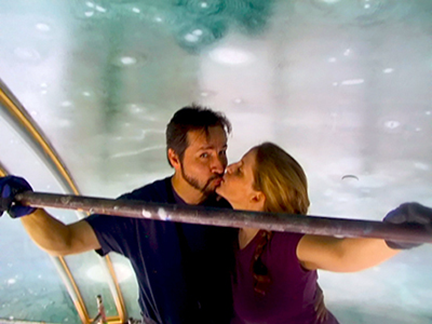
|
|
What can I say? Muralists are babe-magnets!
|
|
For the most part, we do not paint in comfortable studios, away from curious eyes. We paint at a work site with all the dangers and hostile environments
that come with the territory. This is why we never tend to alone unless you are working in a safe environment. But a work site
that also happens to be a construction site is dirty, noisy, distracting and at times hazardous. Now, place yourself on a scaffolding many
feet above the ground and you begin to see how things get more complicated.
|
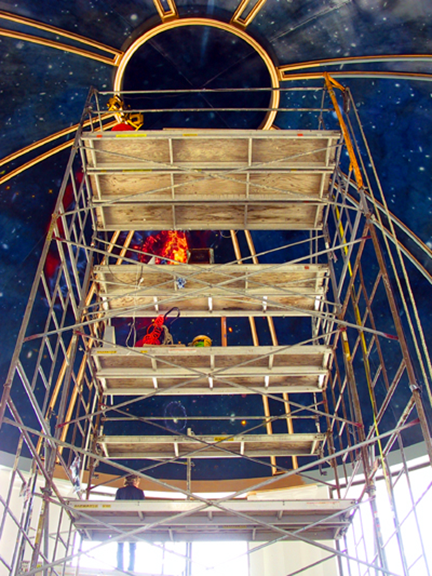
|
|
The supernova was the most complex object in the mural. I began applying colors
layers right at the beginning of the glazing stage. By the end of the project, I
was still working on it. It would eventually take over 20 glazes to complete it
and many long hours of work.
|
|
|
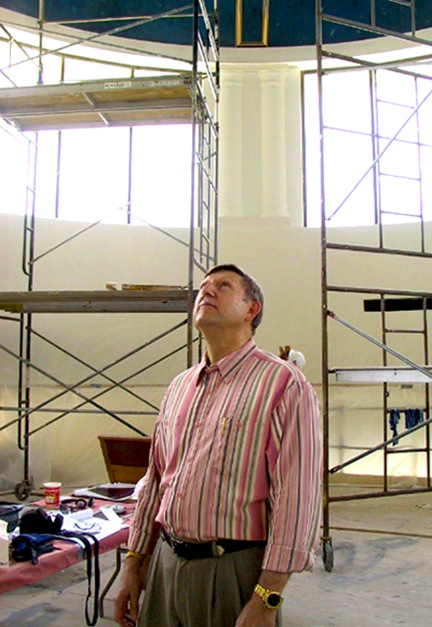
|
|
Michael Thomas, founder and President of Justice Planning Associates, Inc.
(JPA), during his first visit to the penthouse. Mike was also the designer
of this construction project and I had worked with him on realizing the final
design for the mural.
|
|
|
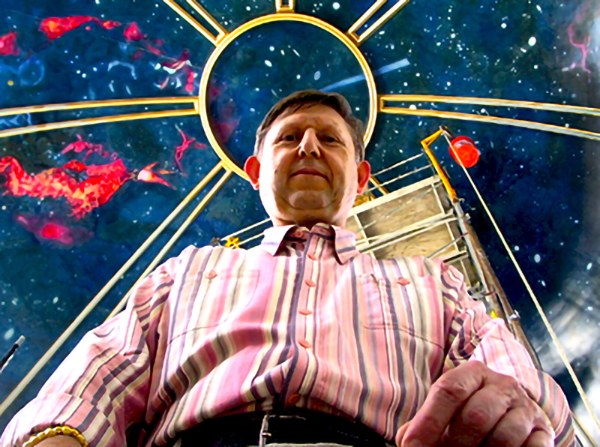
|
|
Mike and his brain child.
|
|
Painting murals may seem a glamorous profession to some or just plain fun. But to us it is very hard and exhausting work.
We are not thinking: - "What a great artist I am." We are thinking: - "I can't wait to finish and get the hell out of here!"
At times we may be pleasantly surprised with a particular project, but for the most part, this is an exception to the norm. This is why
I prefer not to do more than one large project a year. There are easier ways to make a living. But to balance that, mural painting is
never boring. The public is always with you and you are always the star of the show. Now all I need to start this project with both
feet on the ground was another star.
|

|
|
The next step in the painting was to build up detail. So at all times we had photographic references nearby.
|
|
|
|
|
Our next glaze had a heavier concentration of raw umber which, once applied over the dominant
Prussian Blue tint of the previous glaze, would give us a nice rich dark tone that was our goal.
|
|
It was my wife Nancy who managed to solve my problem. In preparation for our wedding she had hired a personal trainer to help her
look her best and they had become good friends. When Nancy told her what I was up to, she mentioned that she had a fellow Buddhist
friend who was a decorative artist and might be available. His name was James E. Todd and his business
was called Dances with Walls Decorative and Theme Artistry (www.danceswithwalls.com). This was promising.
James had been in business for over thirty years and decorative and faux finishes were pretty much a staple of mural painting.
|
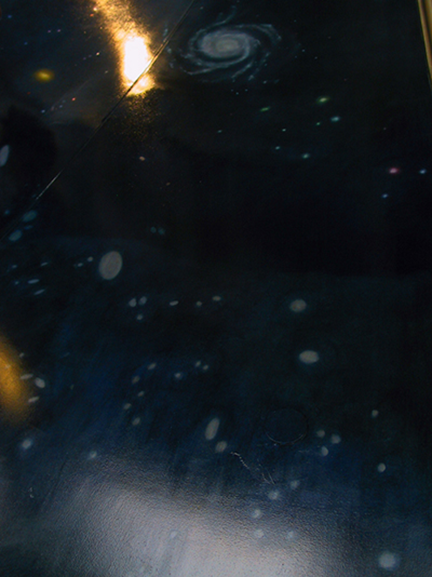
|
|
Same as before, we applied the glaze over most everything...
|
|
|
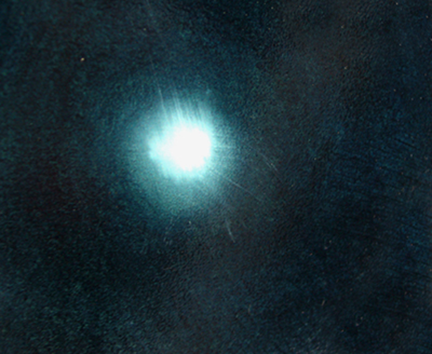
|
|
...and then we wiped off the spots with stars. The final effect really made the stars looked bright even before we build them up
with more opaque color.
|
|
What's more, he had been a Hollywood set painter working in several A-list films. I love films! What were the chances of finding someone with
that kind of training who could entertain you with stories of your favorite passion? I immediately asked Nancy to invite him to dinner and that's
how we finally met. "Jim" was great to get along with. Not only was he a fabulous story teller, but also a rock-n-roll encyclopedia.
He loved classic rock so much that he named his son Dylan (as in Bod Dylan). We ended up spending a great evening in conversation, enjoying
after-dinner coffee and desert while watching the Cleveland skyline across Lake Erie from our condo's balcony.
|
|
|
Our one and only mishap -which we quickly cleaned. While pouring a glaze mix from a
storage container into a hand-cup, the cup fell on the platform and spattered the drum
windows. A clean cloth moist with solvent took care of the splatter in no time. For
the most part, we only keep on the platform small amounts of paint and medium necessary
for a day's work. This helps minimize mishaps like this one.
|
|
|
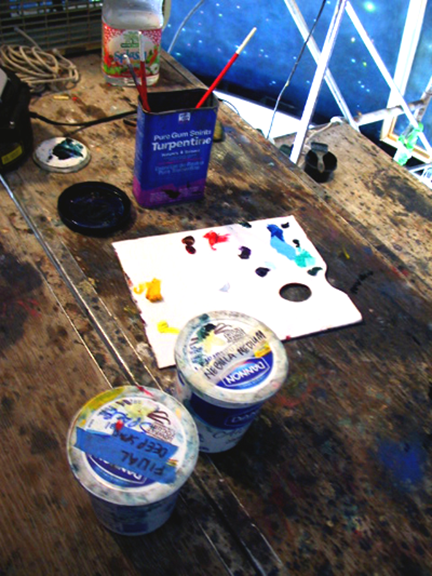
|
|
With our glaze mixes sealed in their plastic containers, small amounts of paint were
placed on the paint palette to begin modelling objects. Modelling (or modeling) is
what I call giving final form to object you are working on. You model by applying
highlights and shadows to bring out the illusion of three-dimensional form. But modelling
can also be moving a color around to achieve a final shape. It all the depends on what
you are working on.
|
|
|
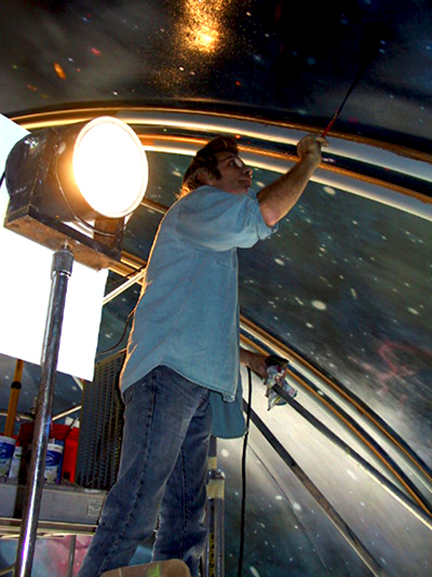
|
|
Modeling objects -stars, nebulae, comets, etc., is time consuming especially considering that we had
thousands to do. Fortunately, there is much repetition so get pretty good at painting them. On overcast days,
we used my two spotlights, Cindy and Mindy, to help illuminate the work area.
|
|
There were however three things that could prove a hindrance to my joy. One was the fact that we were not getting Hollywood money.
The other one was that Jim was not experienced with Artist's Oils. And the last thing was that Jim was a few years older than me.
At fifty-one I was still as fit as a forty-year-old, and Jim, with his trim and wiry frame also look fit. But was he fit enough and
willing to climb scaffolds several times a day?
|
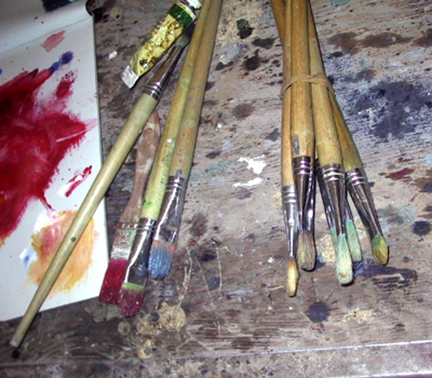
|
|
Most of the object modeling was done with bristle brushes. For blending and
softening edges we used synthetic fan brushes or our fingertips.
|
|
|

|
|
You begin modelling by glazing a tint of the desired color for a star and then applying
opaque paint to shape it. Some will get glazed several times depending on how vibrant we want
them to be. Variations in tint intensity made objects appear closer or further away.
|
|
|
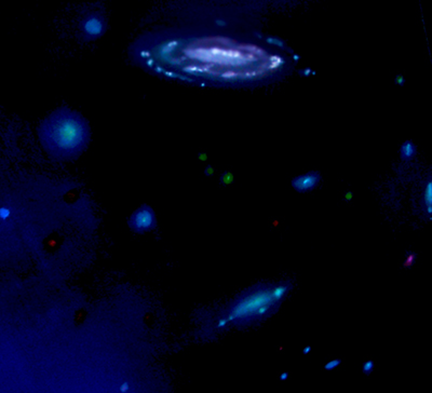
|
|
Since objects needed to be seen from 50 feet down, we exaggerate the intensity of the whites.
|
|
My timing was good because at the moment Jim was not working in any project. Same as me and with all painters in Cleveland at the time,
things were slow. Unlike me, Jim really loved to paint, so he didn't mind a pay cut in the short term to keep busy. And, he was excited
about the prospects of doing a dome mural. As to his lack of experience with oils, that didn’t bother me too much because any painter that
does faux texture is already familiar with the techniques. And once on the job, Jim proved to be a natural and an incredible fast learner.
|
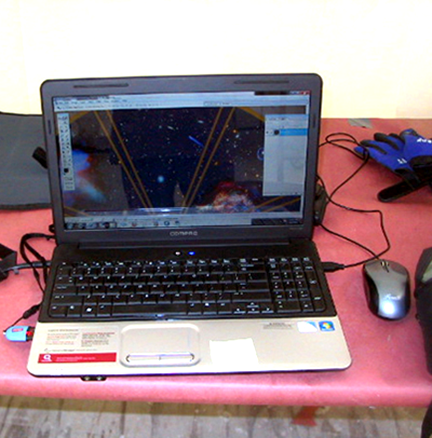
|
|
I used my laptop to zoom in to study small details. Since the images are
illuminated from the light radiating from the screen, the objects look more
natural than viewing them in the printed reference material.
|
|
|
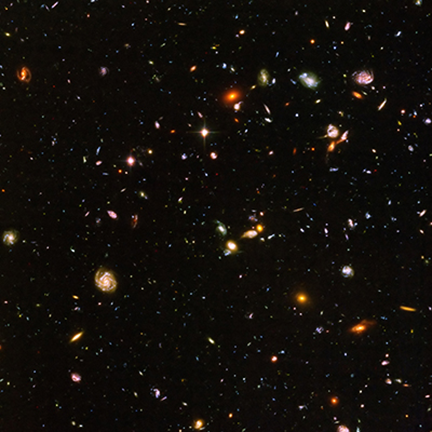
|
|
Reference image of deep space taken by the Hubble Space Telescope.
|
|
|
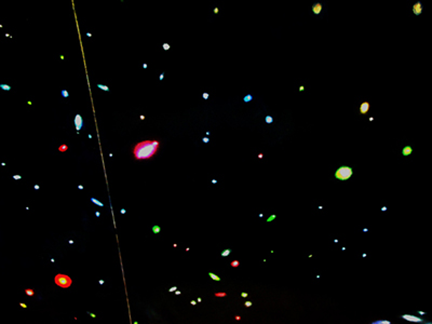
|
|
Computer image of Hubble image after applying a filter in Adobe Photoshop to show
simplified color of the stars. From this image we build our paint color palette.
|
|
|

|
|
Detail of finished painting showing deep space. While we had
to saturate colors more to account for viewing distance, we managed to
closely replicate objects as seen on the Hubble images.
|
|
Now, as to the physical concern, that would have to wait until we did a site visit. We did so about a week later and the place was
humming with activity. We got our gear (safety helmets and badges) and headed up the scaffold to the main platform. During the weeks
I had been doing preparations, the plasterers and painters have been getting the cupola ready for us. I had instructed them to paint
it with several coatings of a dark blue primer and the job was almost done. Only the circle at the crown of the cupola needed finishing.
|
|
|
As work progresses, one day blurs into another. You start your day by
continuing where you left off the day before. By then the last glaze is
dry and you could add more layers of color. At all times you are painting
at arm's reach from the cupola's surface, too close to be able to take in a
large size object like a nebula. But having already modeled the form in the
under-painting means that you never have to guess where you are in relation to
the object. All your concentration can then be dedicated to coloring.
|
|
|

|
|
There was no way to move the scaffolding for a quick peak to check your work
progress without spending a lot of effort (or getting a hernia). Moving this
monster was almost an impossibility for the two of us. Eventually the scaffolding
would be moved to work at another part of the mural and then you could gauge your
progress for the day and take note of what needed to be done.
|
|
|
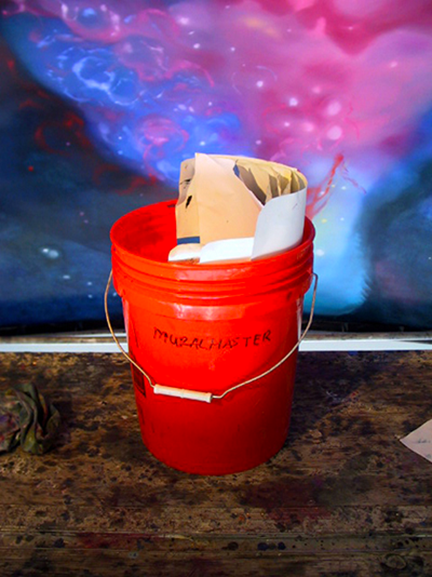
|
|
All our visual references and design masters were kept inside a bucket until
needed. It save you the time and effort of having to climb down the scaffold
and up again, especially when your arms are already tire from painting.
|
|
|
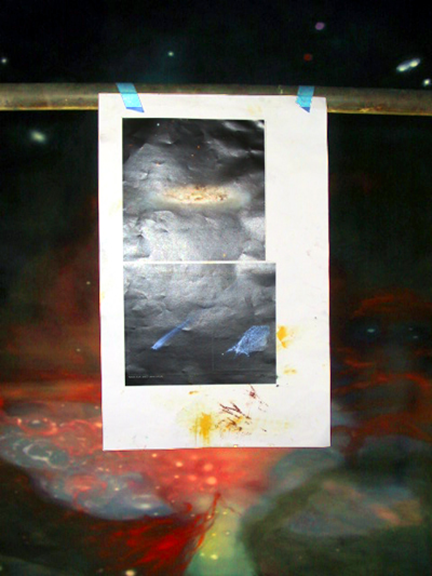
|
|
We taped reference images anywhere that was convenient except on the painting itself.
|
|
There was also a gathering of workers taking a look at the finished product. Among them the site engineer and several supervisors.
Also present was Scott Marous Jr. -Scotty, the company official in charge of the project. All of them, great guys who went out of their
way to get us whatever we needed to get the job done. I introduced Jim to the group and then asked him to go up and take a looksee at
the tower. As he began to climb one of the guys leaned closer and asked me: - "Is he the other artist?" To which I answer without taking
my eyes off Jim: - "If he makes it to the top." Well, he did! Thus reassured, were ready to rock-n-roll!
|
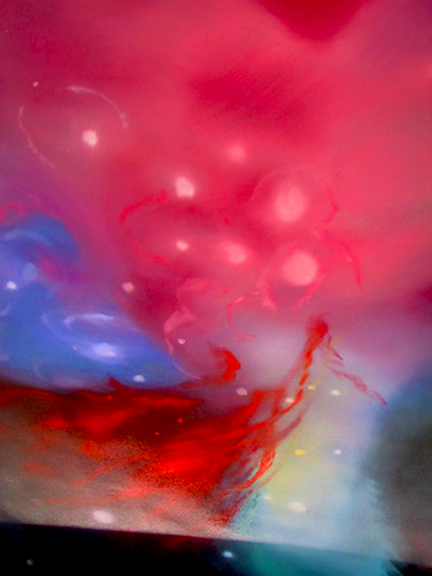
|
|
Painting in layers makes some colors appear to float over others.
|
|
|
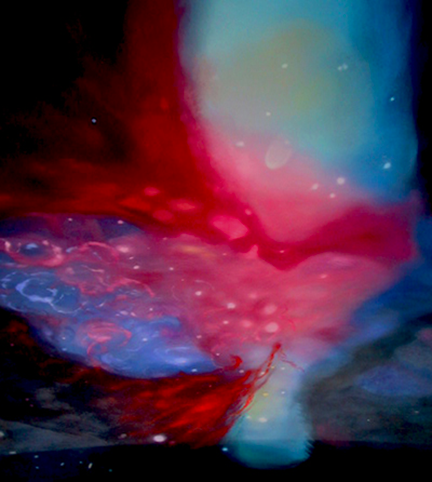
|
|
With every layer you model form and add new elements until the object is completed.
Because of the transparency of the tints, background lights show through. Your final layers
are color accents. These use very little medium and more opaque paint.
|
|
|
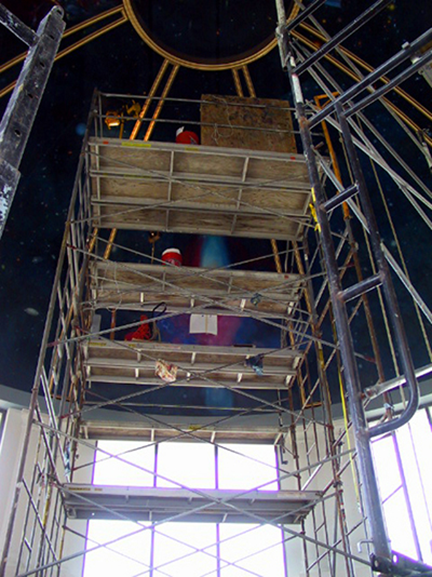
|
|
We are now working later into the day. Glare diminishes as the sun begins to set.
At this time we rely on our lamps for illumination. With better light control, we
can work color accents and details.
|
|
|
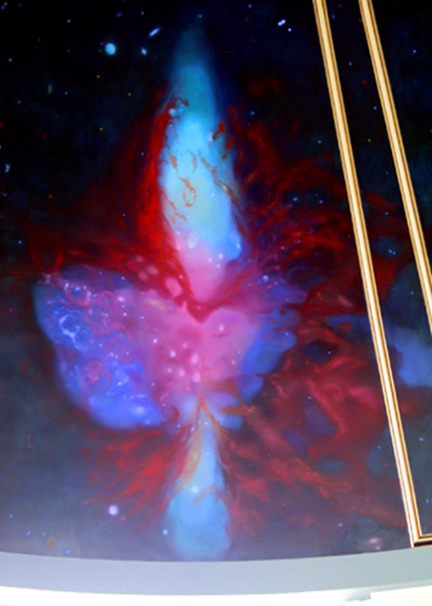
|
|
Glare can whitewash the most intense colors.
|
|
|
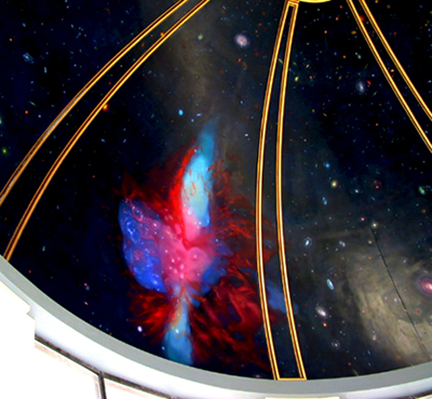
|
|
This nebula is done but I had to wait for the sun to move and the glare to go away in order to see it.
|
|
|
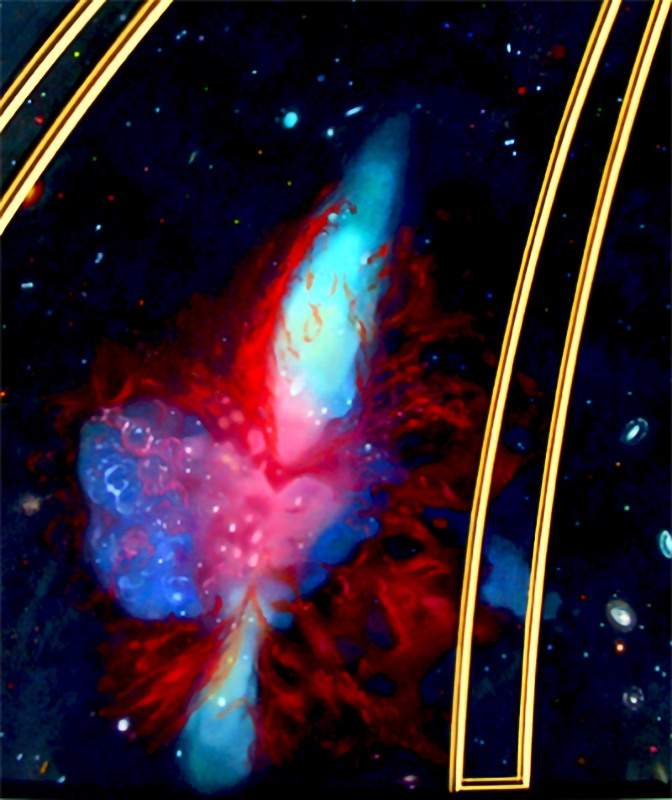
|
|
M82 Galaxy, completed.
|
|
The First Steps
How do you begin painting a large mural without feeling overwhelmed by its scale? This is one
of the questions I'm always asked. People seeing a finished mural for the first time get such a
visual overload that their minds finding hard to focus at first glance. They have what I call a
"Wow" factor. That first impression that is… alien to us. I never have that wow factor because
I have experienced the slow growth of a painting from birth to fruition. I have taken it all in
small increments that are easily digestible by my senses.
|
|
|
As work progressed at the penthouse, so did the construction work
at the hall below us. The on and off noise from the metal saw and was
so excruciating that we felt like being trapped inside a giant ringing bell.
This weekly torture was absolutely disorienting.
|
|
|
|
|
No matter how much I tried, I could not block the noise. When we
reached our endurance limits, our only recourse was to stop and
head for the nearest coffee bar.
|
|
My wow factor are more private moments; little pauses when I step back to appreciate a day's work, or a
finished detail. They are basically a look and a smile, maybe a slow breath, a pause for reflection,
and then the moment is gone. You move on, and as the days pass by, and you collect more sighs, and then it's
over. You don't fall in love with it. You just turn your back and walk away. You have to let go because if
you fall in love with your own work, you will never finish it; you will never grow. This is perhaps my biggest
strength as an artist: I never fall in love with my work. Once I'm done with a painting, I never look back.
|
|
|
Listening to music and audio books helped block the noise level.
|
|
|

|
|
Orion Nebula, in progress.
|
|
So, what's the first of the many steps in painting a mural? The easiest one all: washing the surface to
remove grime. Grime -dirt that is ingrained on the surface to be painted, is the enemy of a painting.
Paint on a brush needs to grab to the surface to achieve a strong bond. Dust, grease, dirt and other
impurities create an unstable barrier that do not allow for this strong bond to take place. These pollutants
need to be removed before you start working the wall. The cupola had been freshly primed and one would
expect its surface to be cleaned.
And sure enough, it was relatively clean of grime but it already had a coating of dust.
Remember that at this early stage the place was still a construction site and the air was
full of dust particles. At this time we also sanded smooth the occasional rough surface patch.
|
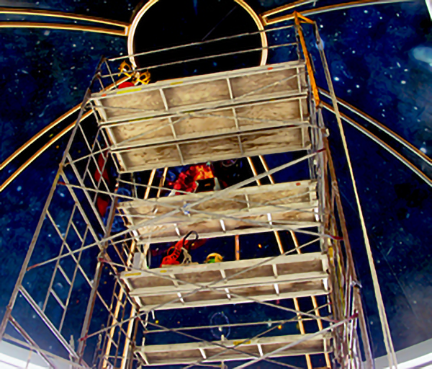
|
|
The width of the supernova was wider than my reach from the scaffolding.
So I usually worked on one side for as long as it took and then move the
scaffolding a few feet to work on the other side. The height of the
scaffolding was not enough to reach the center ring.
So we had a wooden platform constructed for us to stand on it. This was
one of those occasions when I made sure my harness was on and connected
to a safety line.
|
|
|

|
|
When you are painting with the head tilted back, blood
does not circulate freely to your brain and you get dizzy; some artist
experience temporary blindness.
This happened to the great Michelangelo while painting the ceiling of
the Sistine Chapel and it also happened to me while painting the ceiling
of the Gordon Square Theatre. So what you do to avoid it is paint for five
minutes and then rest for five before painting again.
|
|
There were several air conditioning vents on the drum of the dome
moving particles around the vault with dust settling on surfaces. So, we prepared a solution
of water and tsp (Trisodium Phosphate) cleanser to scrub surfaces and then we rinsed with plenty
of clear water to remove the residue. It is very important that no cleanser or detergents
containing wax (like dish soaps) is used as a cleanser. On some jobs I have used a solution
of vinegar and baking soda. Both tsp and baking soda cause a minor abrasion on previously painted
surfaces that leave a good "tooth" for new coatings of paint to grab on. A couple of
fans helped circulate air near the crown of the cupola. This sped drying times but their
primary purpose was to keep us cool. Keep in mind that hot air rises to the top and, with
nowhere to go, it stays there raising temperatures.
|
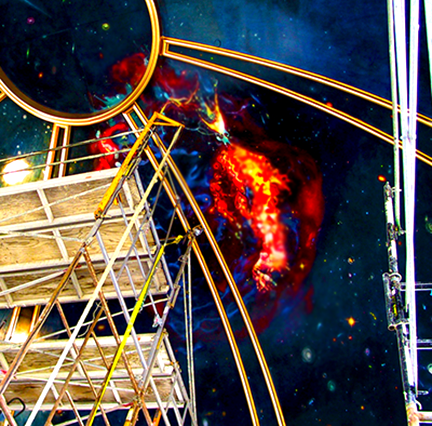
|
|
After modeling and tinting objects in deep space, we added additional
dark glazes around them. However, some areas were left without further
work and other we darkened more. This practice of making variations in
the dark tone made small objects appear to shimmer and at the same time
recreate the clouds of stardust floating in space. Many of the "smaller"
objects are over six inches in diameter. Upon close inspection you can
see beautifully modeled distant galaxies of all shapes.
|
|
|
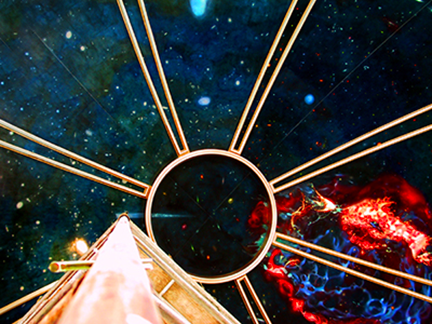
|
|
While a section waits to dry, the scaffolding is moved around to work on other sections.
|
|
Priming and Transferring the Design
Before continuing the narrative, l will explain to the reader not familiar with "scaffolds" what they are and how they work.
A scaffold is simply a raised platform that allows workers such as painters or builders to safely reach at a height above
ground or floor level. This platform is temporary and movable. They are supported by a framework of wood or pipes that can be
arranged in many configurations. Some are equipped with casters to allow movement without having to dismantle and reassemble the
framework. Our scaffolding system consisted of a large platform reaching up to just below the dome’s drum, and several "towers"
(stacking of tubular structures to support one platform) on the of the first platform. It was both impressive and intimidating.
|

|
|
A monster glare.
|
|
|
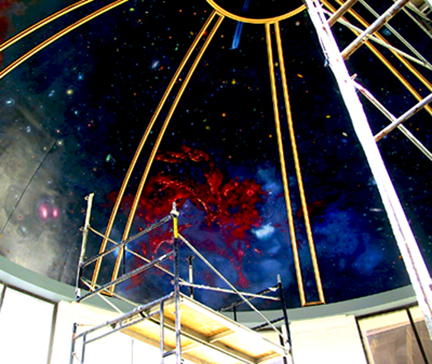
|
|
I discovered that in late summer, around 3 pm or just before dusk, one can
really have some fabulous viewings. For now, we waited for the glare to move.
|
|
|
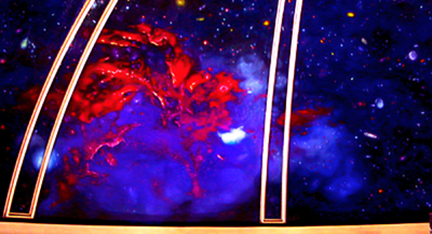
|
|
During one of his visits, Mike Thomas observed that the gas cloud on this object did not look as violet
as in the Hubble reference image. He was right. I had applied the appropriate tint but as the thin glaze
dried and became transparent, the strong blue under-glaze kept coming through. This however was an easy
problem to correct. All I had to do was paint a stronger red-violet glaze over it using less medium. By the
end of the day Mike got to see the transformation. That's the beauty of painting in glaze tints.
|
|
Upon inspection I did not like the initial arrangement. There were three towers with casters
at the top platform. As you may surmise from the photos in this page, the higher a tower rises
the heavier it gets. They were on top of the first platform which consists of sheets of thick
plywood. And while plywood is very strong it also flexes with the force of heavy weight. So, the
platforms swayed a bit. This is not so noticeable at ground level but you can really tell at the top.
This is dangerous for a muralist painting a ceiling or a dome, because once engrossed in the job,
a slight movement can make you lose your balance.
|
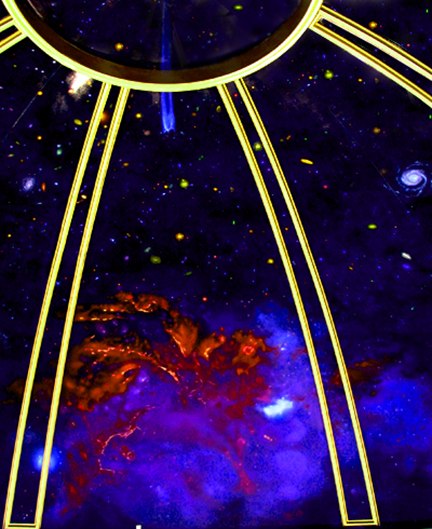
|
|
Milky Way Galactic Center showing ionized gas, completed.
|
|
|
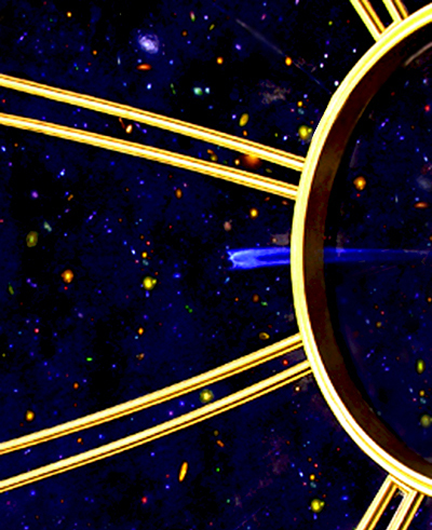
|
|
Detail of the comet.
|
|
|

|
|
On the right day, deep space objects look amazing.
|
|
In addition, the tower's platform was not large enough for our needs. The last thing we wanted was to
constantly move the heavy contractions all over the place. And lastly, the cupola being the inside of an
upside-down half sphere, meant that it had height variations. For us to paint we needed to reach a minimum of four height
levels. I brought the issue to the construction supervisor and he in turn brought the workmen in charge of
erecting the scaffolding system. They asked me what I needed, I made a sketch, and next morning the new
configuration was in place! These guys really know their stuff.
|
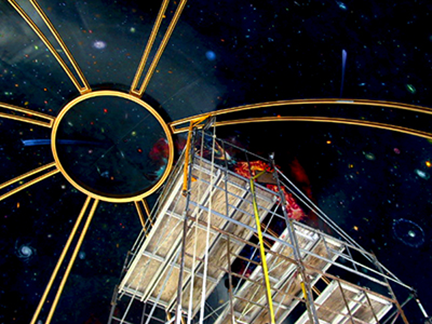
|
|
In time we completed another rotation and ended up where we started.
By then the paint in that section had dried and was ready to receive
more glazes. Once done, the cycle was repeated.
|
|
|
|
|
When I paint, I tend to think in numbers. It is as if my mind were assigning numeric
values to color tones for me to make judgment calls by comparing the value of one to
another. -"Is this red as intense as the blue? Is the orange next to the green raising
the vibrancy of the violet? Okay, that's a six and a nine so I should tone done the value of
the nine or raise the value of the six. But, if I place this four next to the six it may bring
the intensity of the six and make it look like a nine -piece of cake!" Yes I now, I can
drive you mad. But here's the clincher: -in school, except for geometry, I hated math!
|
|
Now we had a "step-configuration" that extended from the crown of the cupola to the edge along the drum.
It was perfect. A series of solid platform where we could reach the entirety of the surface. Naturally,
it was even heavier than the separate towers but it had more rigidity. It took effort, but Jim and I were
able to rotate them around the dome to get the job done. We had other issues concerning movement and placement,
and how to get our supplies up the tower, but these issues and their solutions are I explained in the commentary
next to relevant photographs.
|
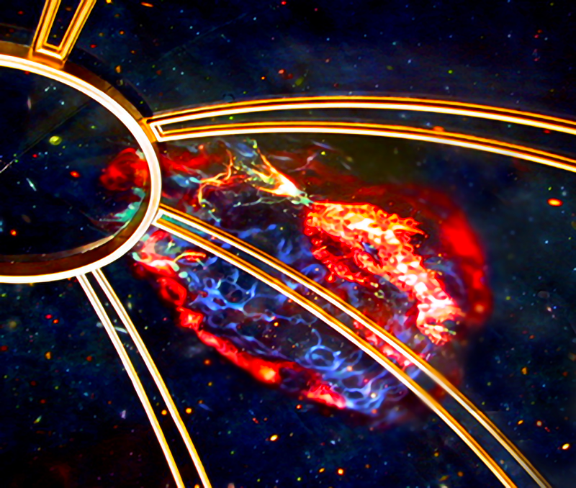
|
|
Almost there... just one more glaze to go. While I do judgment calls and final
touch-ups all around, Jim is a appying a thin coating of Damar varnish to bring
back the intensity of some colors that go flat when as the oil dries. That's
the nature of oil painting. Once done, the mural looks radiant.
|
|
|

|
|
Sometimes when it's late and you are tire, you mind gets the better of you. So...
|
|
The last coating of light gray primer, we apply with brushes. The entire process is illustrated in the pertinent photographs
and explained in the commentary. The only thing I want to add is that, after you complete the priming, you
have no more fears about the scale of the job. Now you feel like you have tamed the dome. It is not easy to
describe the feeling, but be assure that your attitude changes for the best. In a series of small steps, this
is the first leg of the journey. Now we could proceed with the transfer.
|
|
|
...to thank the great people of Morous Brothers Construction for all their help, I left them
with their company logo floating somewhere in space.
|
|
To transfer the design to the cupola we use the "grid method", a low-tech traditional way to reproduce and/or enlarge an
image that you want to paint or draw. The involves drawing a grid over your reference image, and then drawing a grid of
equal ratio on your work surface. Then you "transfer" the image one square at a time, reproducing the exact markings in
a small square unto its corresponding larger square. Simple but effective. Usually you do the markings with something you
can easily erase in case you have to make adjustments. Then you make the markings permanent by going over them with water-base ink
or fluid paint (never with a permanent marker or crayon). For this job we skipped a step and did the markings with fluid
acrylic white paint.
|
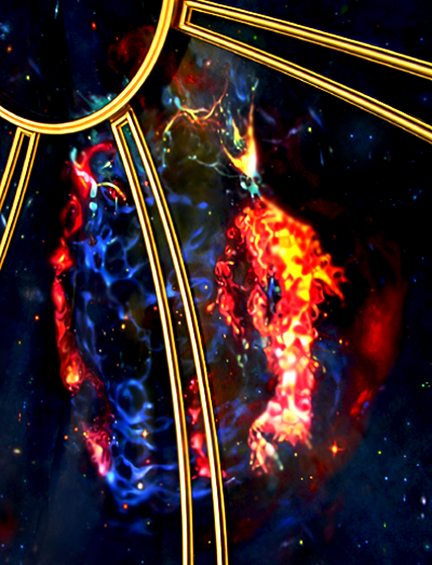
|
|
Supernova remnant Cassiopeia A, completed.
|
|
|
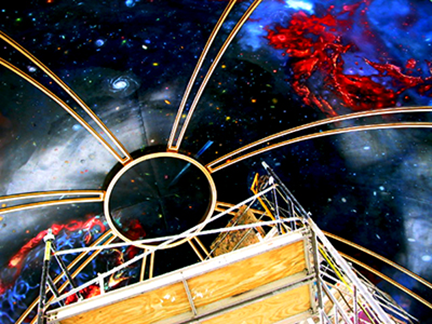
|
|
We applied a coating of semi-gloss varnish to the entire mural. This brought back
the vibrancy of the colors that had turned dull after curing -a normal occurrence in
oil paintings.
|
|
|

|
|
After applying a coating of varnish to the painting, we applied a second coating of gold paint to the ribs.
|
|
Painting the Mural
There is no magical way to paint a mural. What is required of you is patience, endurance, and discipline to follow the rules.
Coffee and snacks help considerably too. You can really burn a lot of fuel on a scaffold. But the beauty of mural painting is that
once the design is finished you don't have to think about it anymore (assuming you did it right the first time instead of rushing in
and screwing it like an amateur). Plan right and you will coast through the process. You can relax because you know from the start where you
are going to finish. For me the fun part is designing the image. Once this is done it becomes... boring. I already know I can do it. So the challenge
that motivates me is to beat the deadline -which we did by four weeks!
|
|
|
Jim is a very happy man and grateful to had been a part of this experience. To celebrate he had his 5,233rd cup of coffee.
|
|
|
|
|
Done! And we did it in 10 weeks instead of the originally allotted time of 14 weeks.
|
|
The painting sequence and process is explained in detail in the image's commentary. So, instead of repeating myself,
I will tell you about the two worse aspects of the job: dealing with sun glare and dealing with construction noise. As I noted
in the commentary, the dome was built on a flat roof. But the distance between the surface of the roof and drum's windows
was so close that sunlight bounced from the roof through the windows into the interior in all directions. For stained glass
windows this would have been perfect, but for painting it far from ideal. Usually flat roofs are covered with a synthetic
rubber or a similar membrane. Generally, this material is dark in color though new trends is to apply a light reflective
coating over it. But in this case the membrane used to cover parts of the roof around the drum was neon yellow, which reflected
even more sunlight into the interior. The glare it produced on the painting surface was blinding.
|
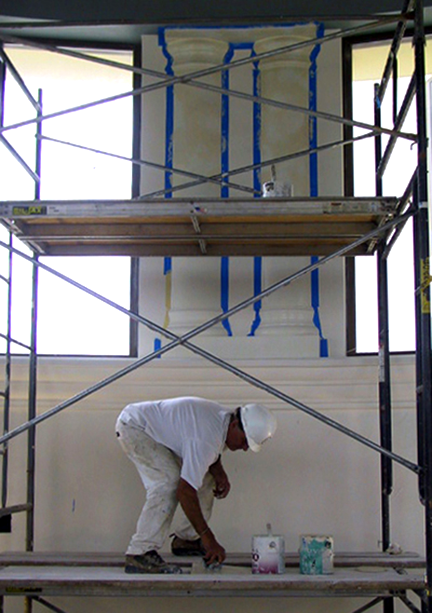
|
|
Victor, a former icon painter in his native Russia but now a proud member
of the Cleveland Painter's Union, moves in to marbleize the columnettes in the
drum section of the dome.
|
|
|
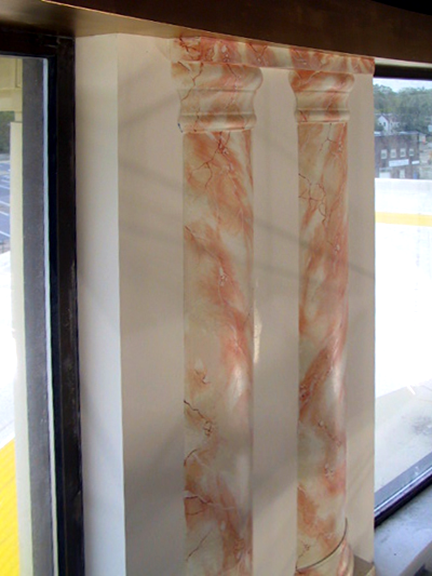
|
|
Marbleize completed.
|
|
|
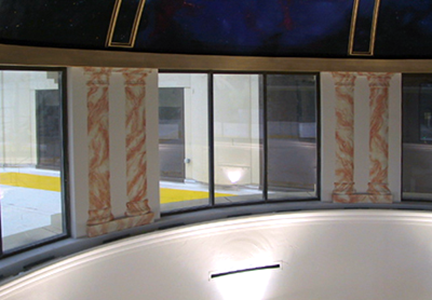
|
|
View of the columnettes and windows along the dome's drum.
|
|
There was no other source of light for us to work with so covering the windows was not an option. In the final weeks
of painting, we stayed until the sun was low in the horizon and the glare had stopped so finishing touches could be
completed. With the assistant of two spotlights we could at least manage the process and move on. But the noise issue
was out of our hands. Working up high inside a dome is like being inside a bell. It magnifies noise. When construction
resumed on the ground level, and saws were used to cut metal bars and studs, I wanted to jump off. The noise was torture. I
suffer from ringing in my ears so ear plugs and noise mufflers were useless. On several occasions we simply stopped painting
and took off to an area pub. Lucky for us, Union workers wrap things up by three or four in
the afternoon so that left us several hours of peaceful painting time.
|
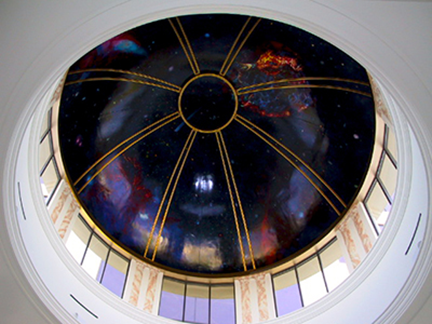
|
|
View of the dome from below. At times the light reflected on the mural acquired beautiful colors.
|
|
|
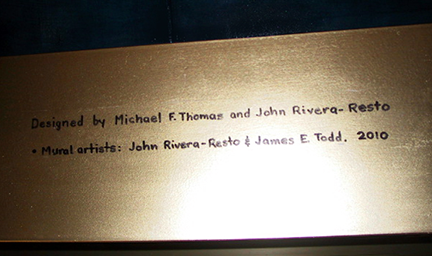
|
|
Mural credits.
|
|
We finished the mural and left the Penthouse ahead of our deadline. The scaffolding system remained so the other workers could move in and finish the space.
As a result, I didn't get to see the finished product from the ground floor until months later. Even with the glare I felt it was a good job. I'm sure
it will look different depending on the time of year and the weather so the viewing will never be the same. Lamps had been added around
the drum so there would be some illumination during the evening and in the dark winter days. The large scale of the hall managed to be both simple
and magestic and the mural added
a touch of the sublime. Looking up it was hard to imagine that I had been up there, high up, touching those stars. The height made me dizzy and even a little
scared, as if the person who painted it had been someone else and the person standing below would never have the courage to do it.
|
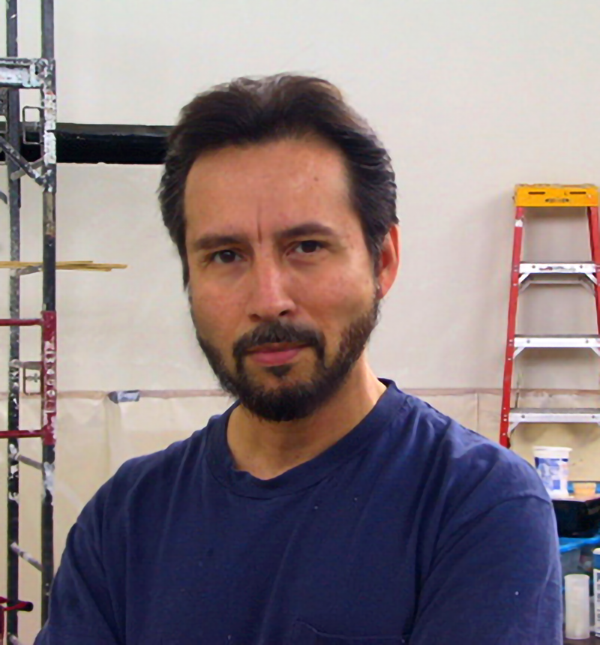
|
|
With the mural completed, it was time to pack and get to the next job. All in all, this was a fun job.
But I made a mental note to stay closer to the ground in the future. At 52, I was beginning to feel a
little too old to be climbing up scaffolds.
|
|
|
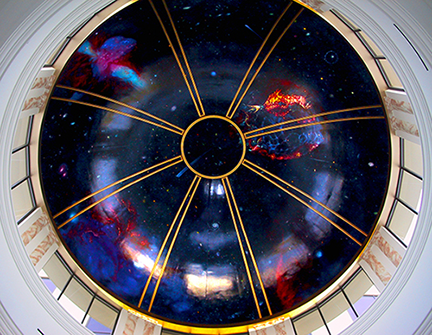
|
|
The finished mural -though not the best photograph. My advice? Go see it in person.
|
|
|
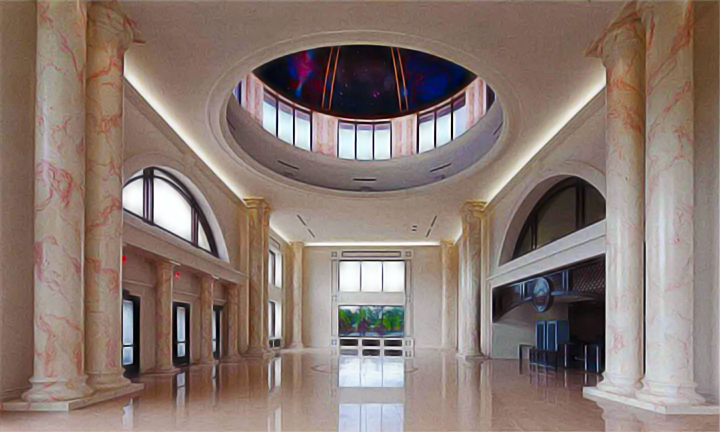
|
|
The Great Hall of the Cuyahoga County Juvenile Detention Center.
|
|
Jim and I collaborated in a few more projects also covered in this website. He fell in love with oils and took to it like peanut butter to jelly.
I also discovered that, when it came to coffee, he could out drink me under the table. Since then I have moved on to more ambitious projects a little
closer to the ground. Today, as I sit in my office updating this page -March of 2019, nine years have passed since completing this job. I have turned sixty
and my interests have shifted to other things that keep me busy. But in reviewing these images and reliving the experience, I can't
help but to marvel at what an achievement this was and how many artists would have killed to get it. And yet, I have not given this job a thought
until now or seen it again since that one visit nine years ago. So I'm thinking that maybe now I could go back to take another look and get that wow factor
that has always eluded me. Perhaps. That's something to look forward to.
